HammondPOS Help Guide
Operational help for venue owners, managers and staff. This guide is designed to reduce support requests by giving clear steps for setup, sign-in, orders, payments, receipts, vouchers, reports, refunds and troubleshooting.
Welcome
HammondPOS is a hospitality point-of-sale system for taking orders, managing tables, printing customer receipts and kitchen tickets, handling staff sign-in, and recording payments and reports.
Step-by-step
Open HammondPOSStart from the installed Android app, iPad app, browser shortcut or approved onboarding link.
Check the venue nameConfirm the screen is showing the correct tenant or venue before taking orders.
Sign inSelect the correct staff member and enter the PIN.
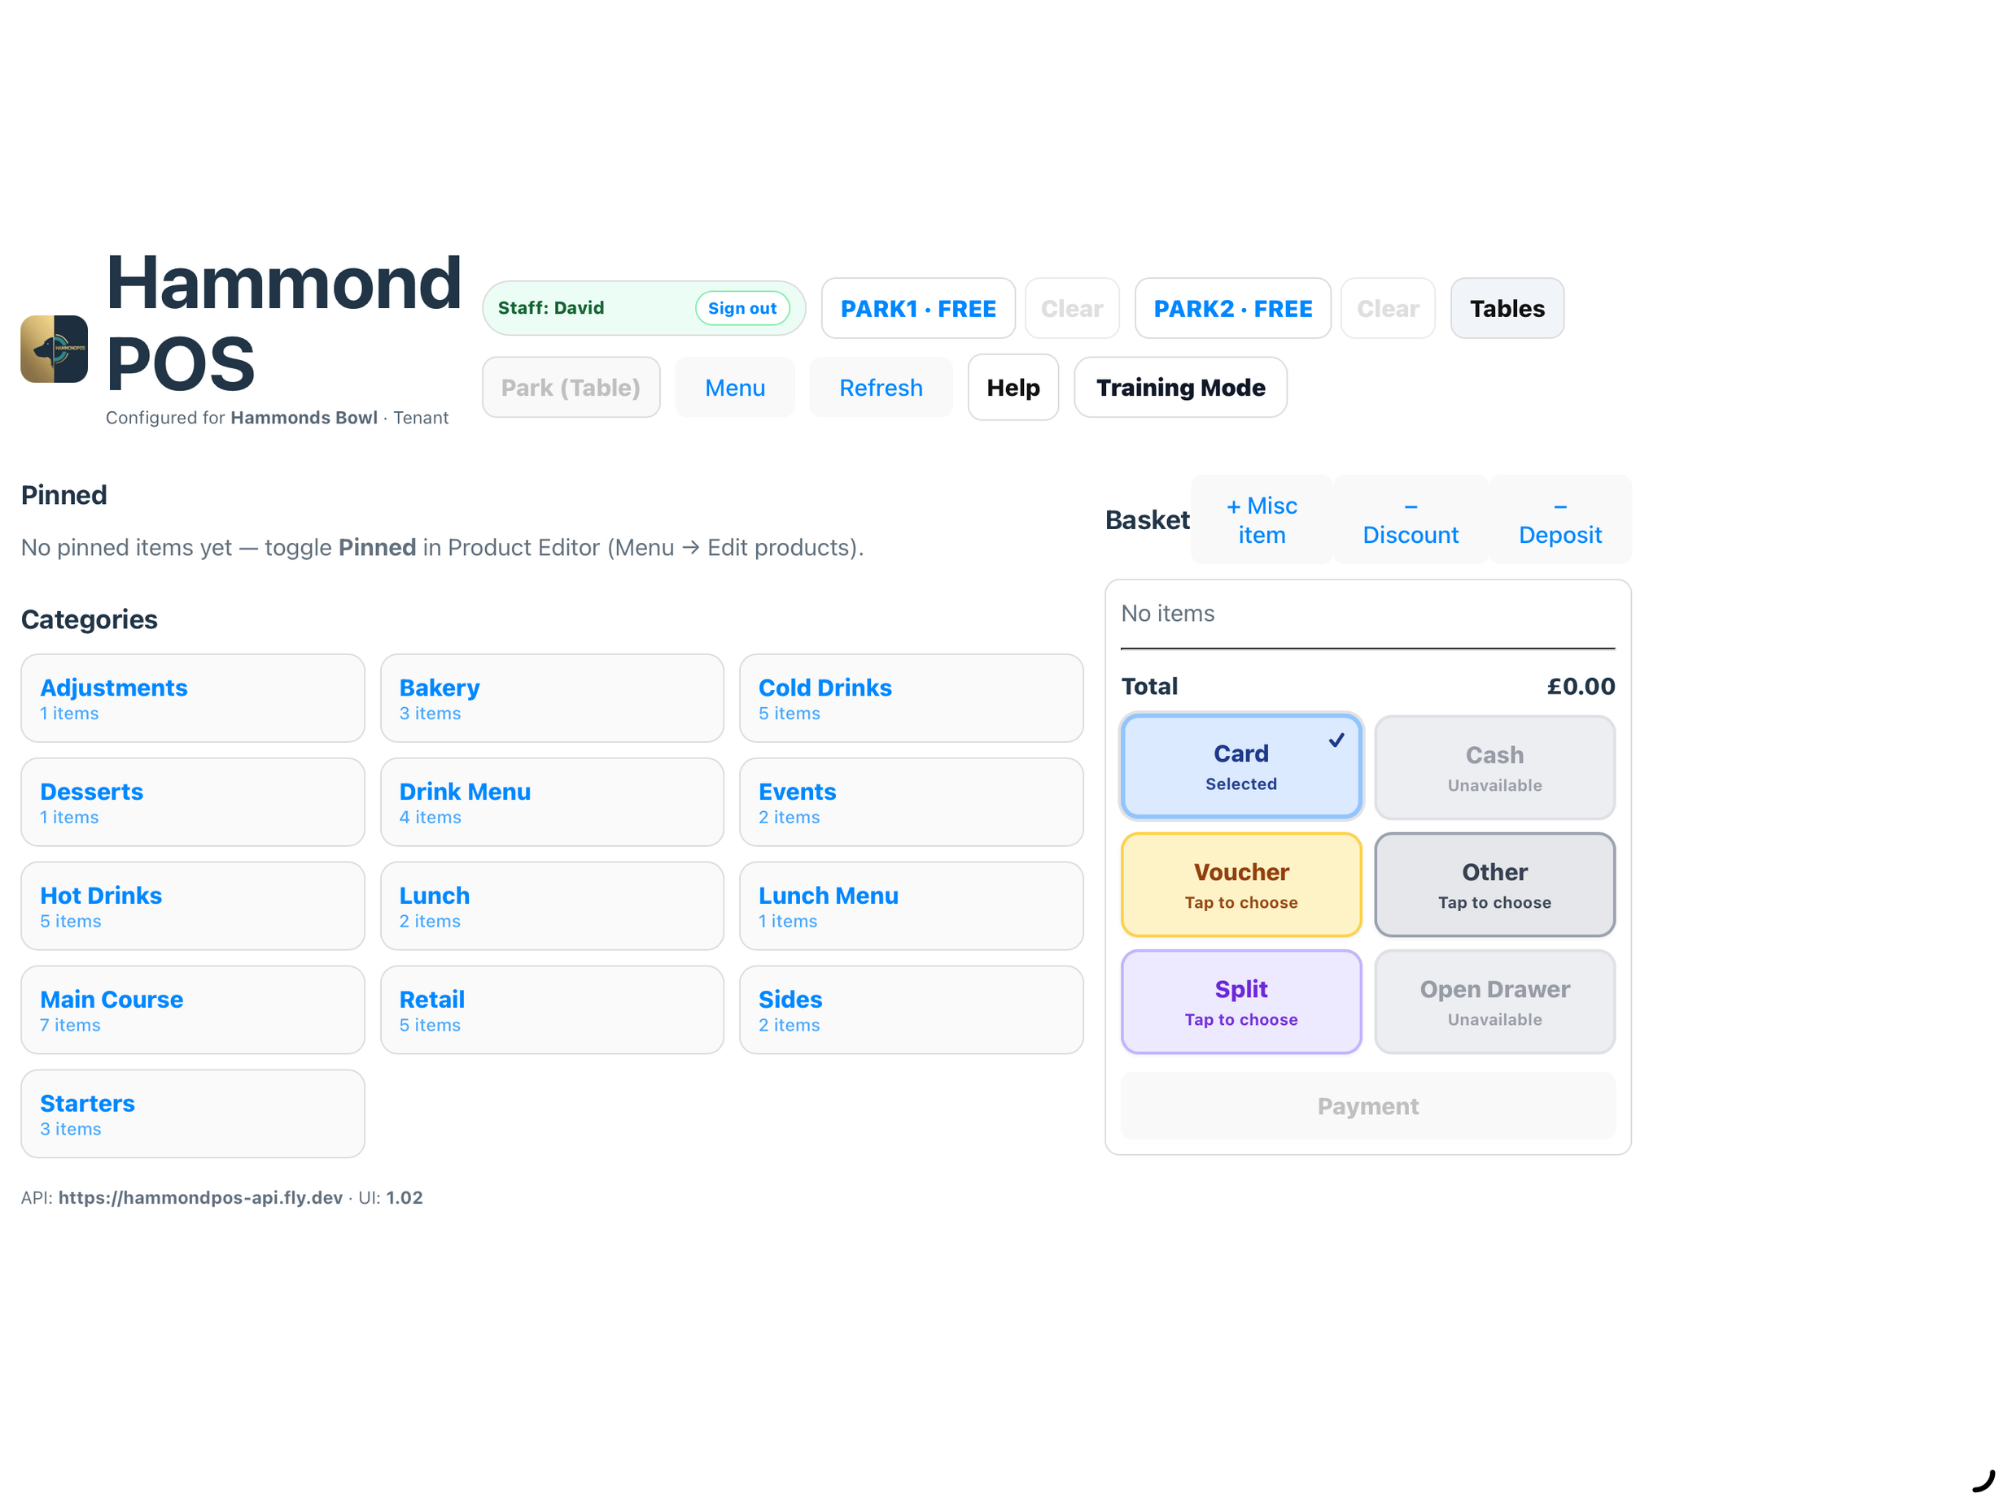
Start with the POS screenUse categories and order tiles to begin service.
First Time Setup
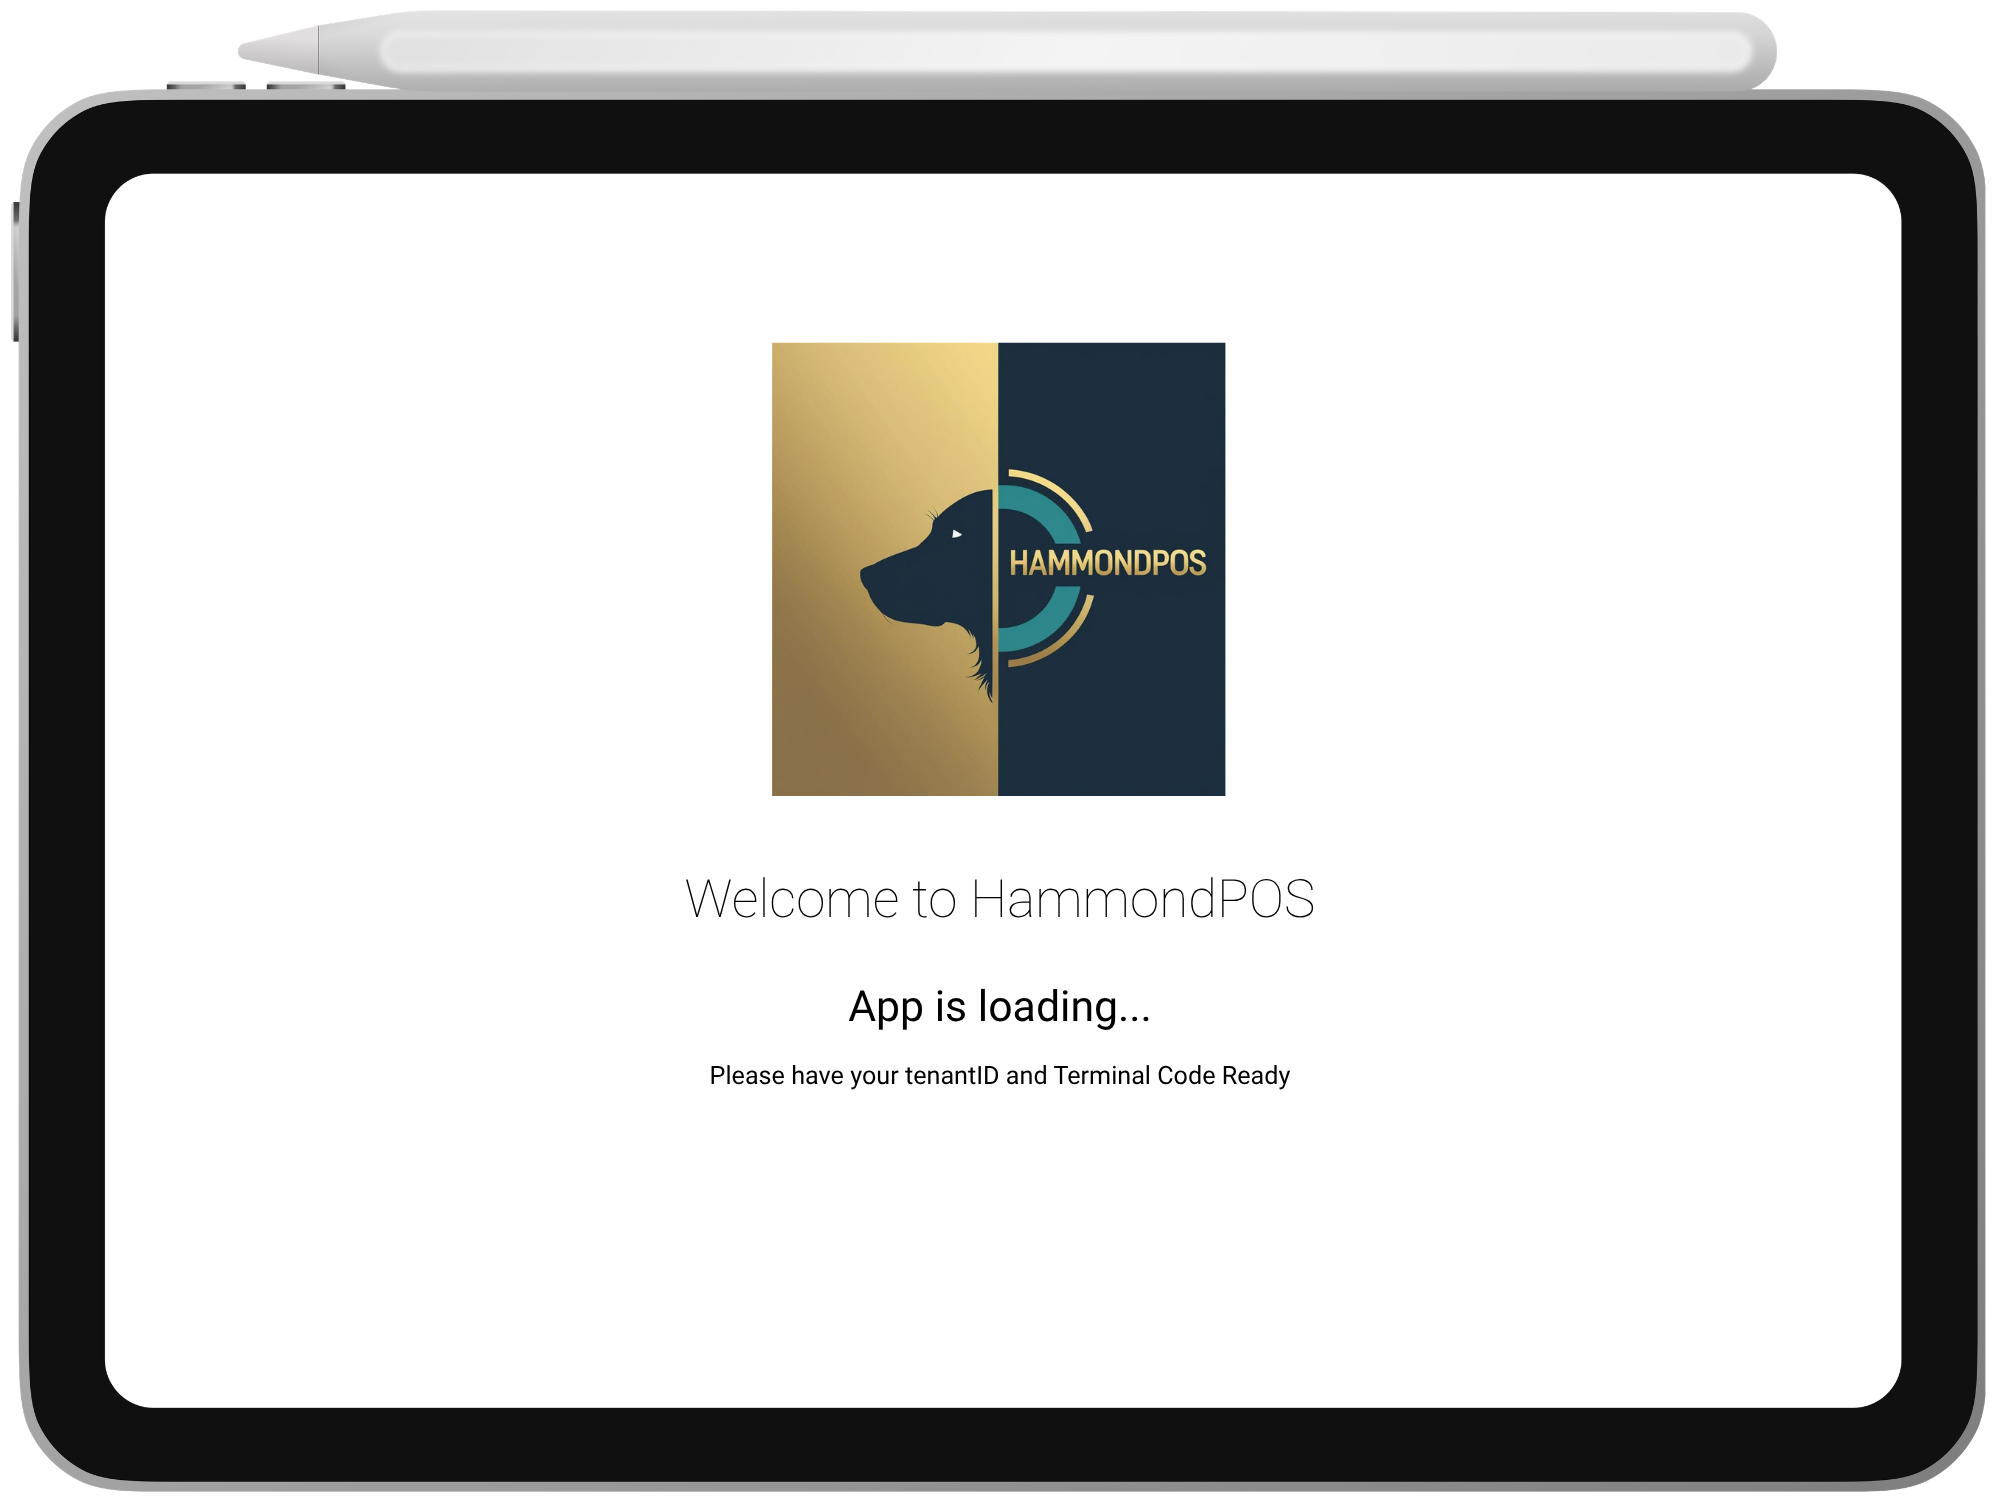
A new device must be bound to the tenant before staff can use it. This protects the venue account and makes sure the correct business settings, printers and payment routes are loaded.
Step-by-step
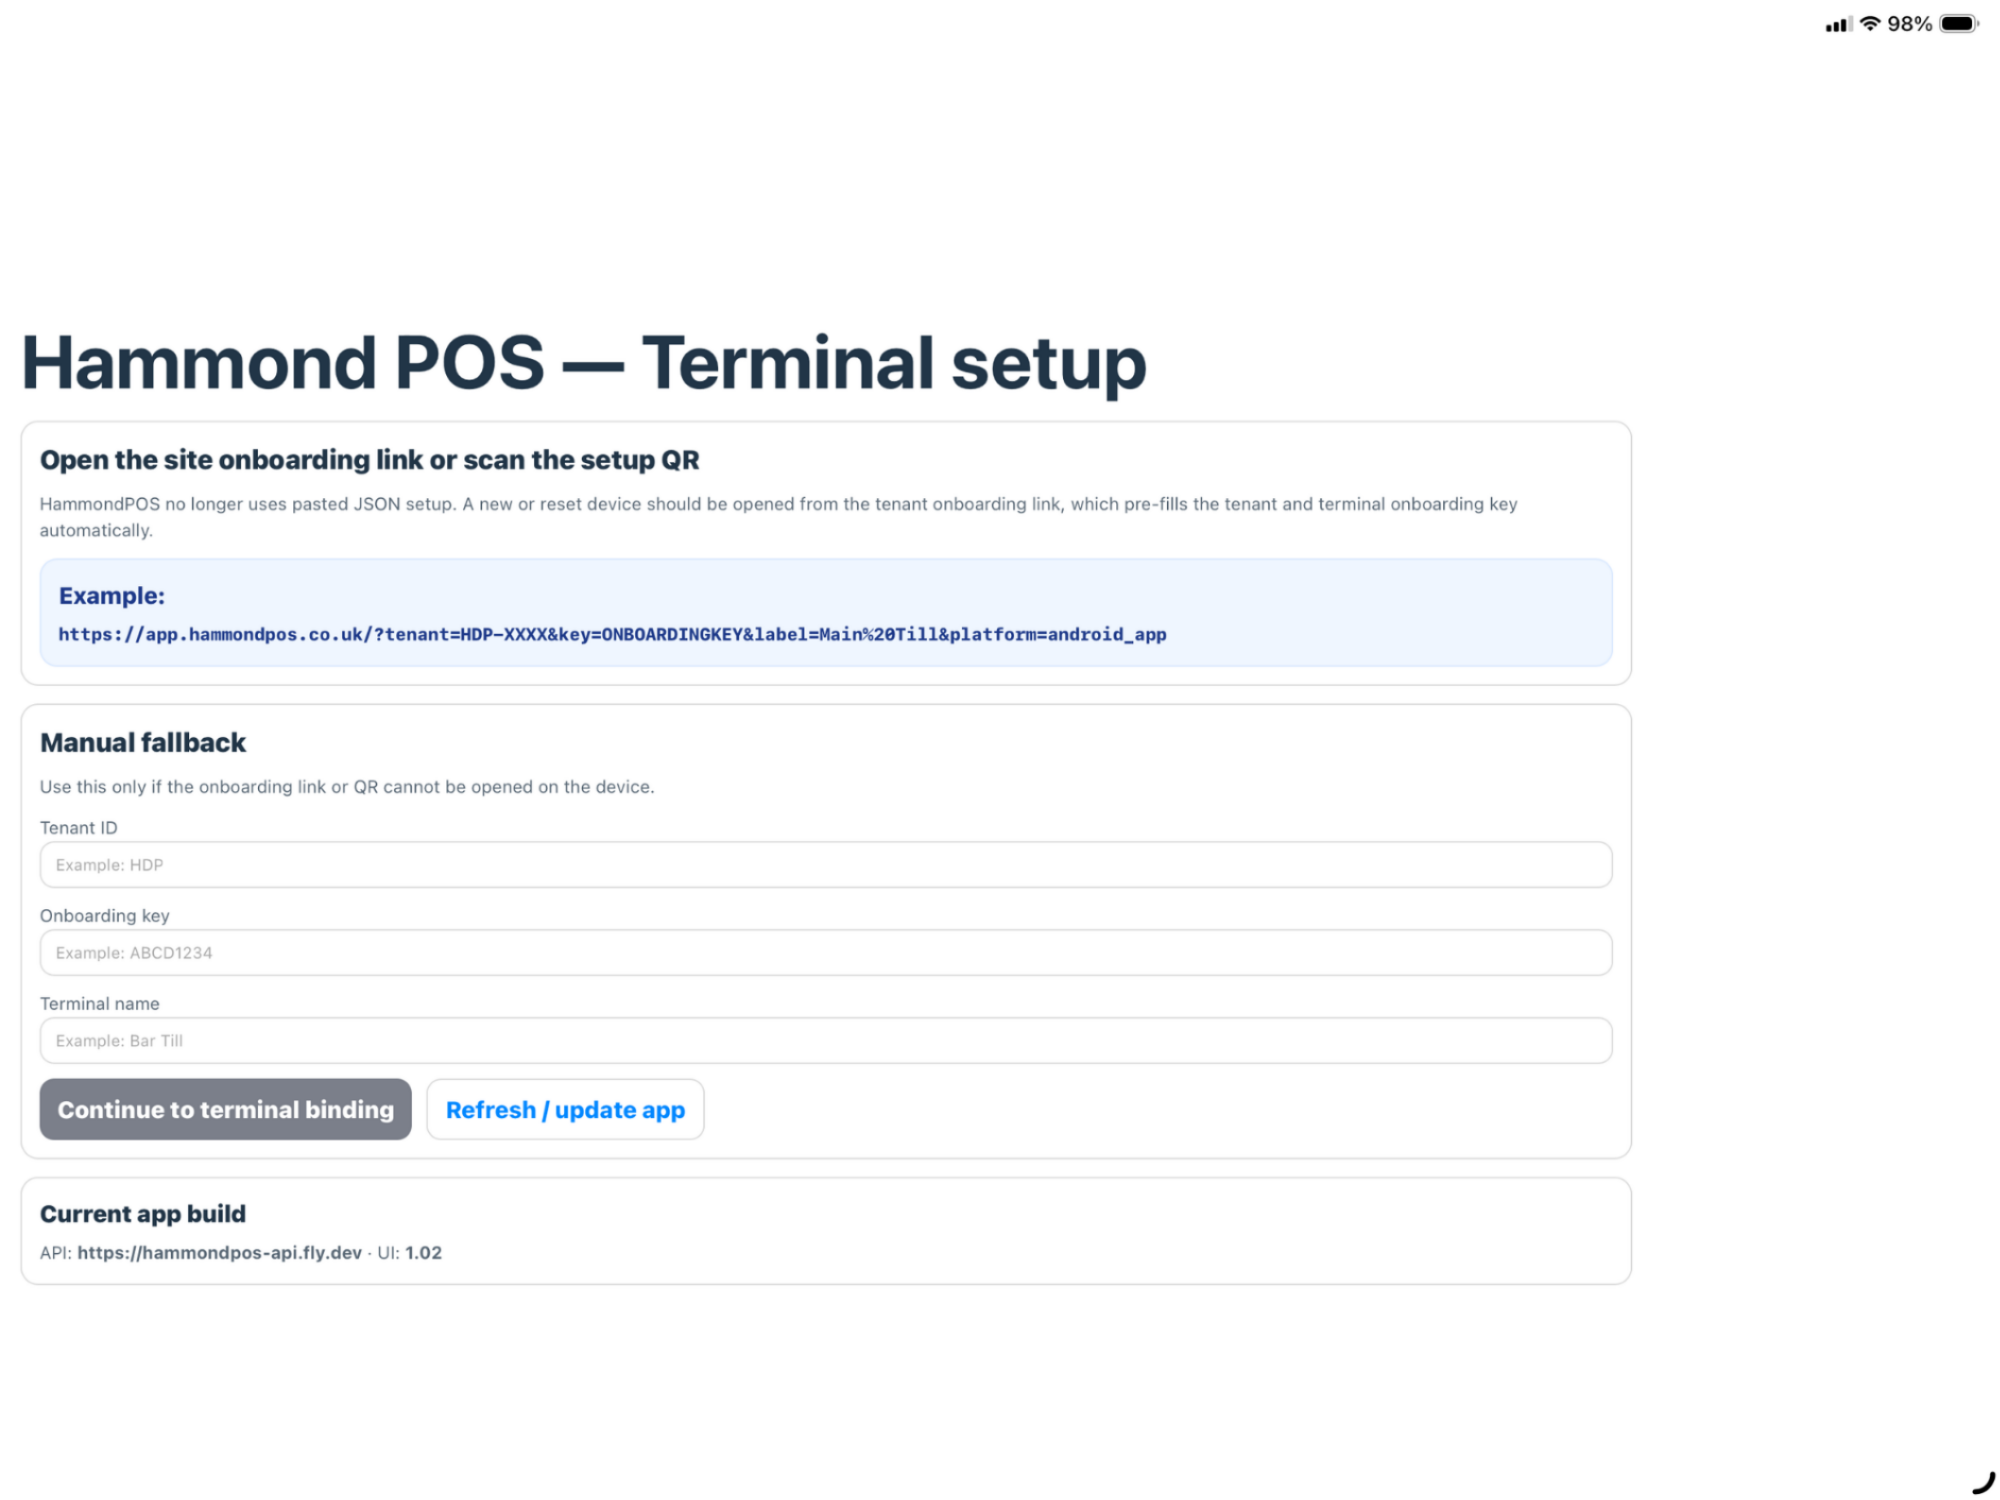
Open the onboarding link or scan the QR codeThe link normally contains the tenant and onboarding key automatically.
Use manual fallback only when neededEnter the Tenant ID, onboarding key and friendly terminal name if the link cannot be opened on the device.
Bind the terminalTap the bind or continue button and wait for HammondPOS to confirm the device.
Allow local network accessOn iPad/iOS, allow Local Network access so receipt and kitchen printers can be reached.
Sign in as owner firstThe owner or installer should complete the first sign-in and check settings before the terminal goes into service.
Signing In
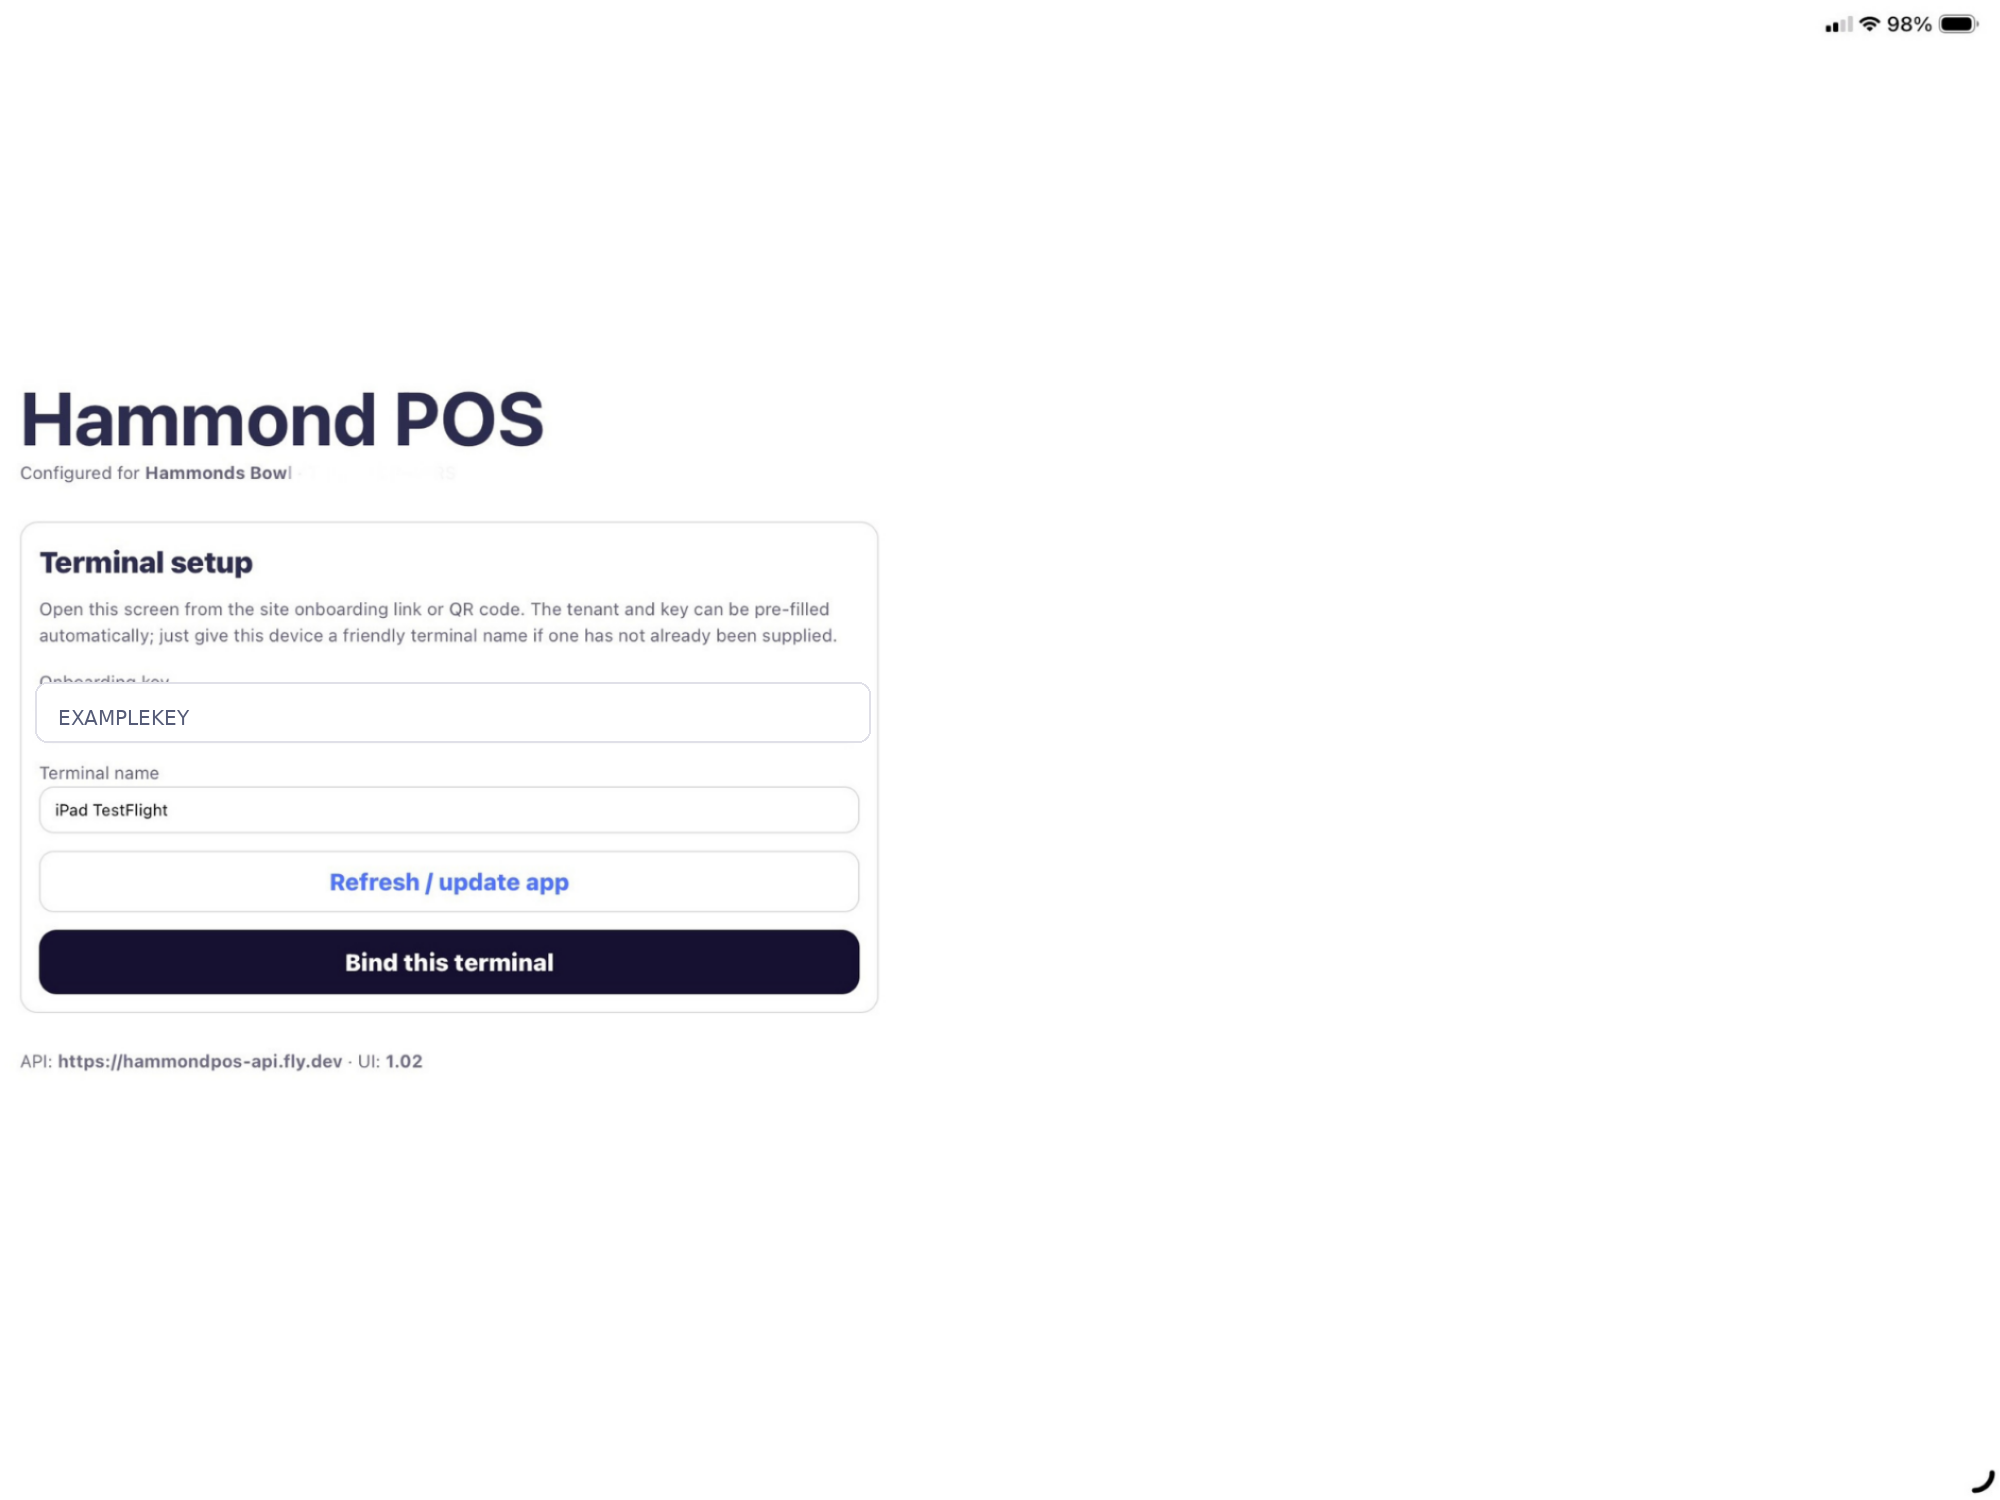
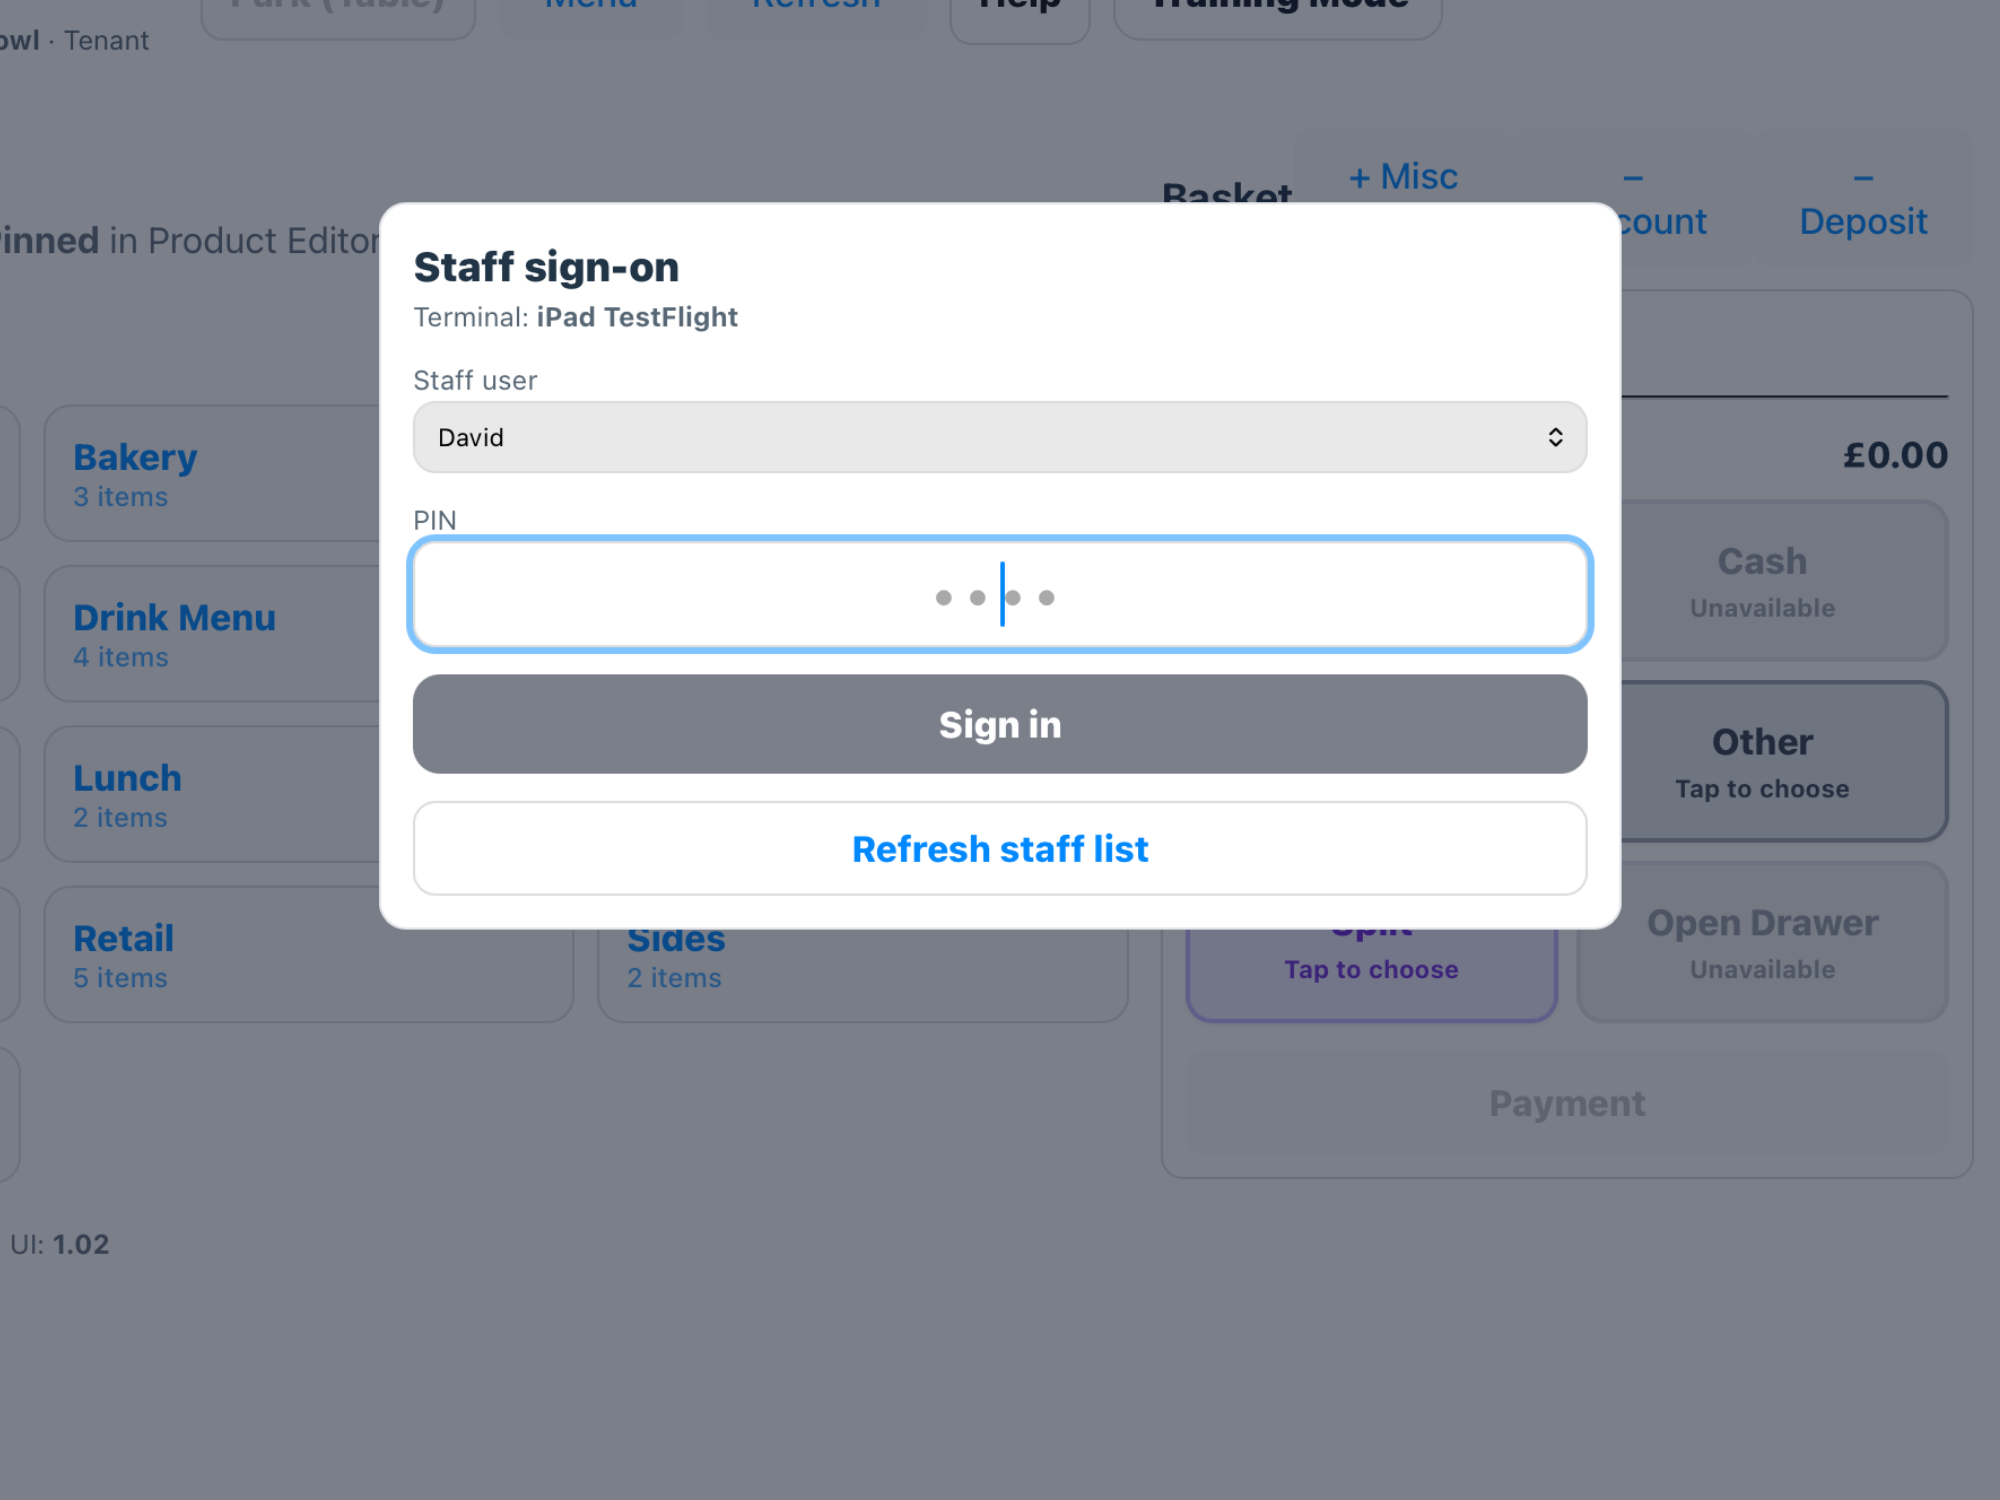
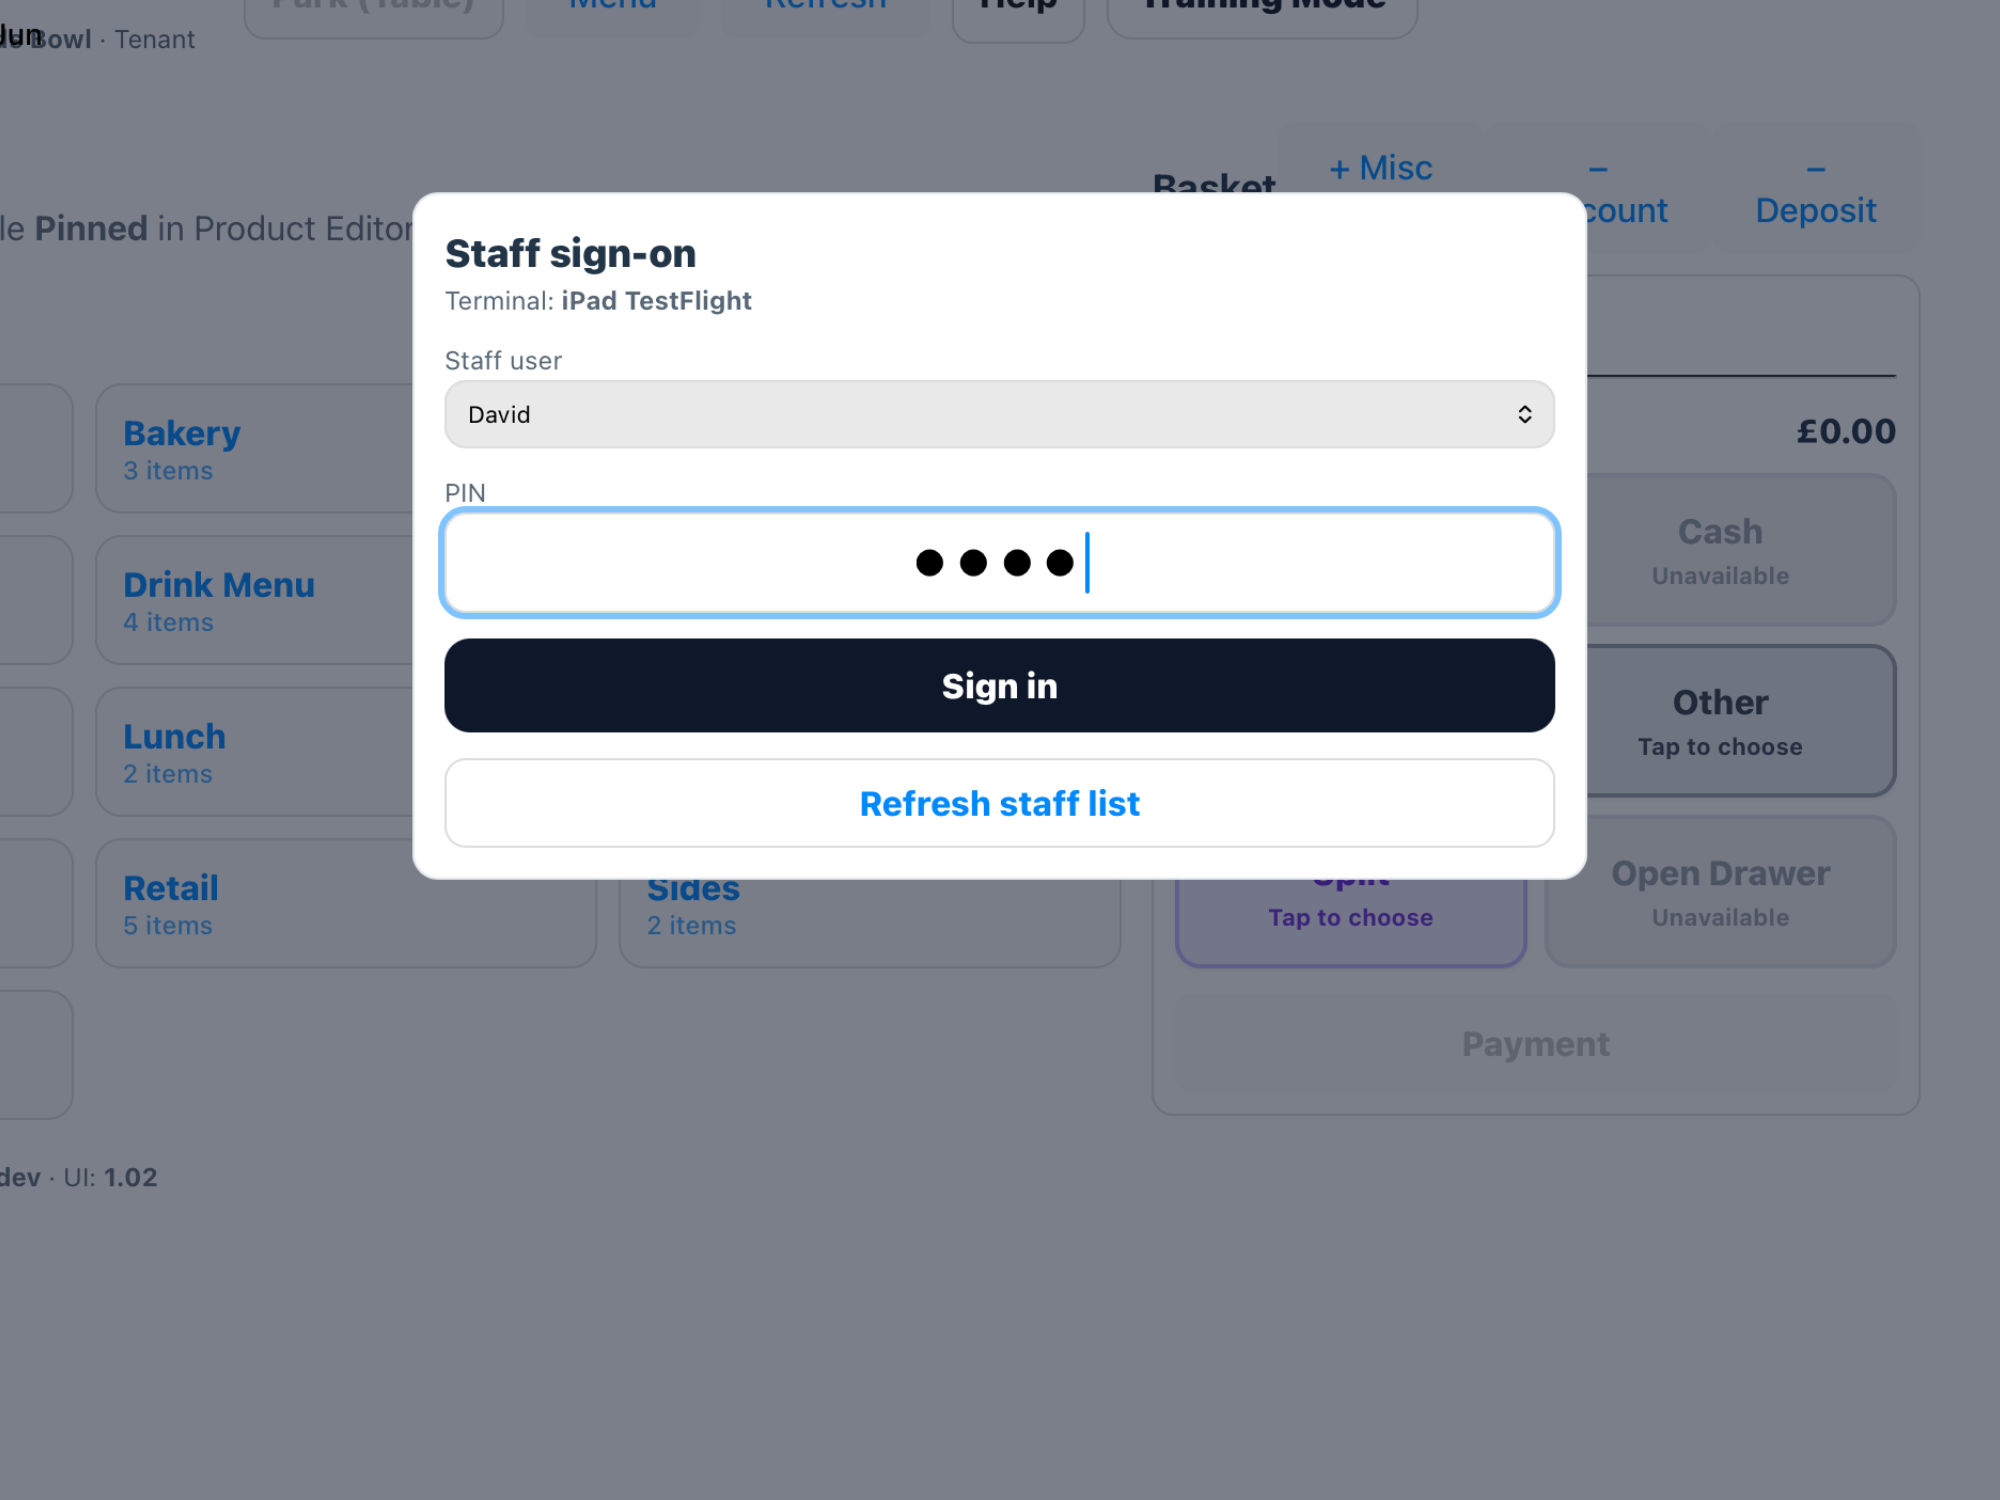
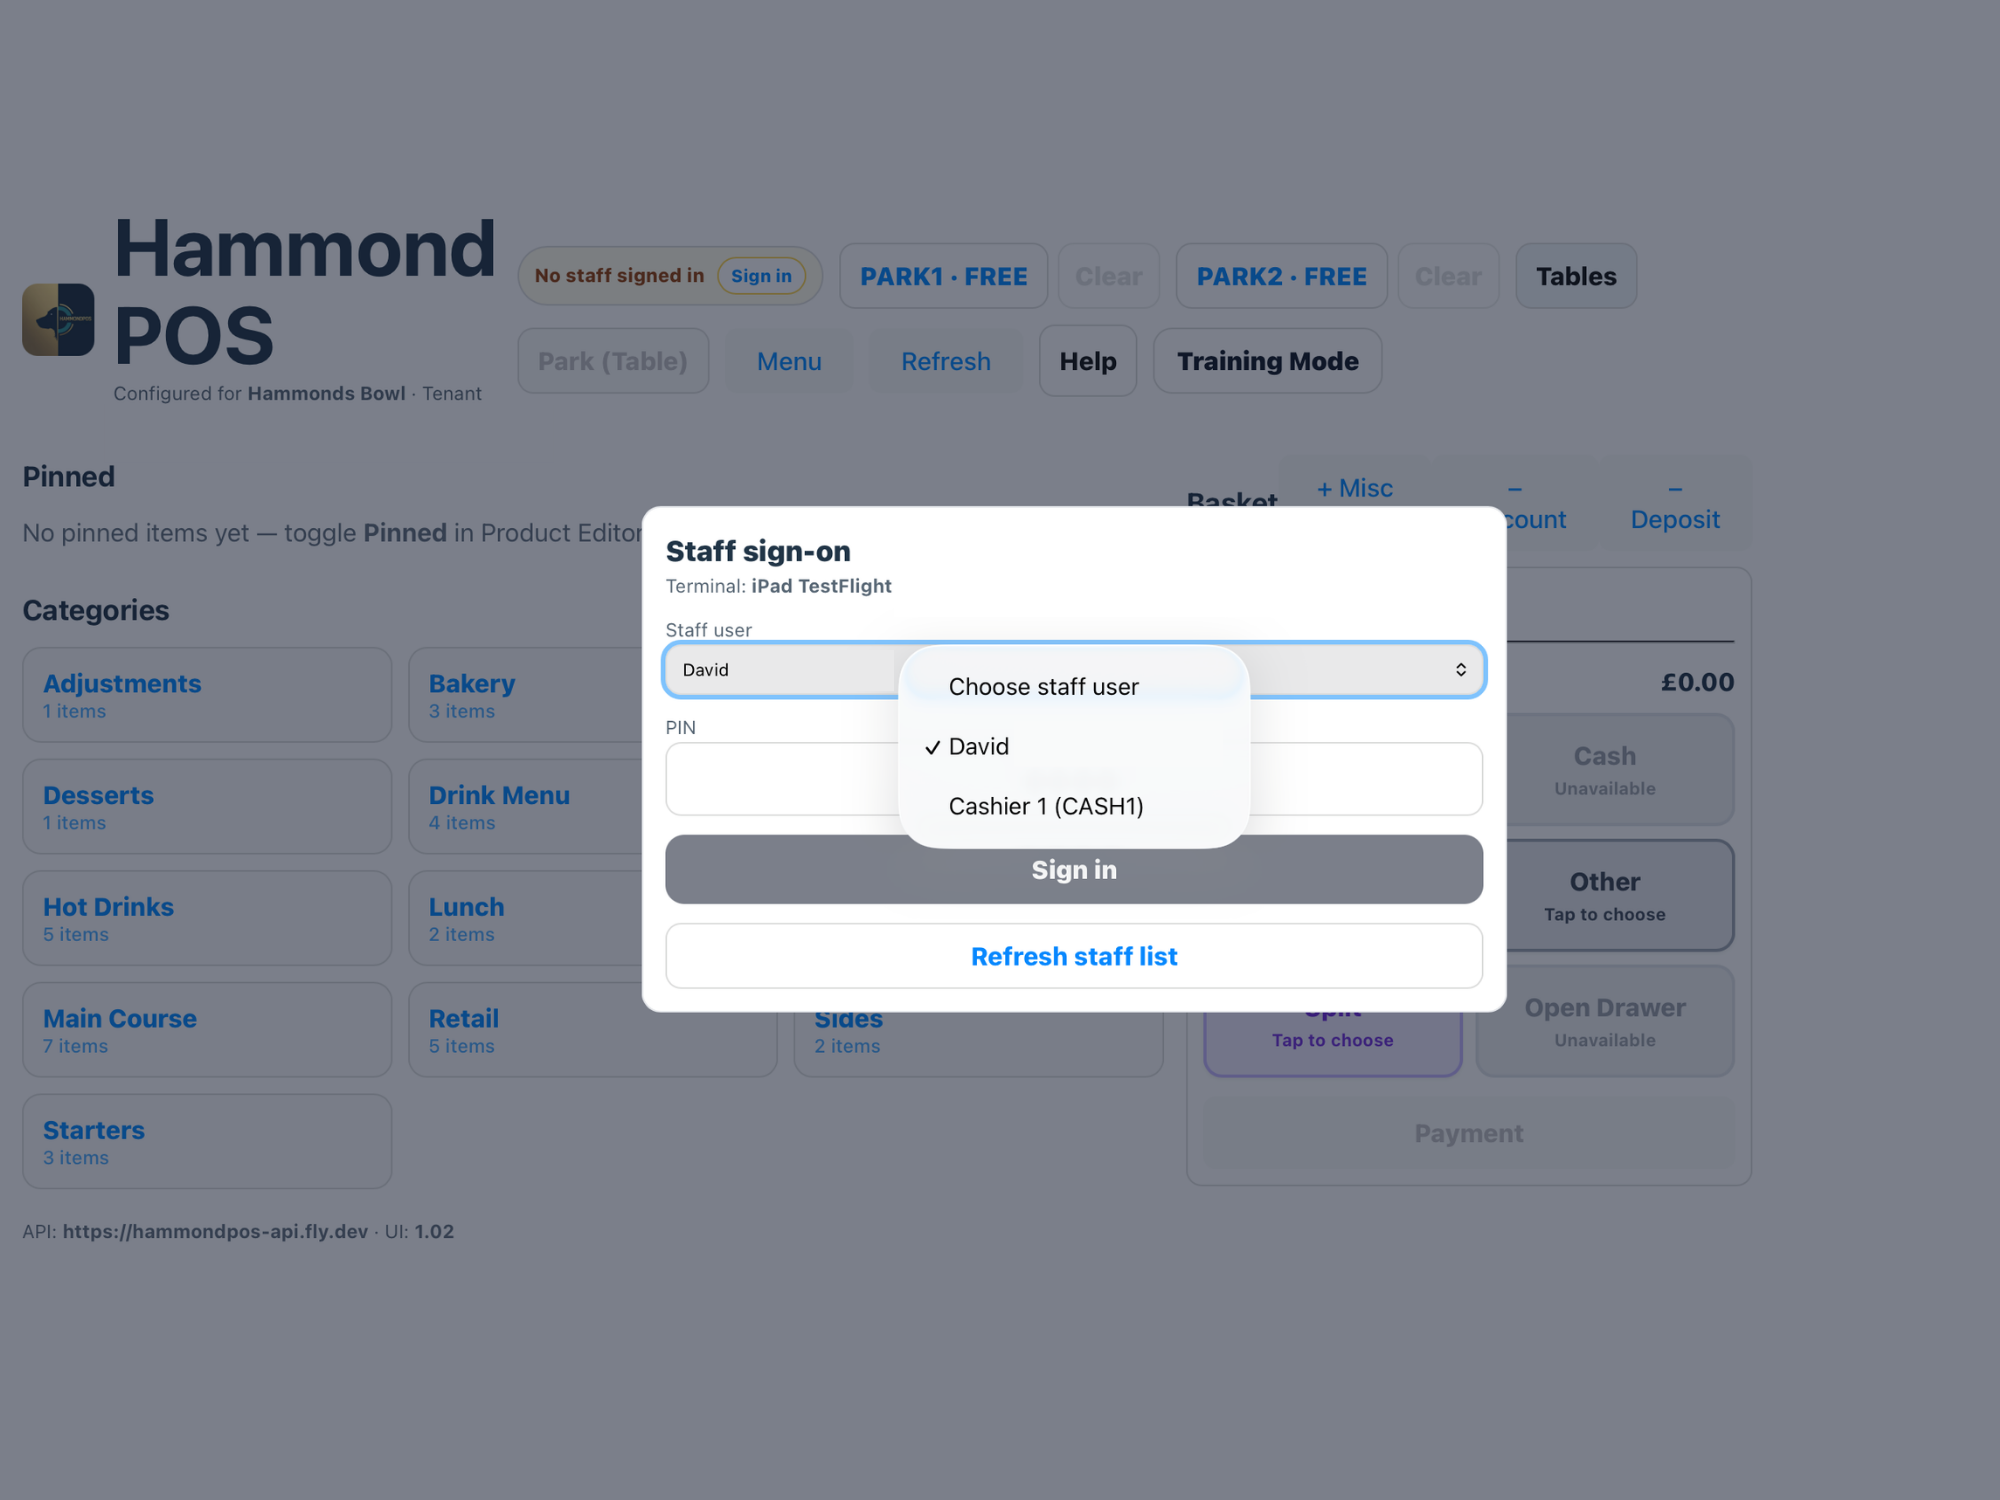
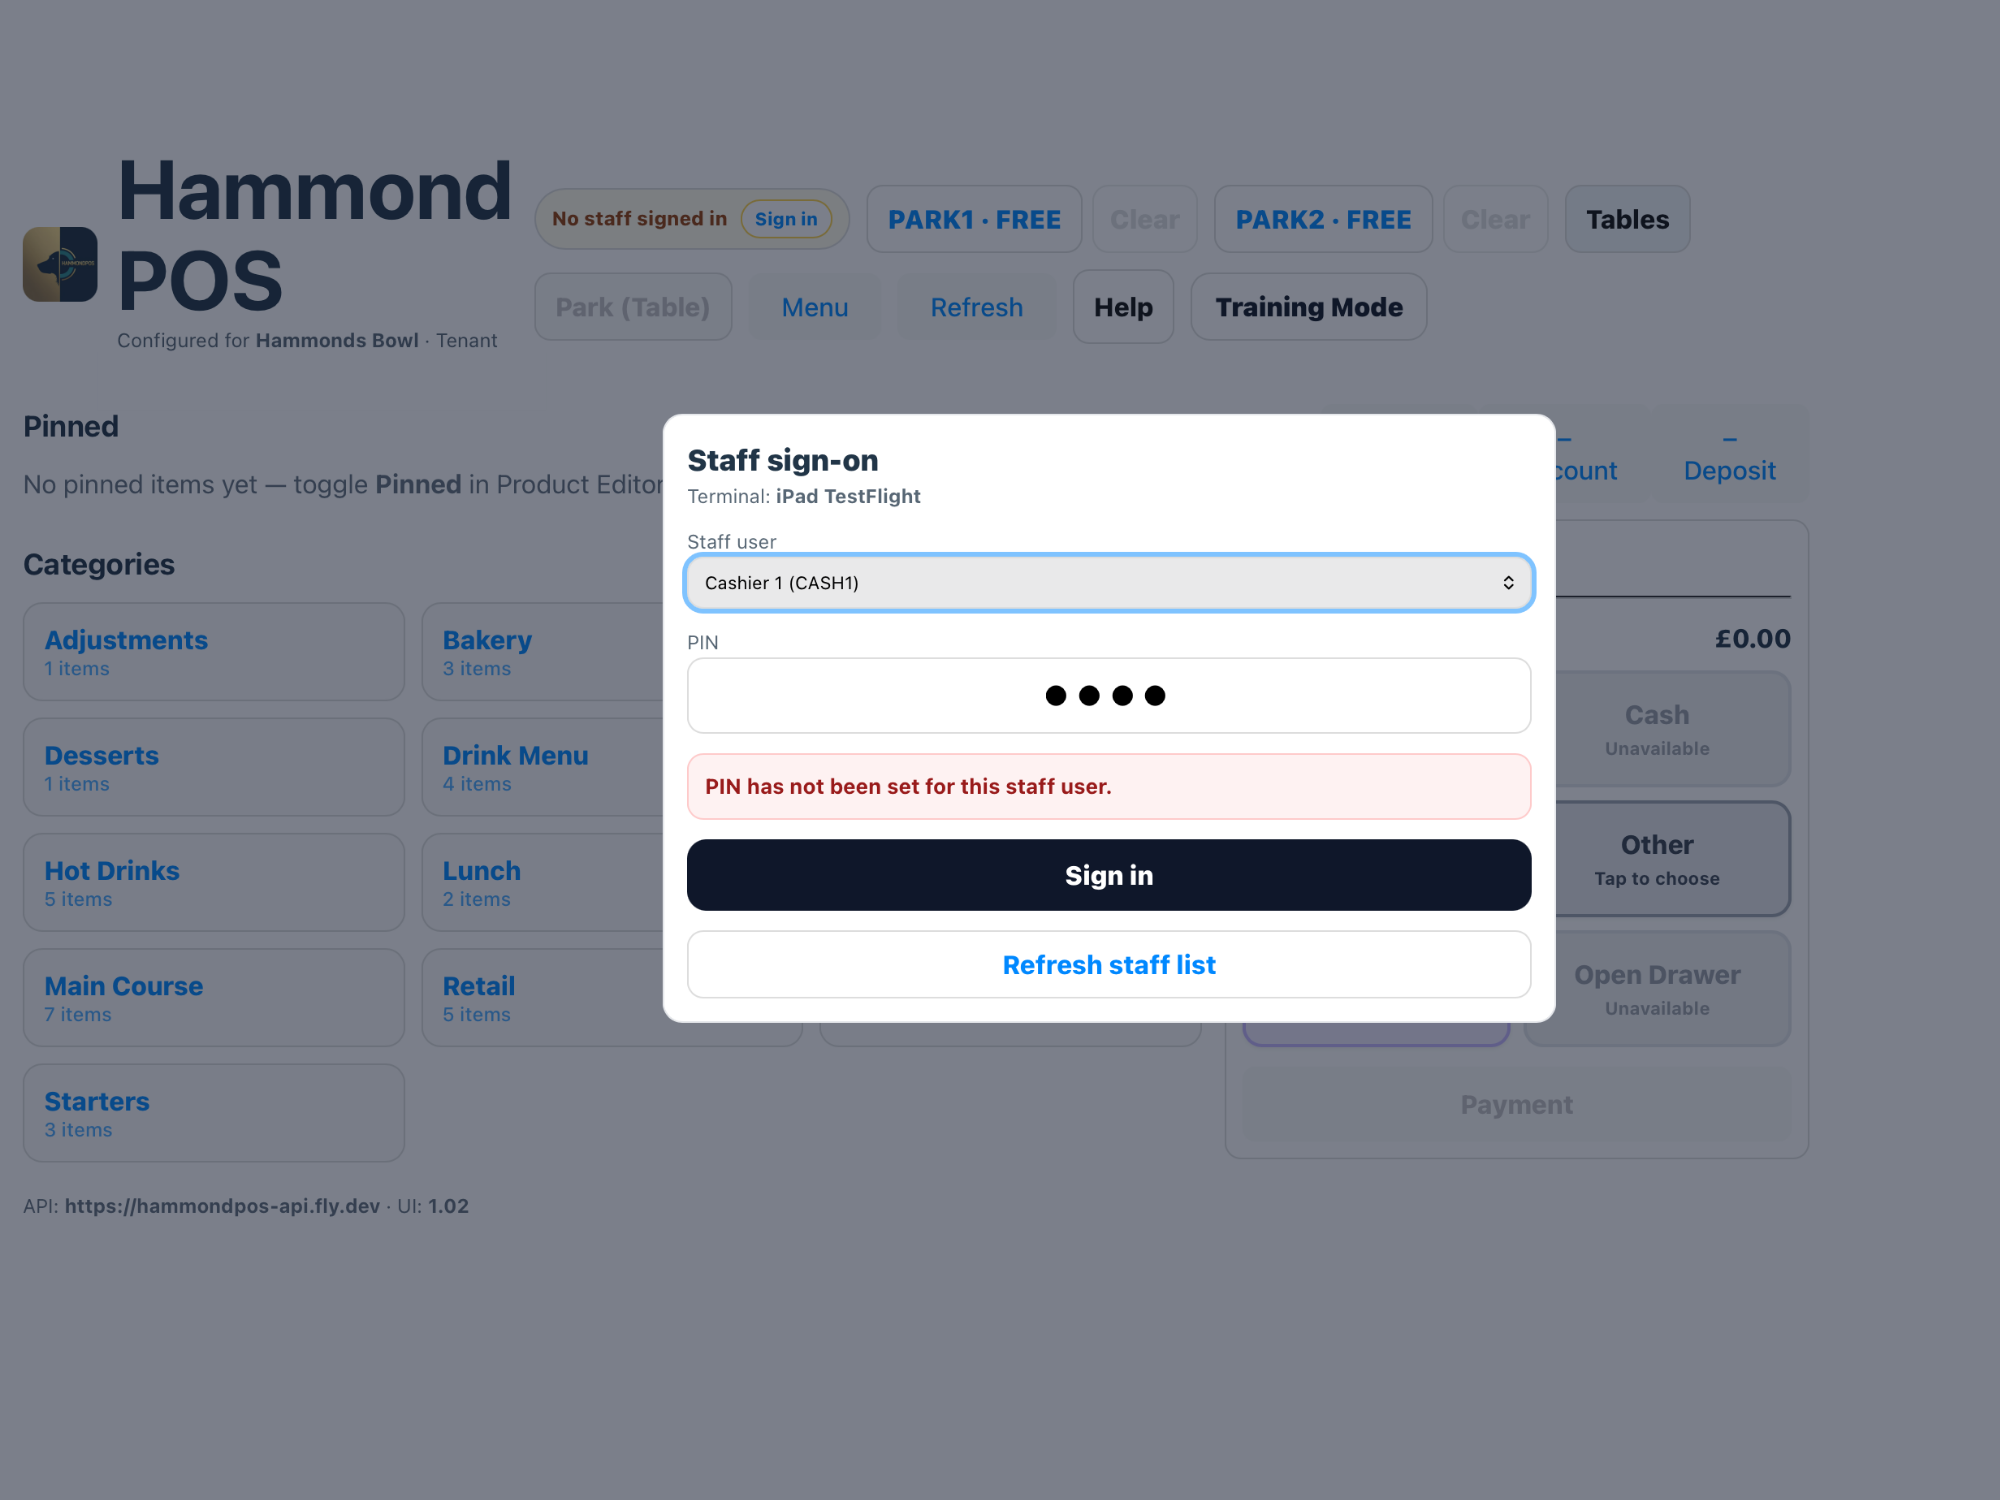
Staff sign in with their own user tile and PIN. This keeps orders, refunds, discounts and management actions tied to the right person.
Step-by-step
Select the staff memberTap the visible staff tile for the person using the terminal.
Enter the PINUse the number pad or PIN entry shown on screen.
Check permissionsOwner and admin users can access management areas that normal staff cannot.
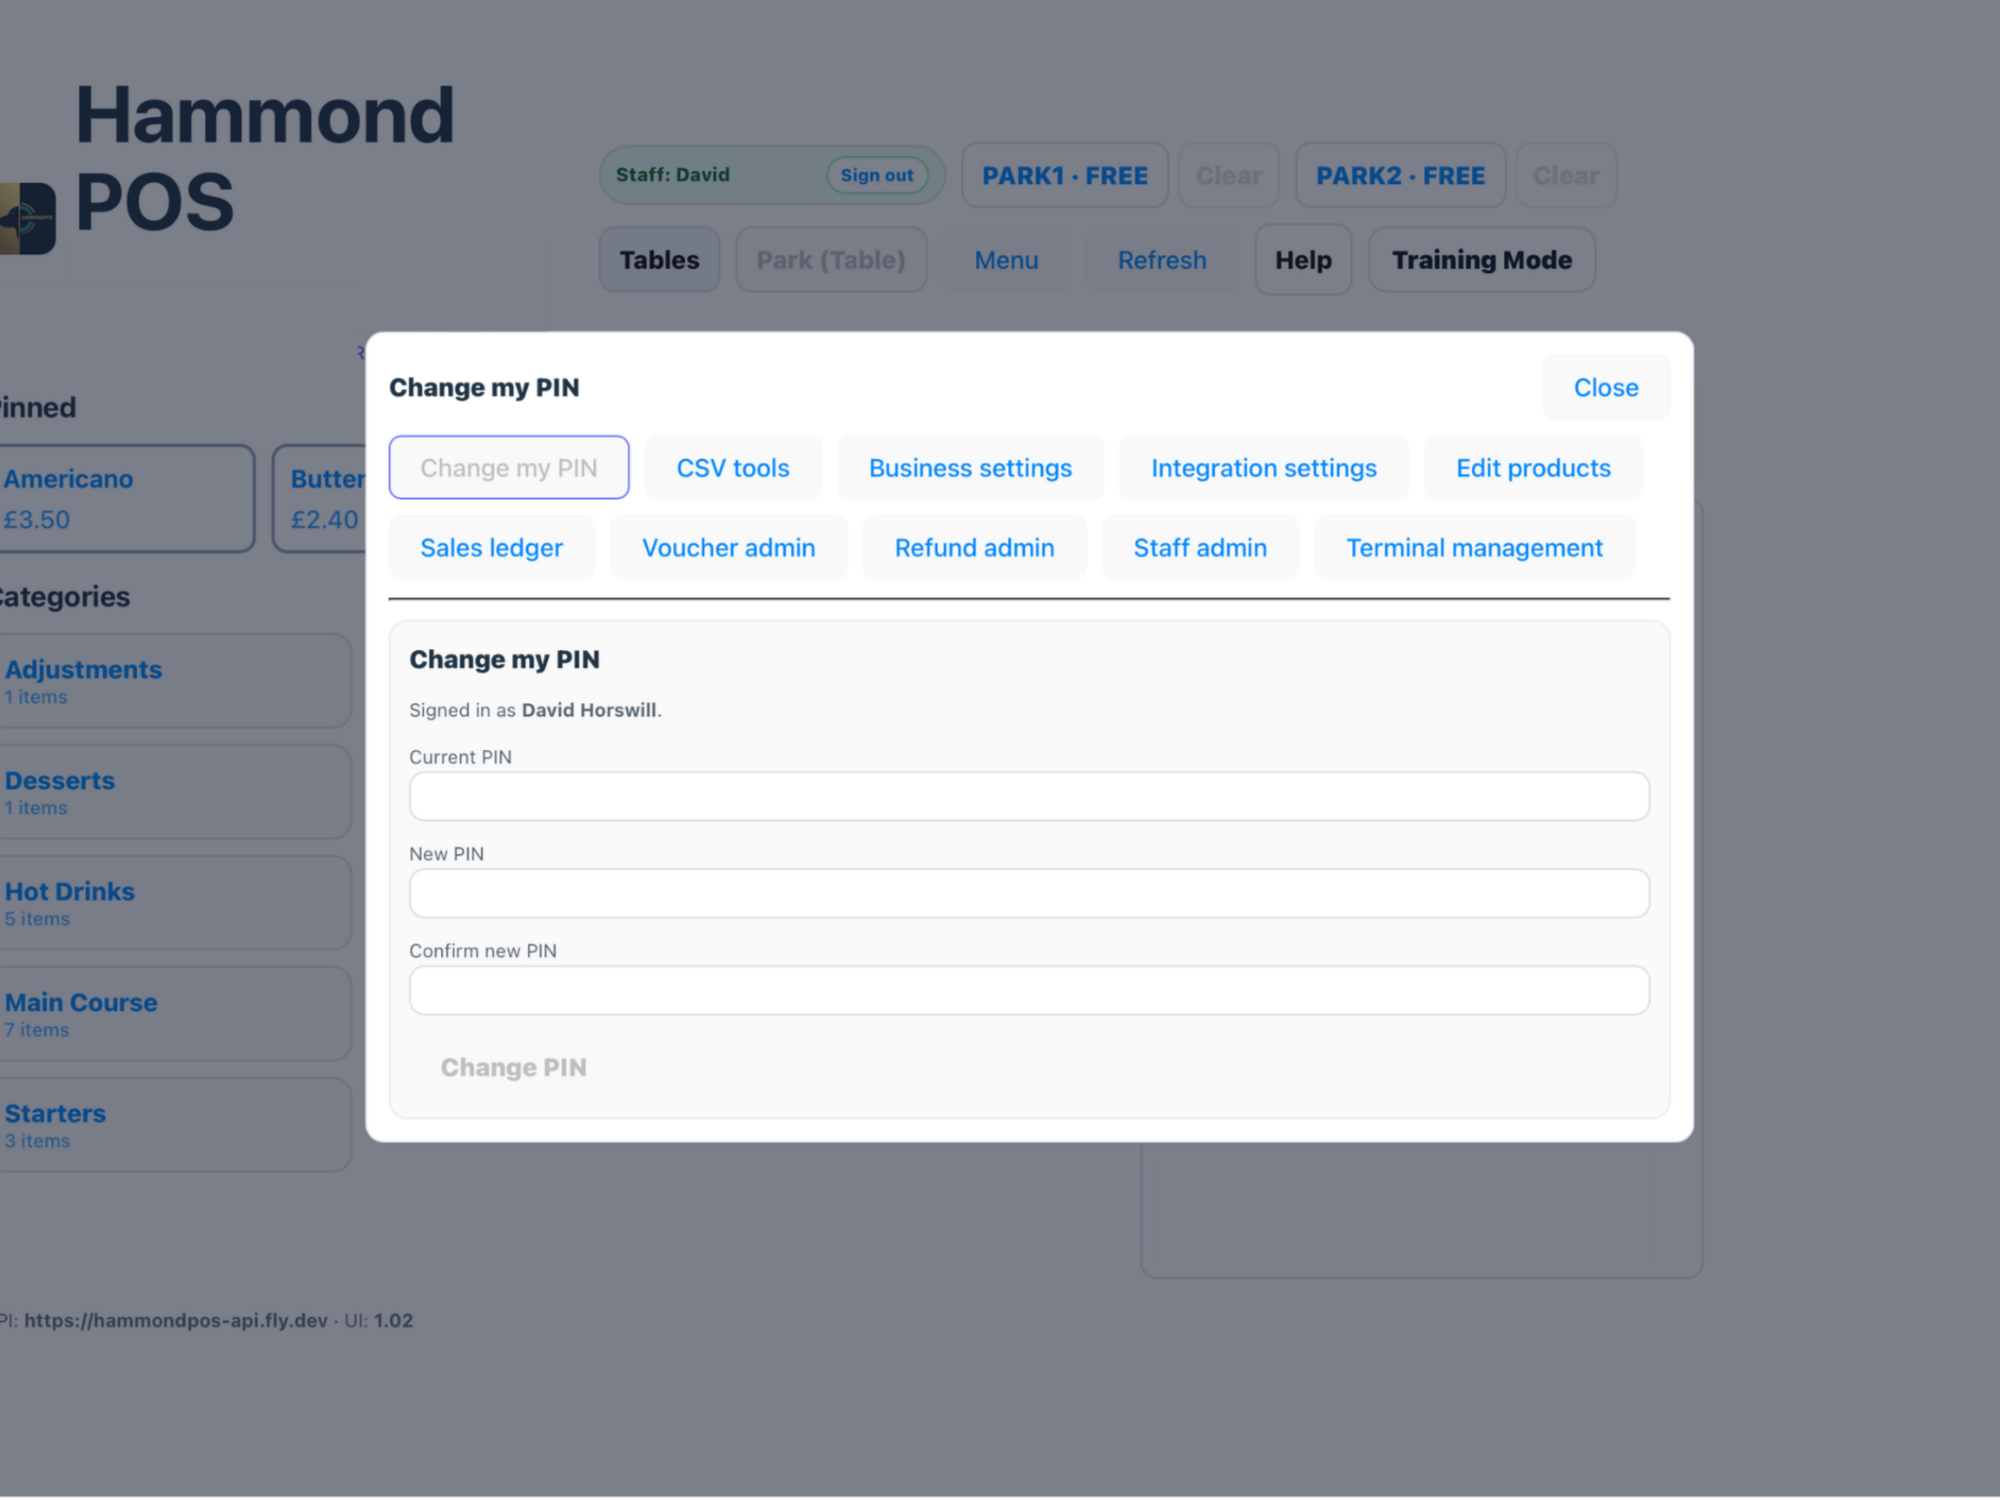
Change PIN when requiredUse Change my PIN from the management menu if the user is allowed to update it.
Taking Orders
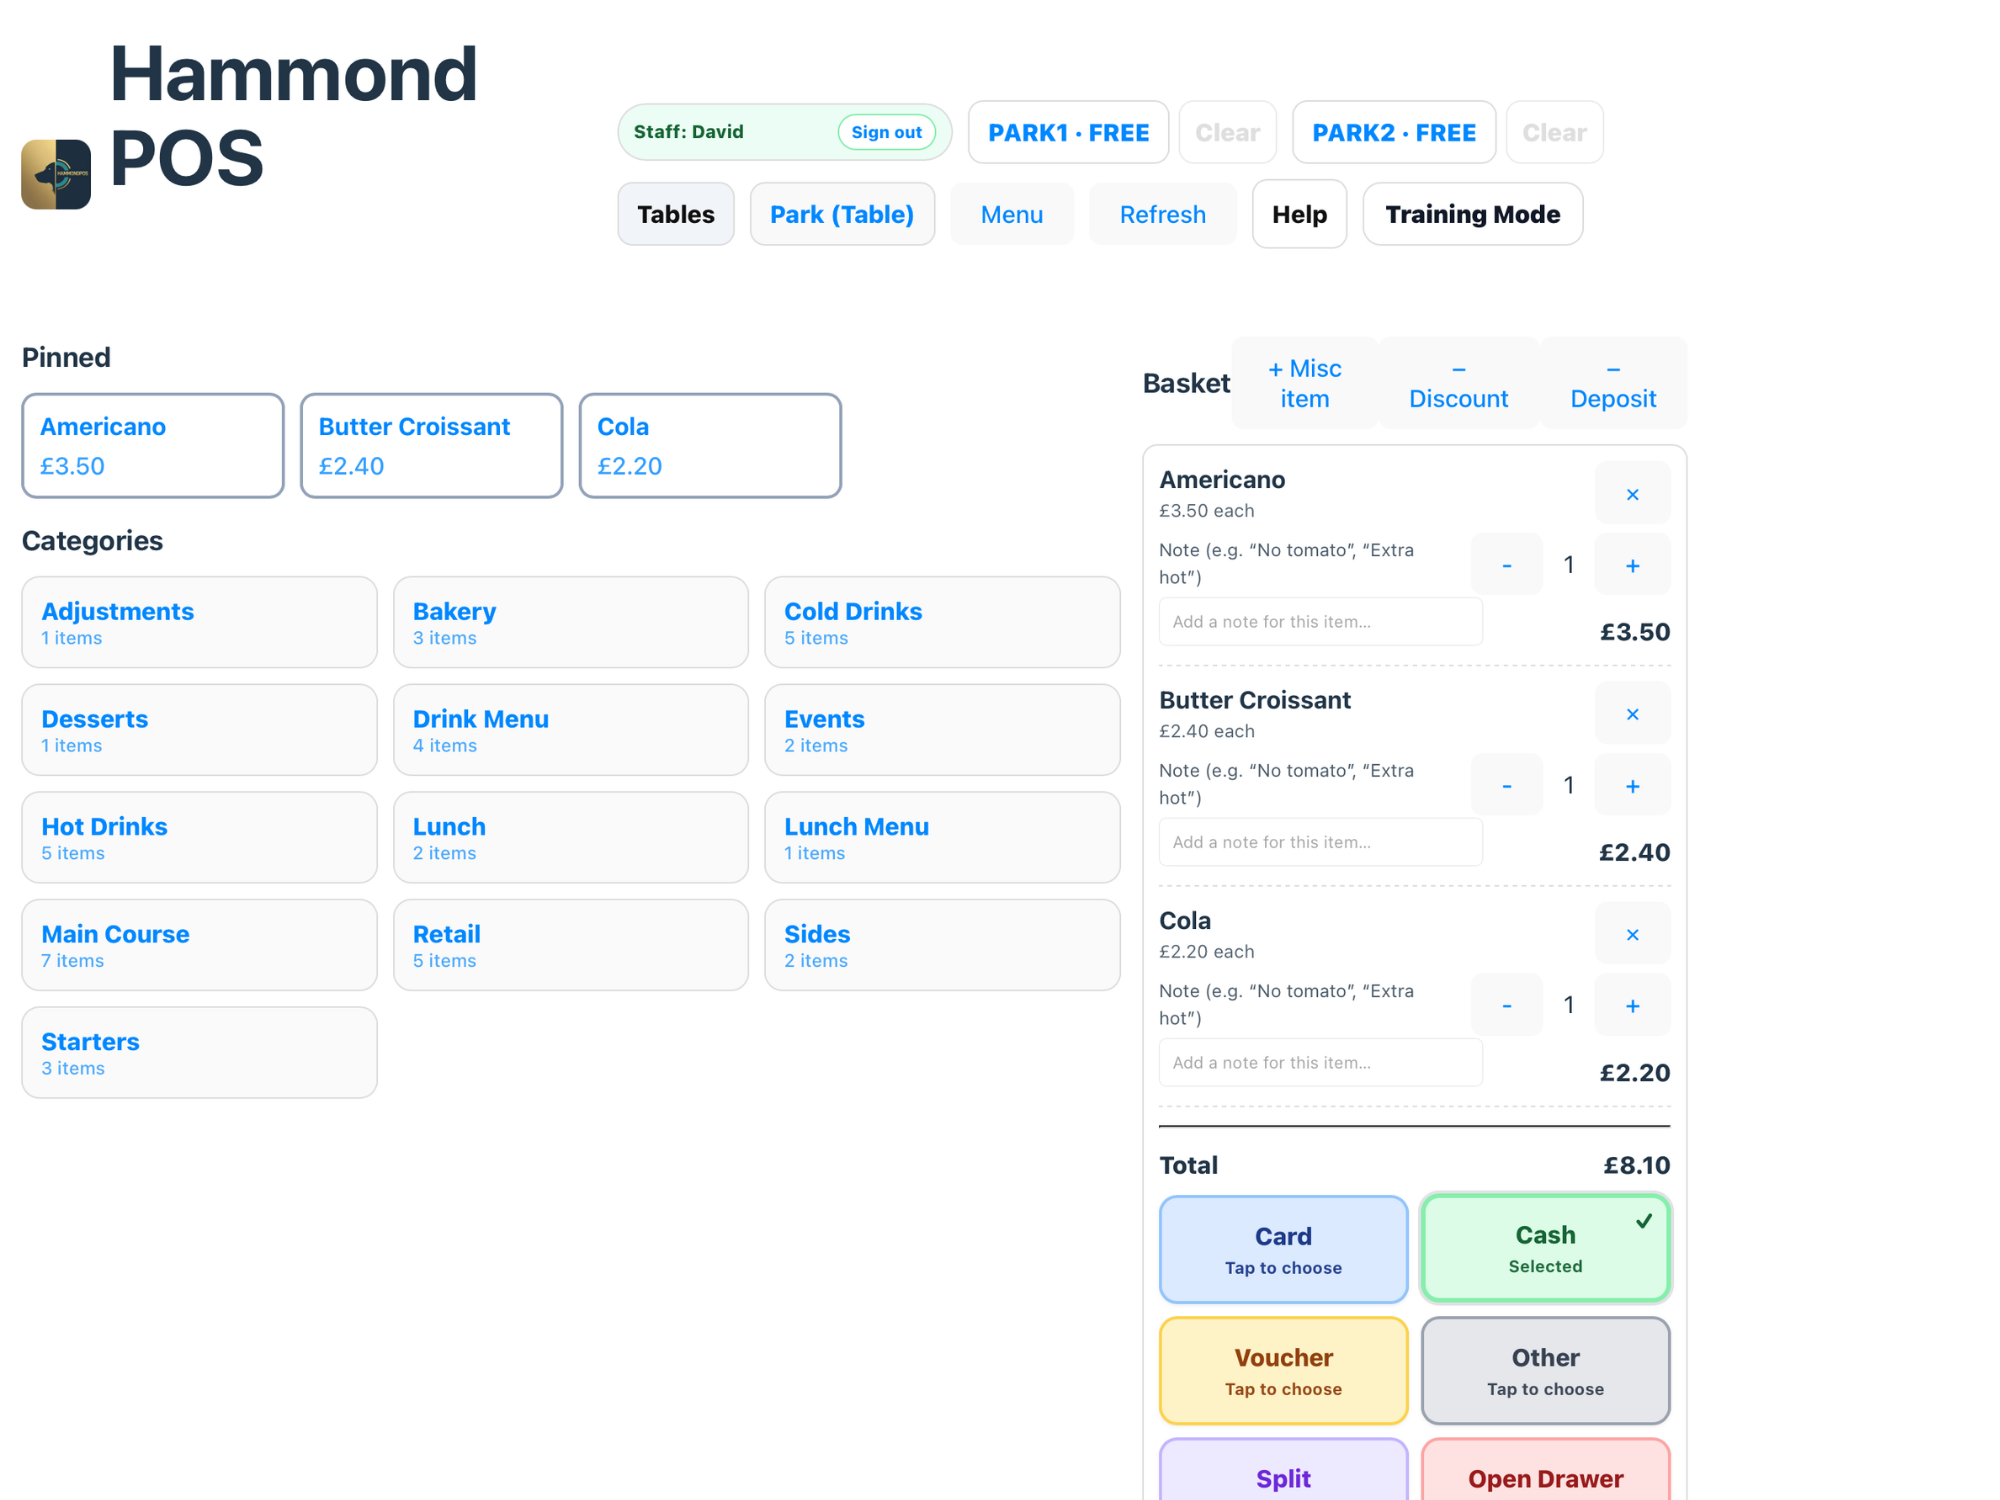
Orders are built from categories, nested categories, product tiles, modifiers, quantities, notes and allergens. The aim is to keep busy service fast while still capturing what the kitchen and bar need.
Step-by-step
Choose a categoryTap the top-level category such as Drinks, Food, Bakery or Mains.
Open nested categories where usedSome venues group products under parent categories, such as Drinks > Beer or Drinks > Soft Drinks.
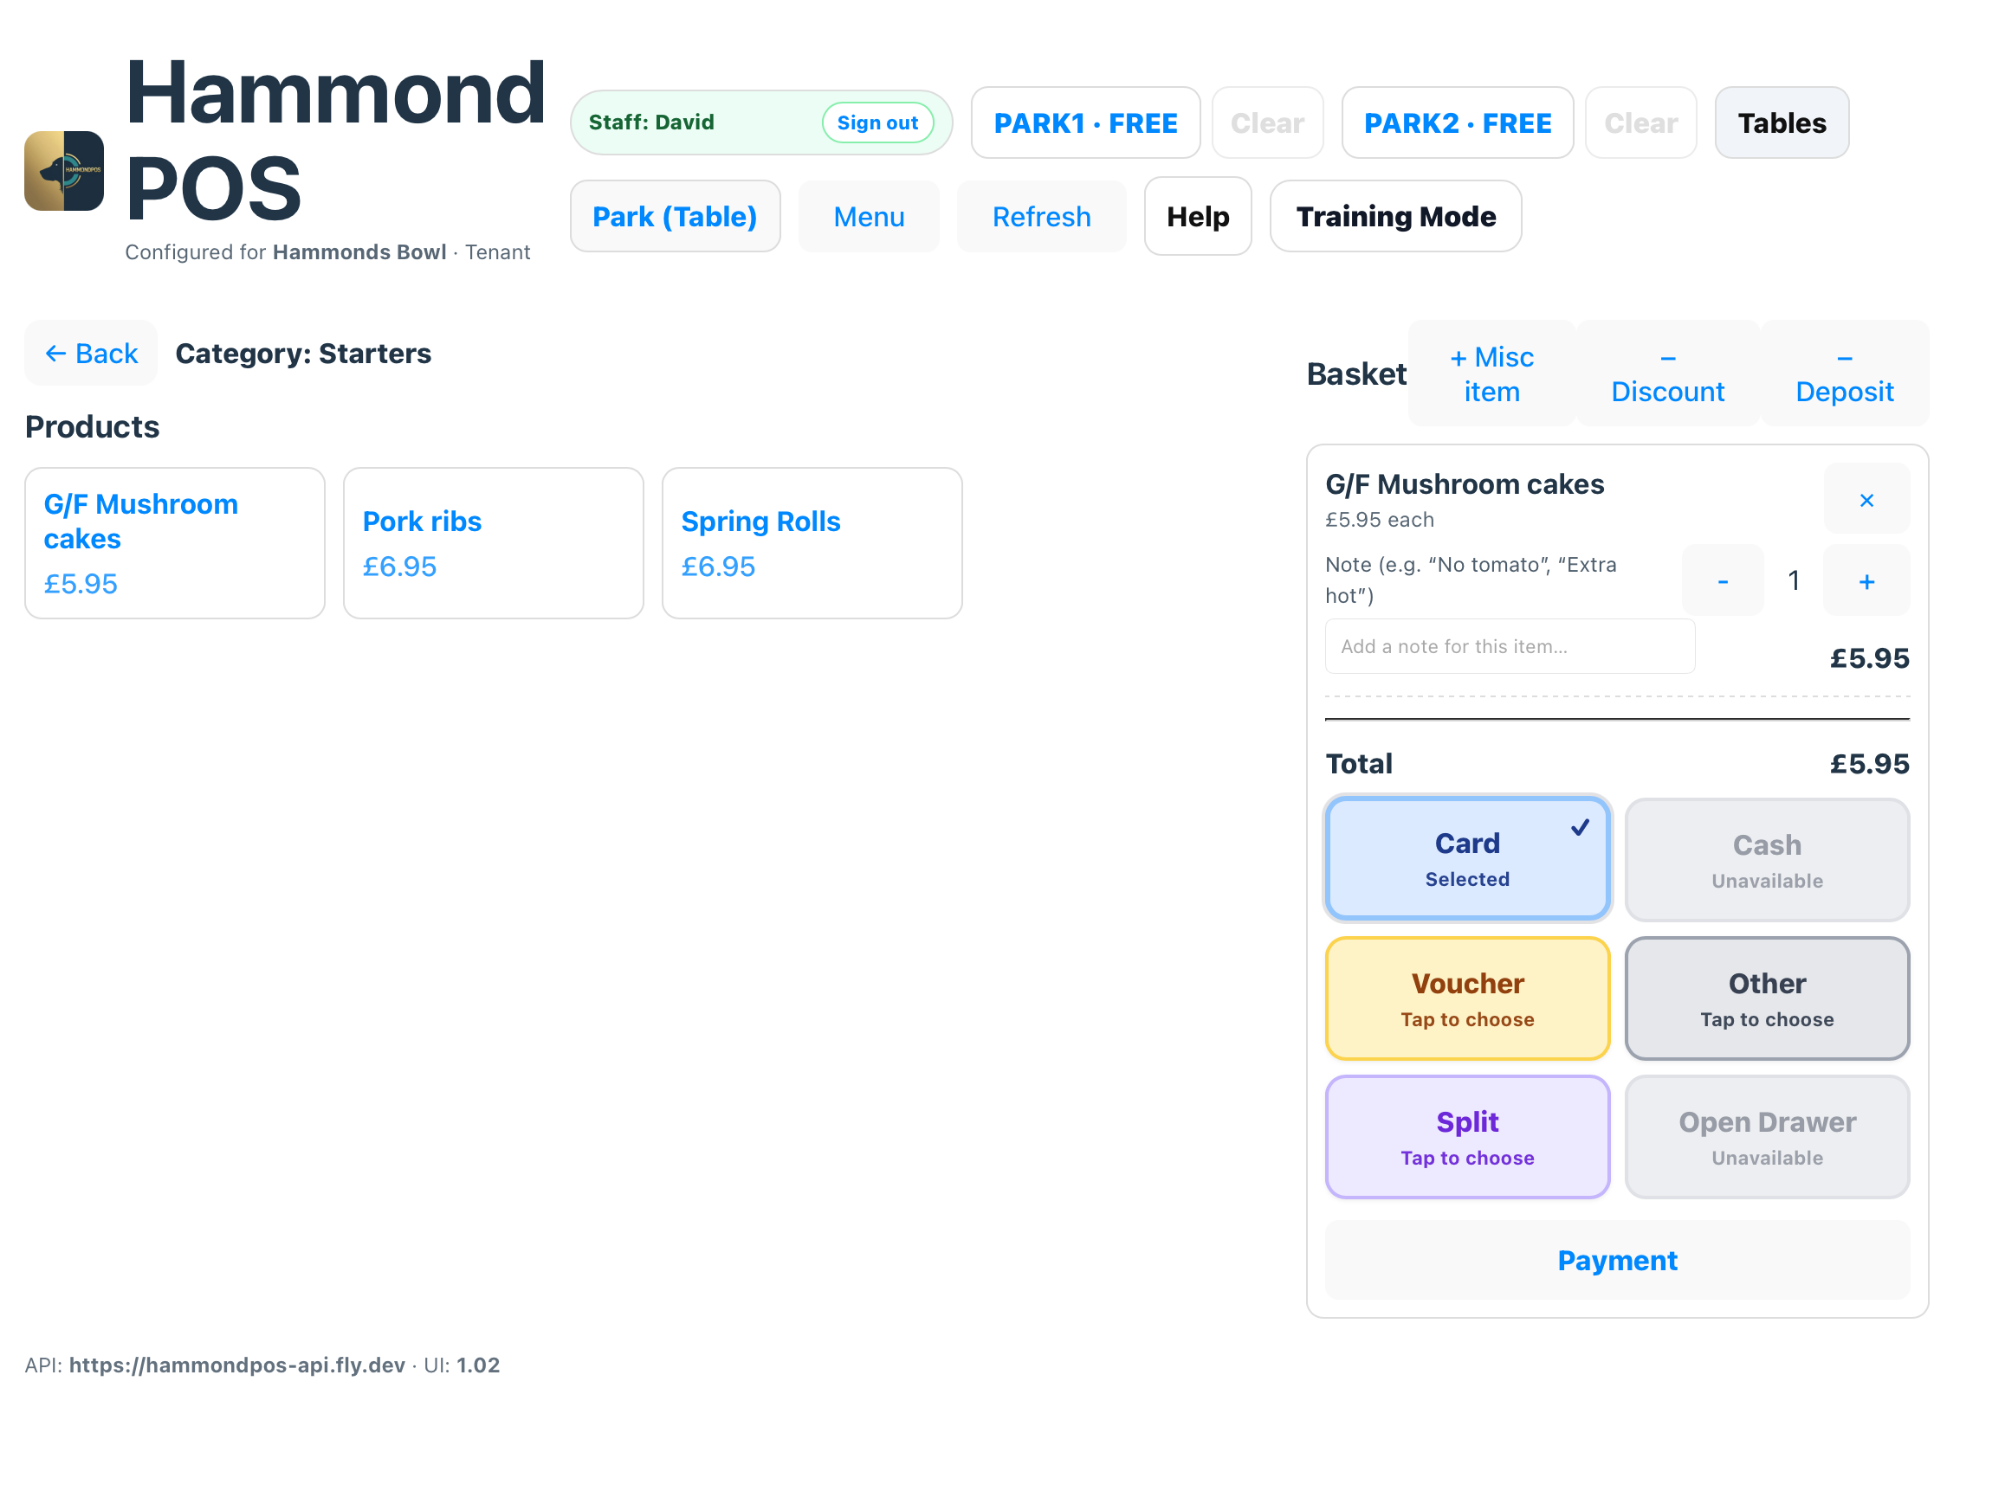
Add products to the basketTap a product tile once for one item, or use quantity controls when available.
Answer modifier promptsChoose required options, extras, sides or preparation choices before sending or paying.
Add notes carefullyUse notes for practical kitchen instructions, not for price changes.
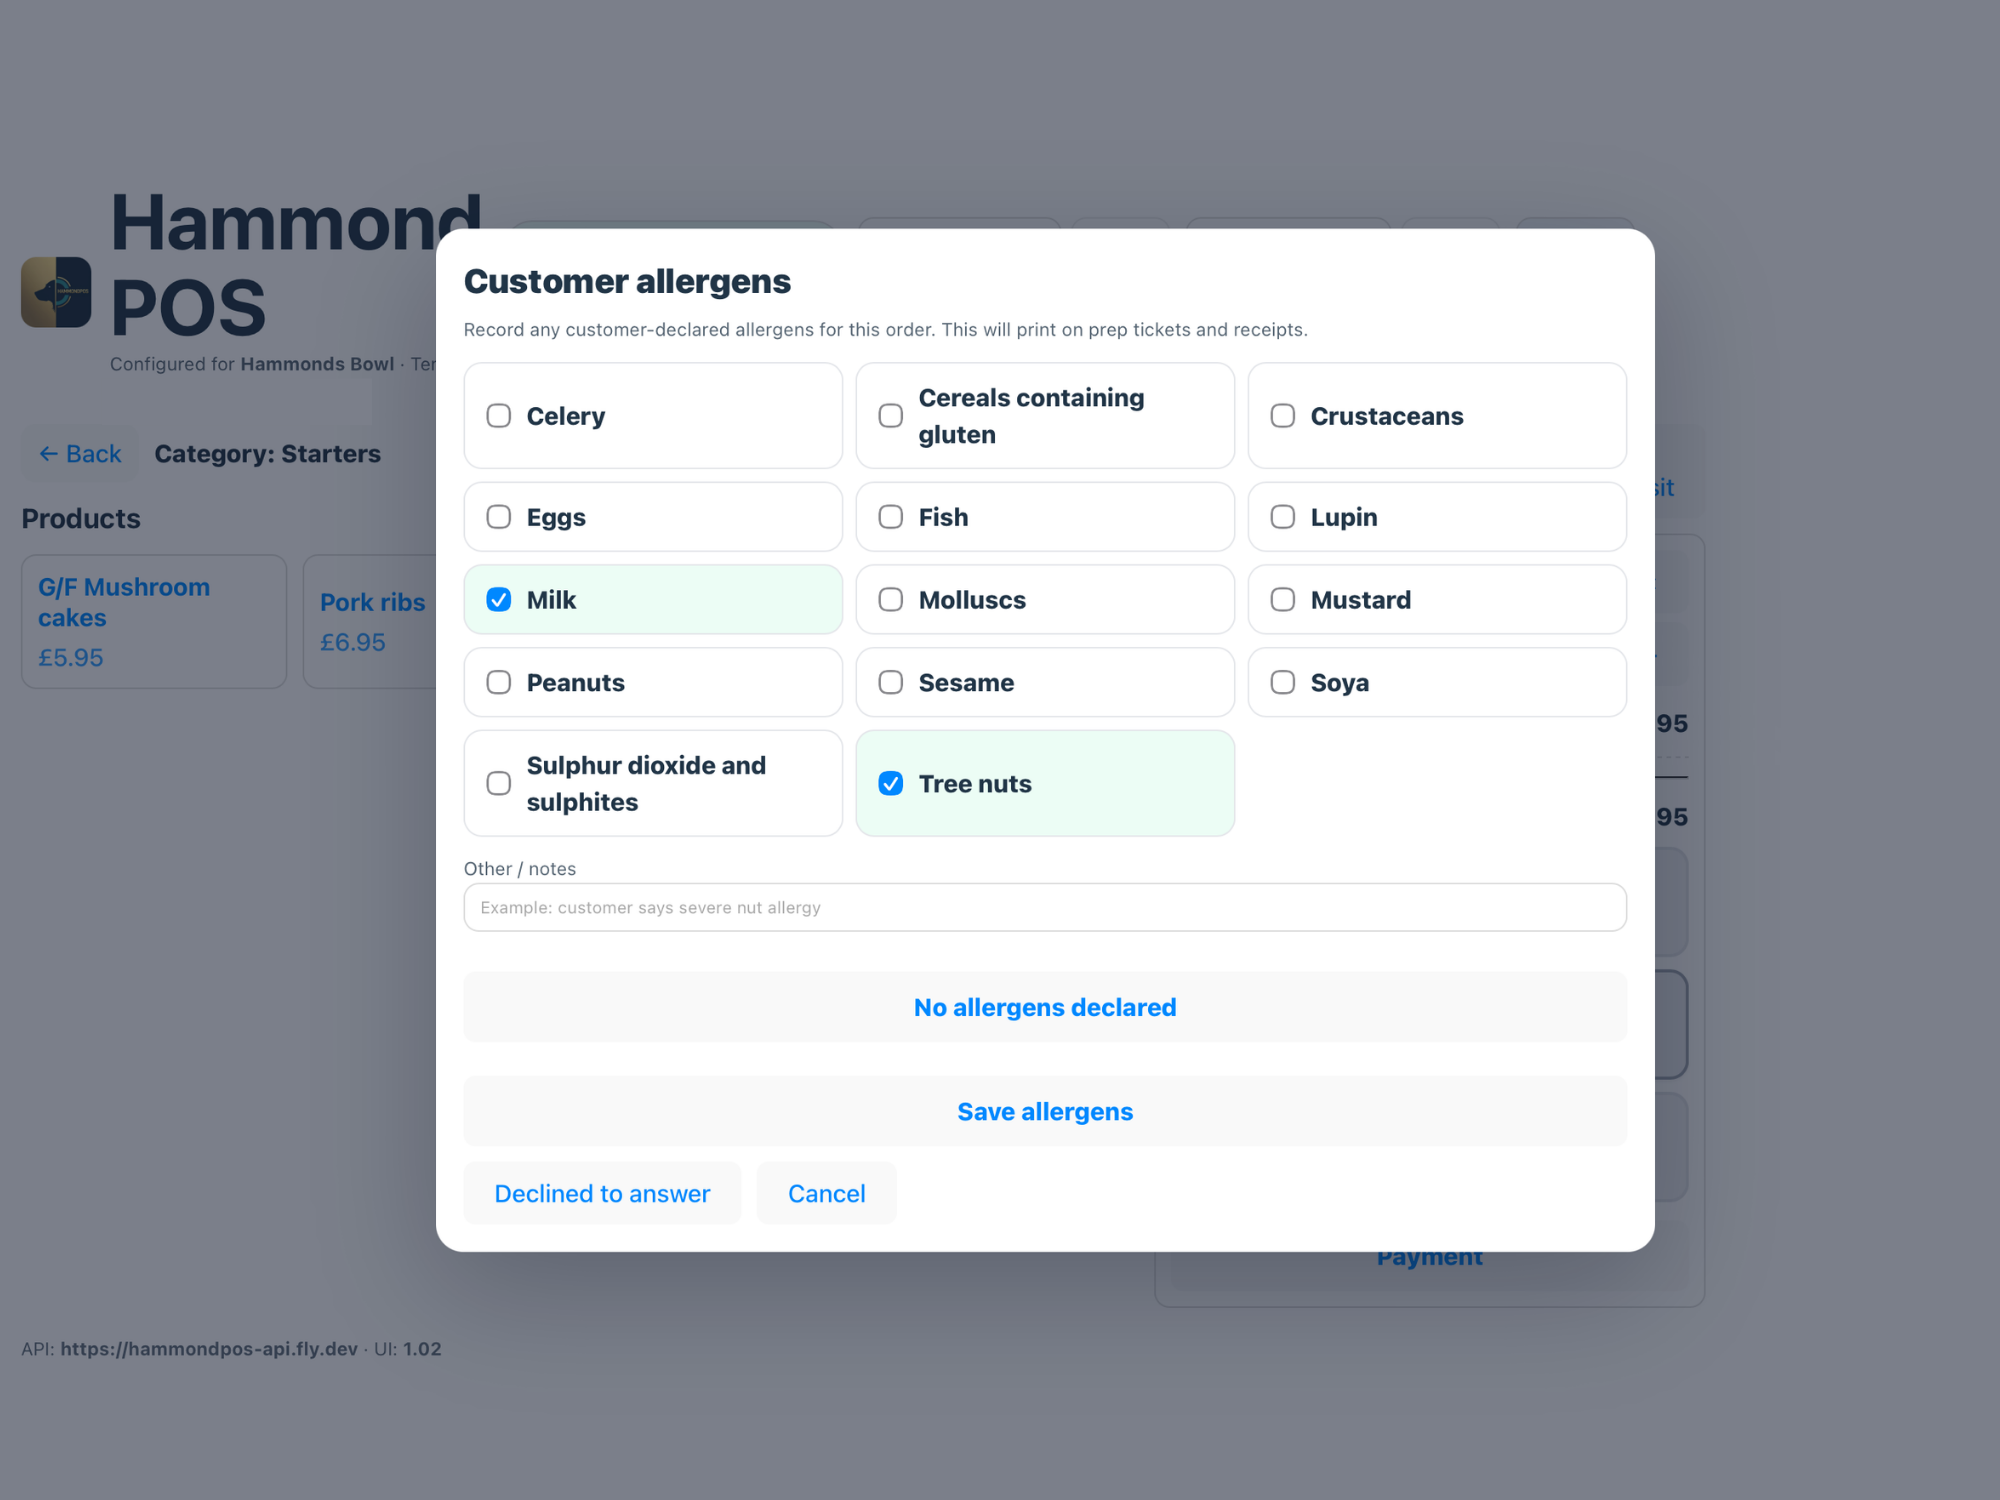
Capture allergensRecord any customer-declared allergens before sending the order to the kitchen.
Payments
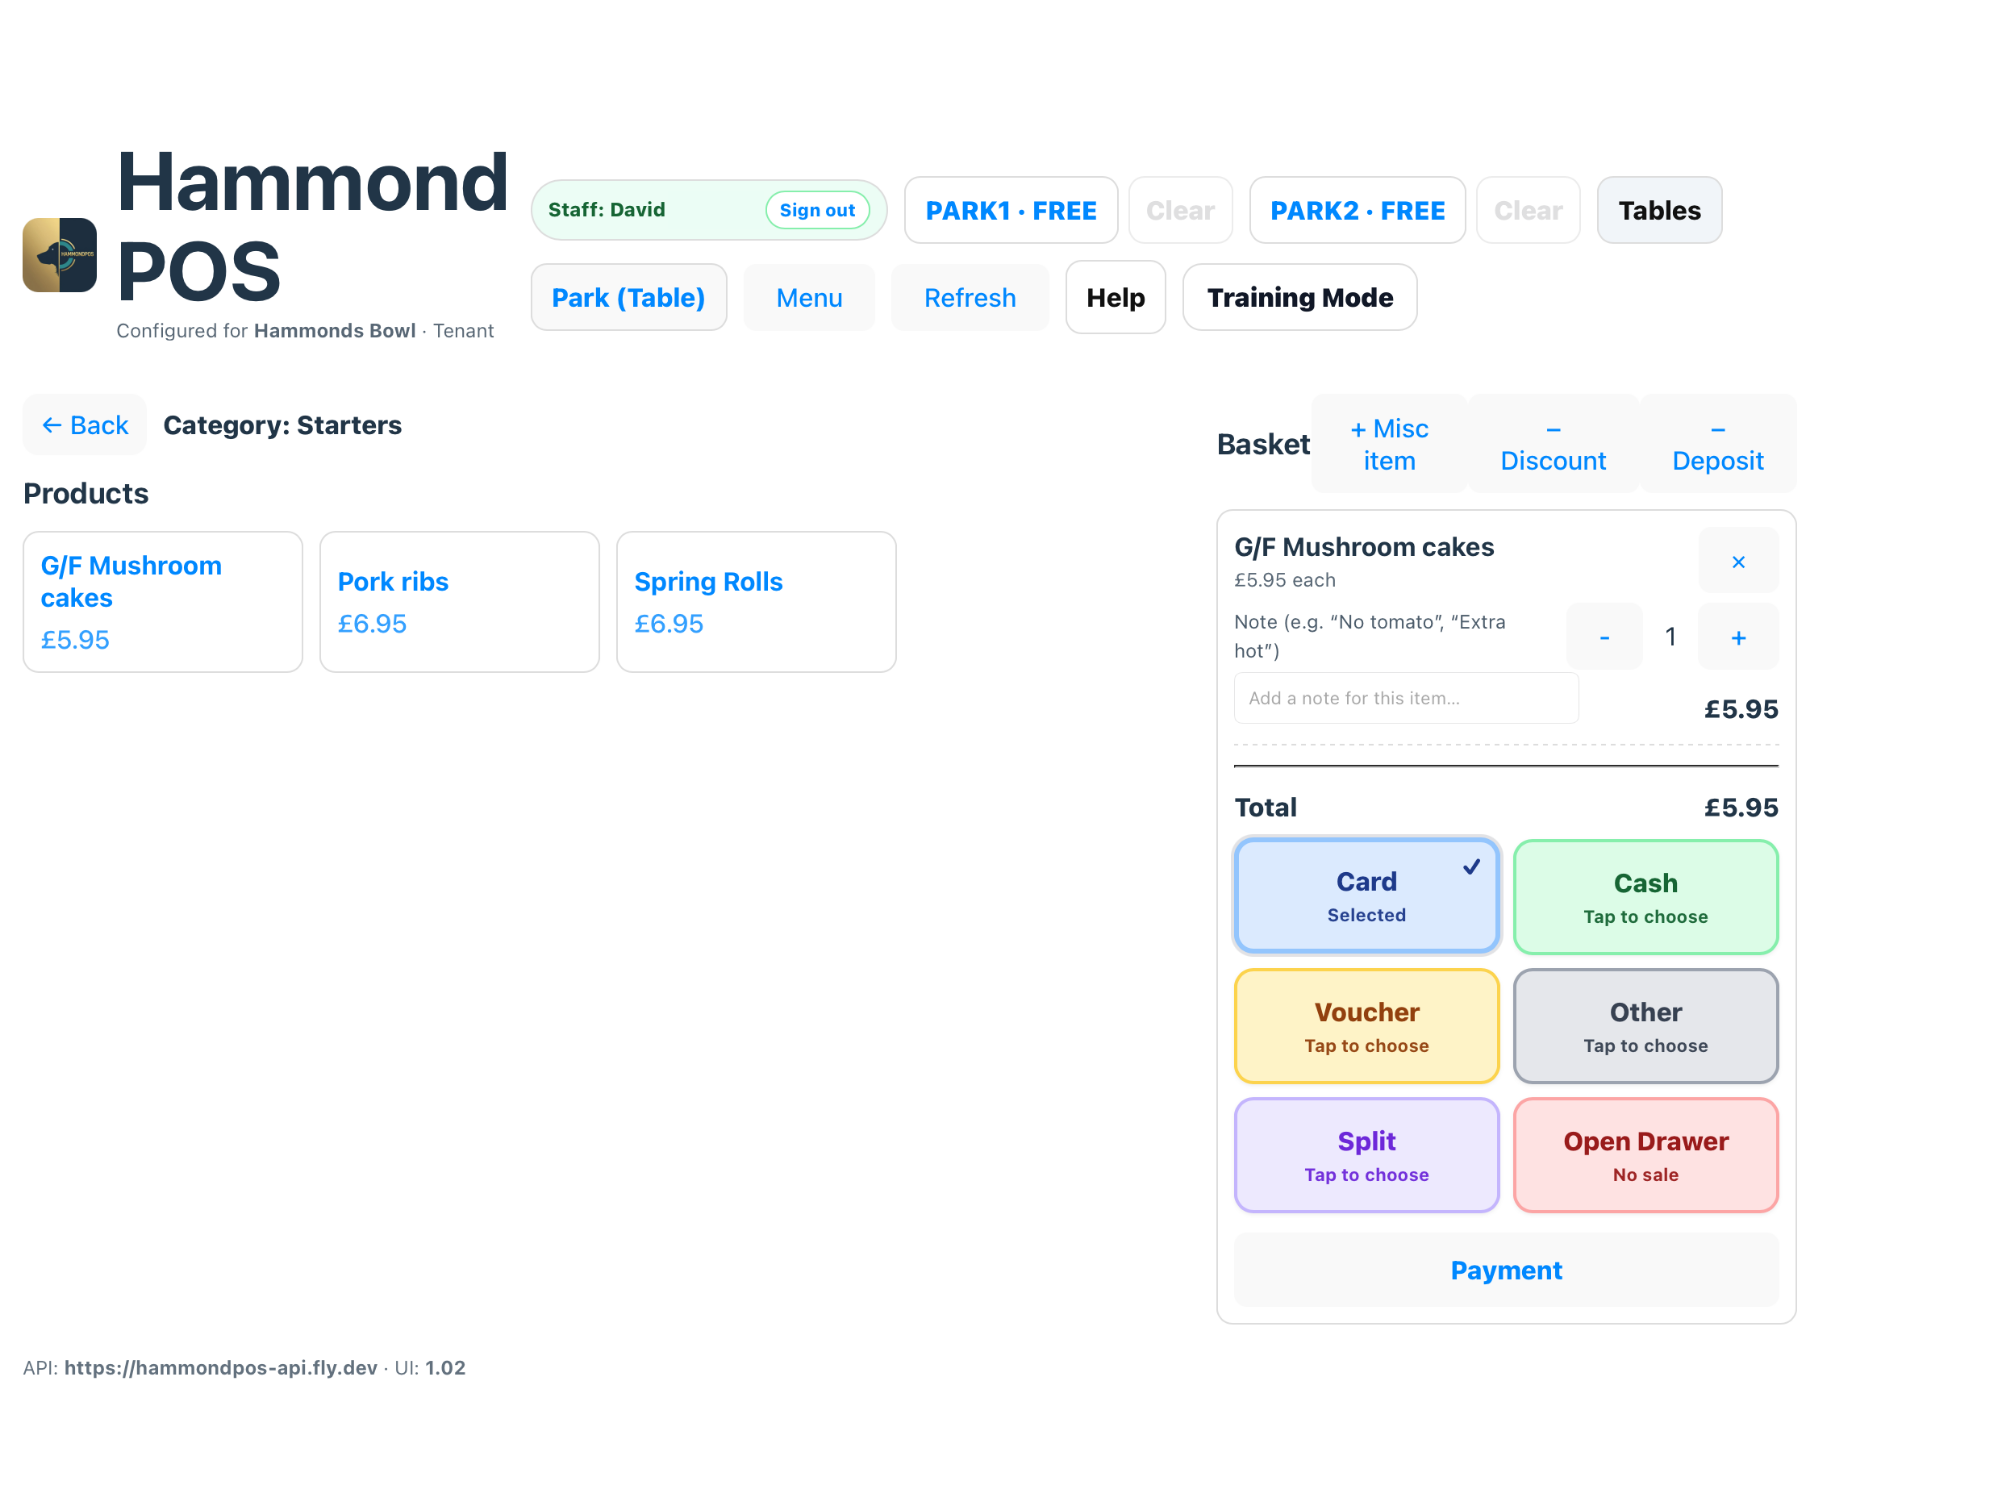
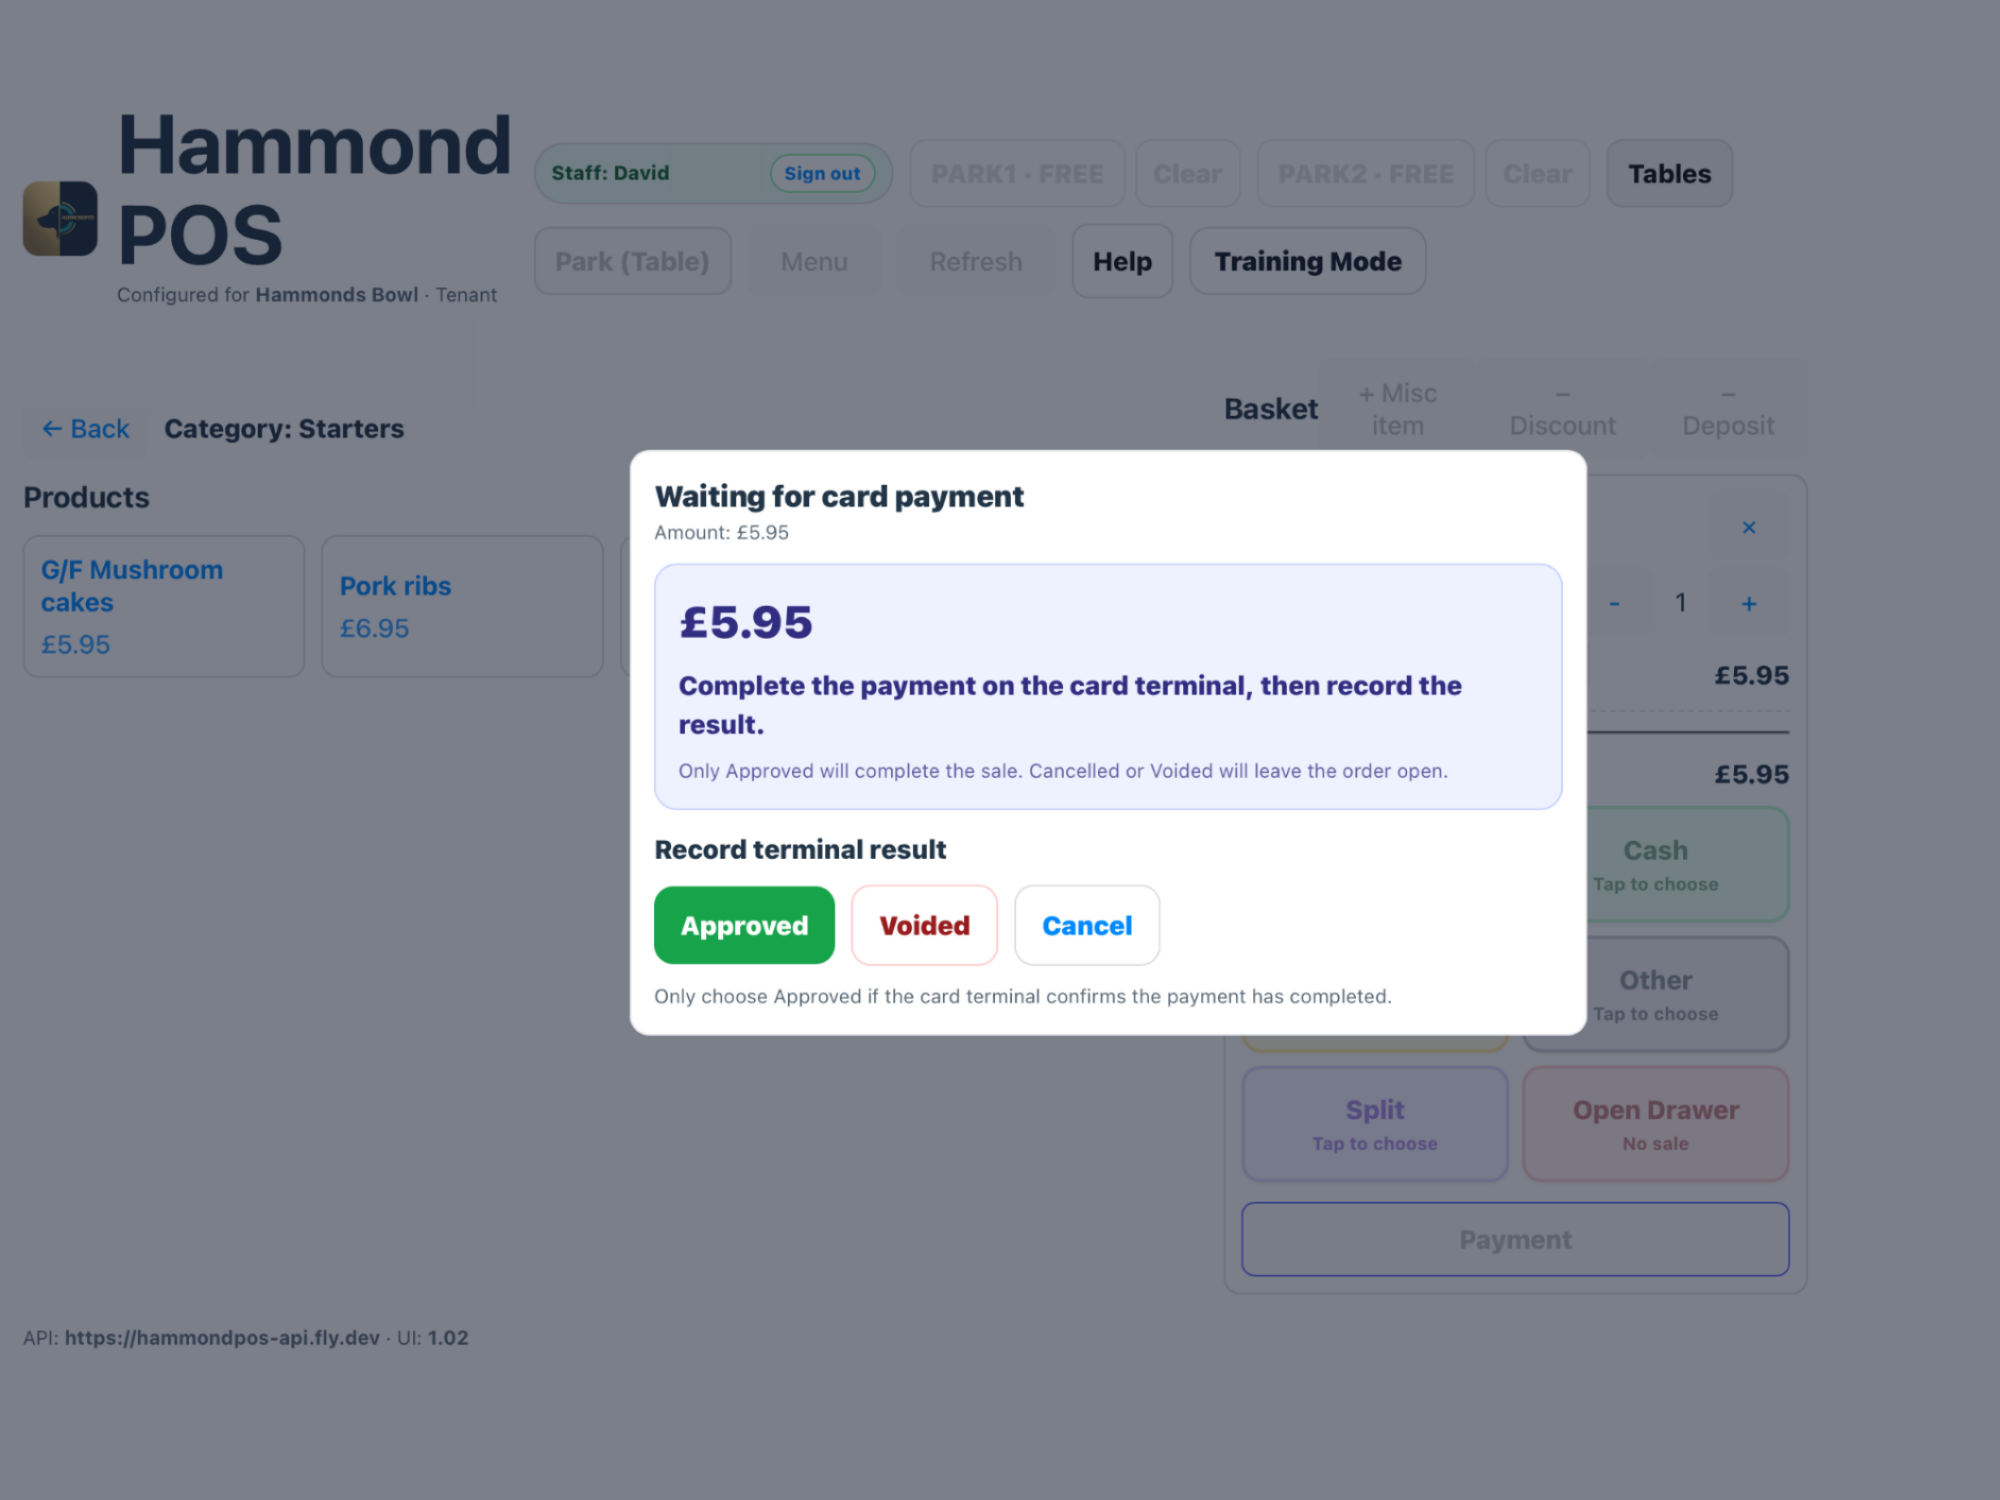
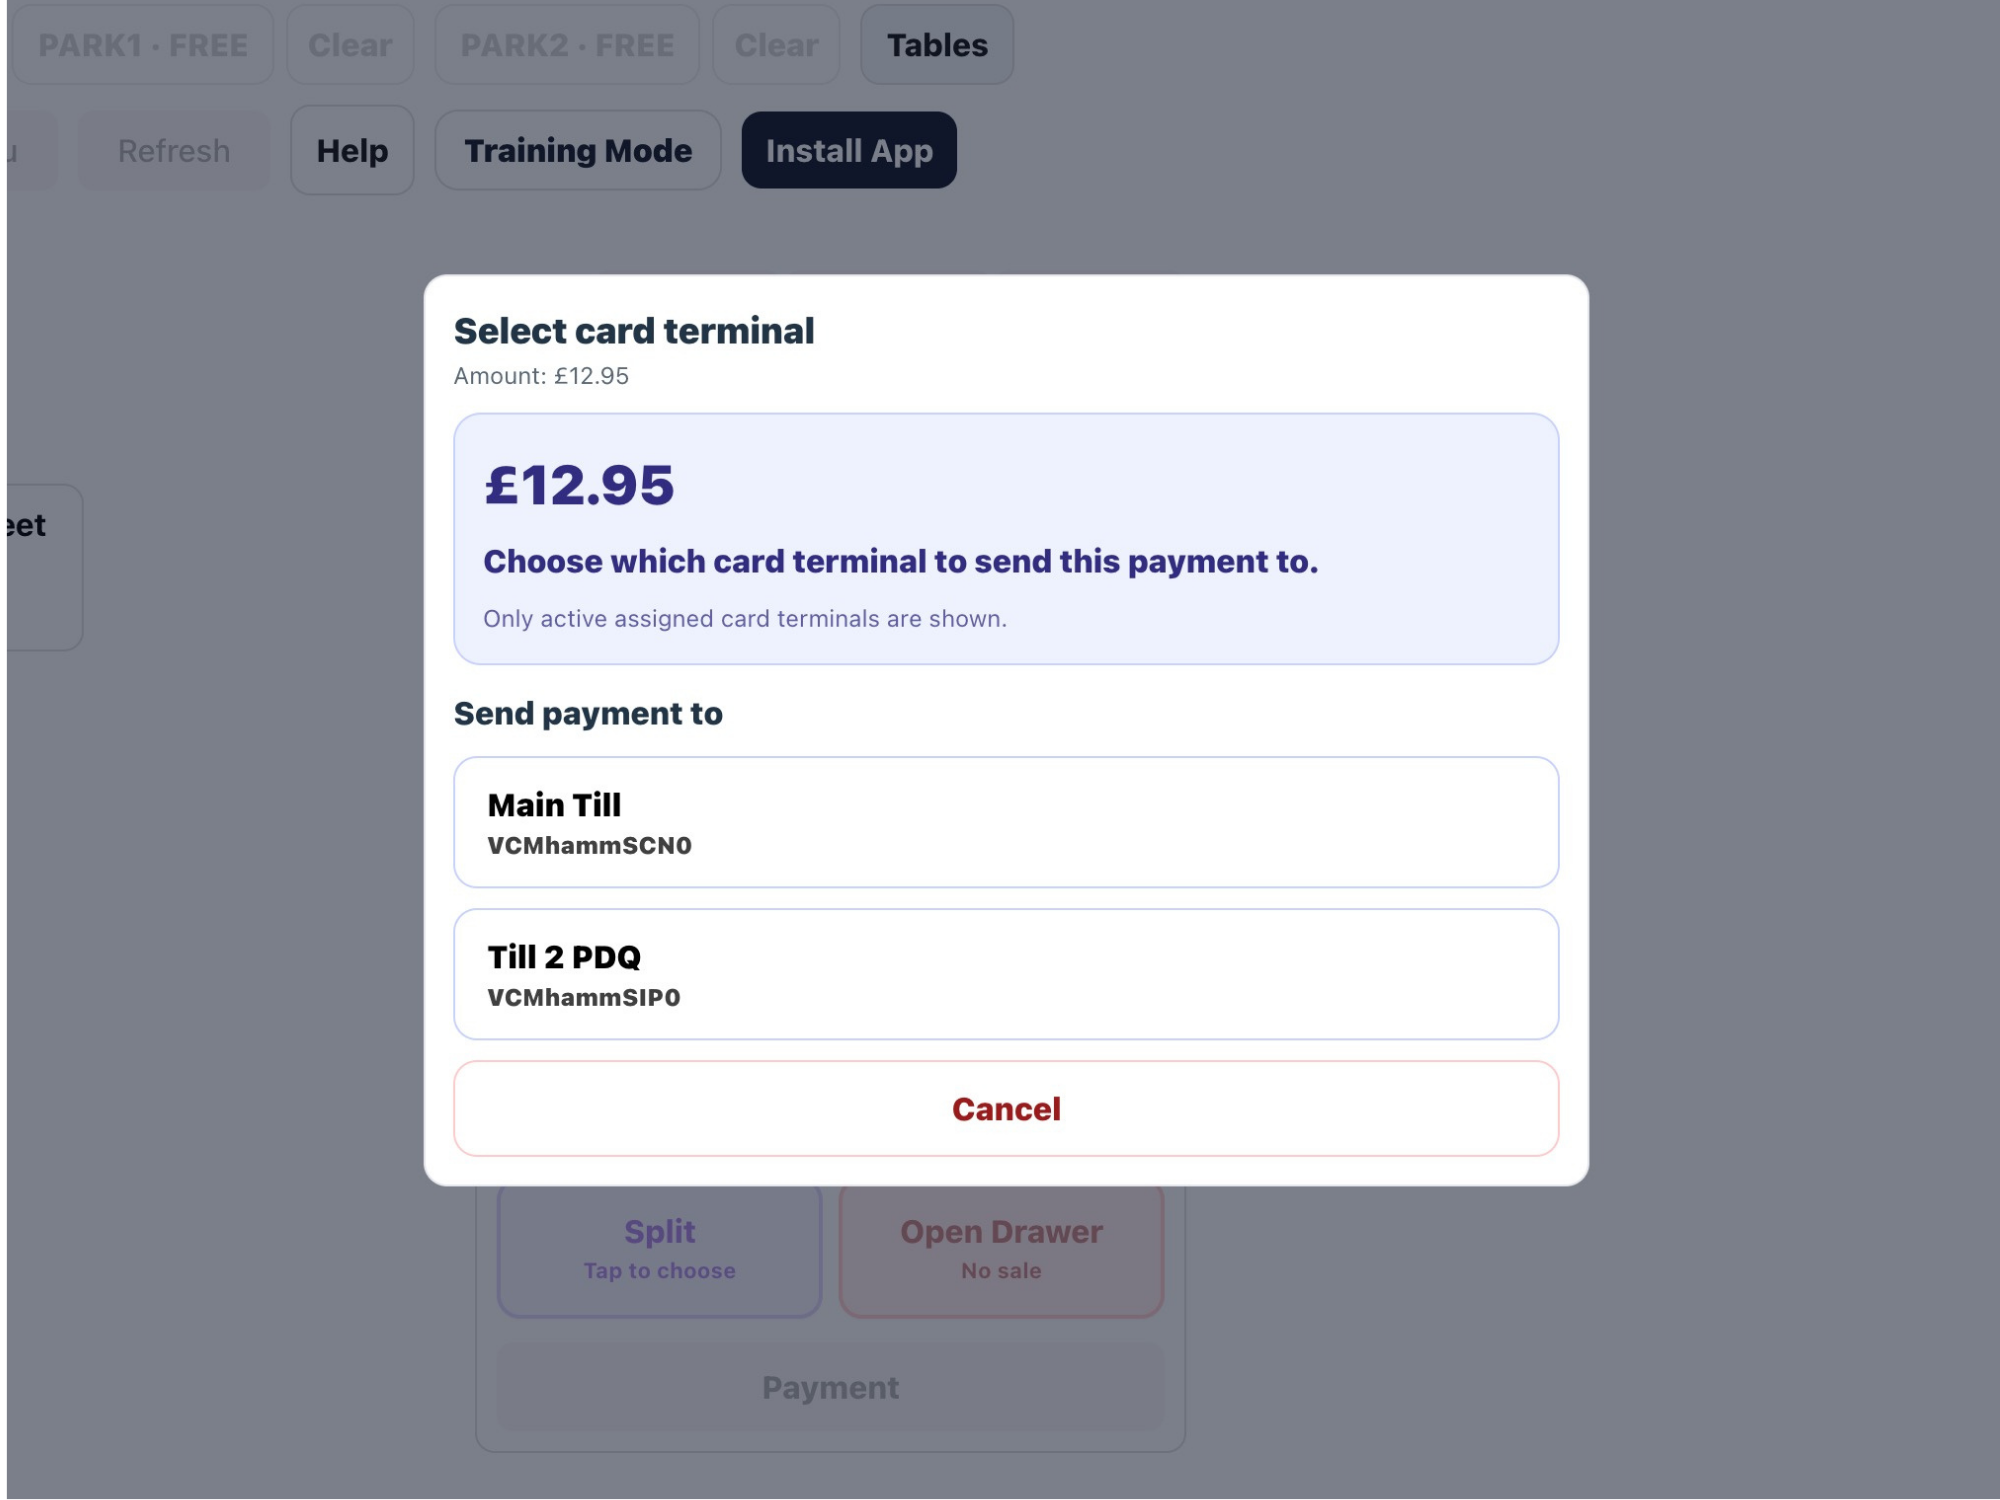
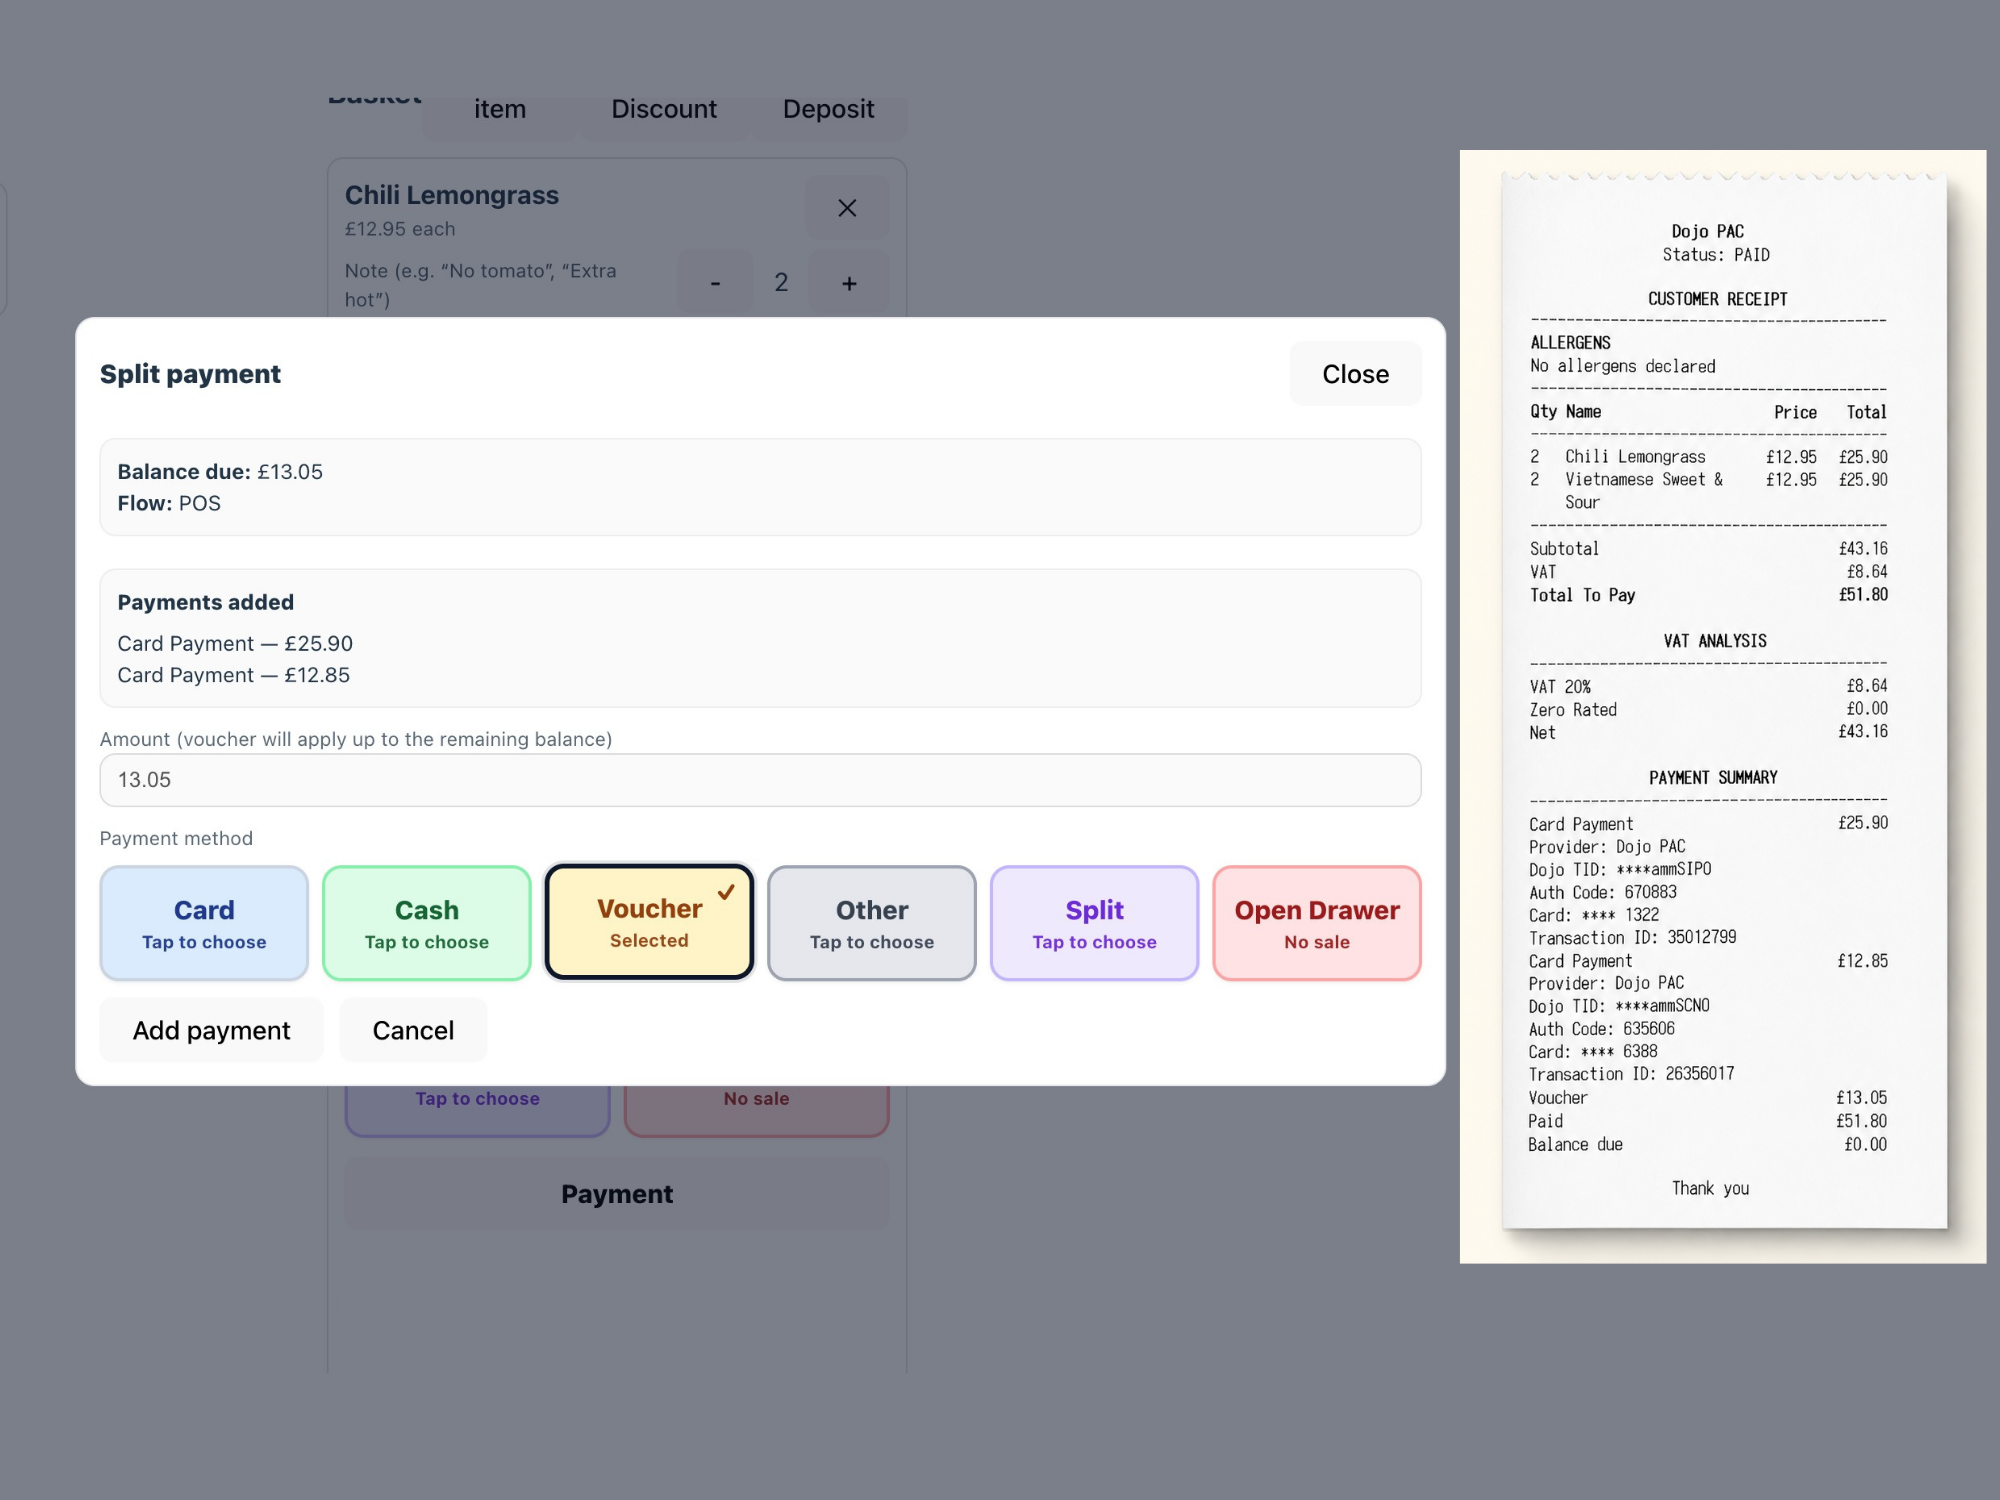
HammondPOS supports cash, manual card, voucher payments and integrated card providers where enabled. Split payments can be used when more than one payment method or card terminal is involved.
Step-by-step
Check the order totalConfirm items, modifiers, discounts, allergens and totals before opening payment.
Choose a payment methodSelect cash, manual card, voucher or the configured integrated card provider.
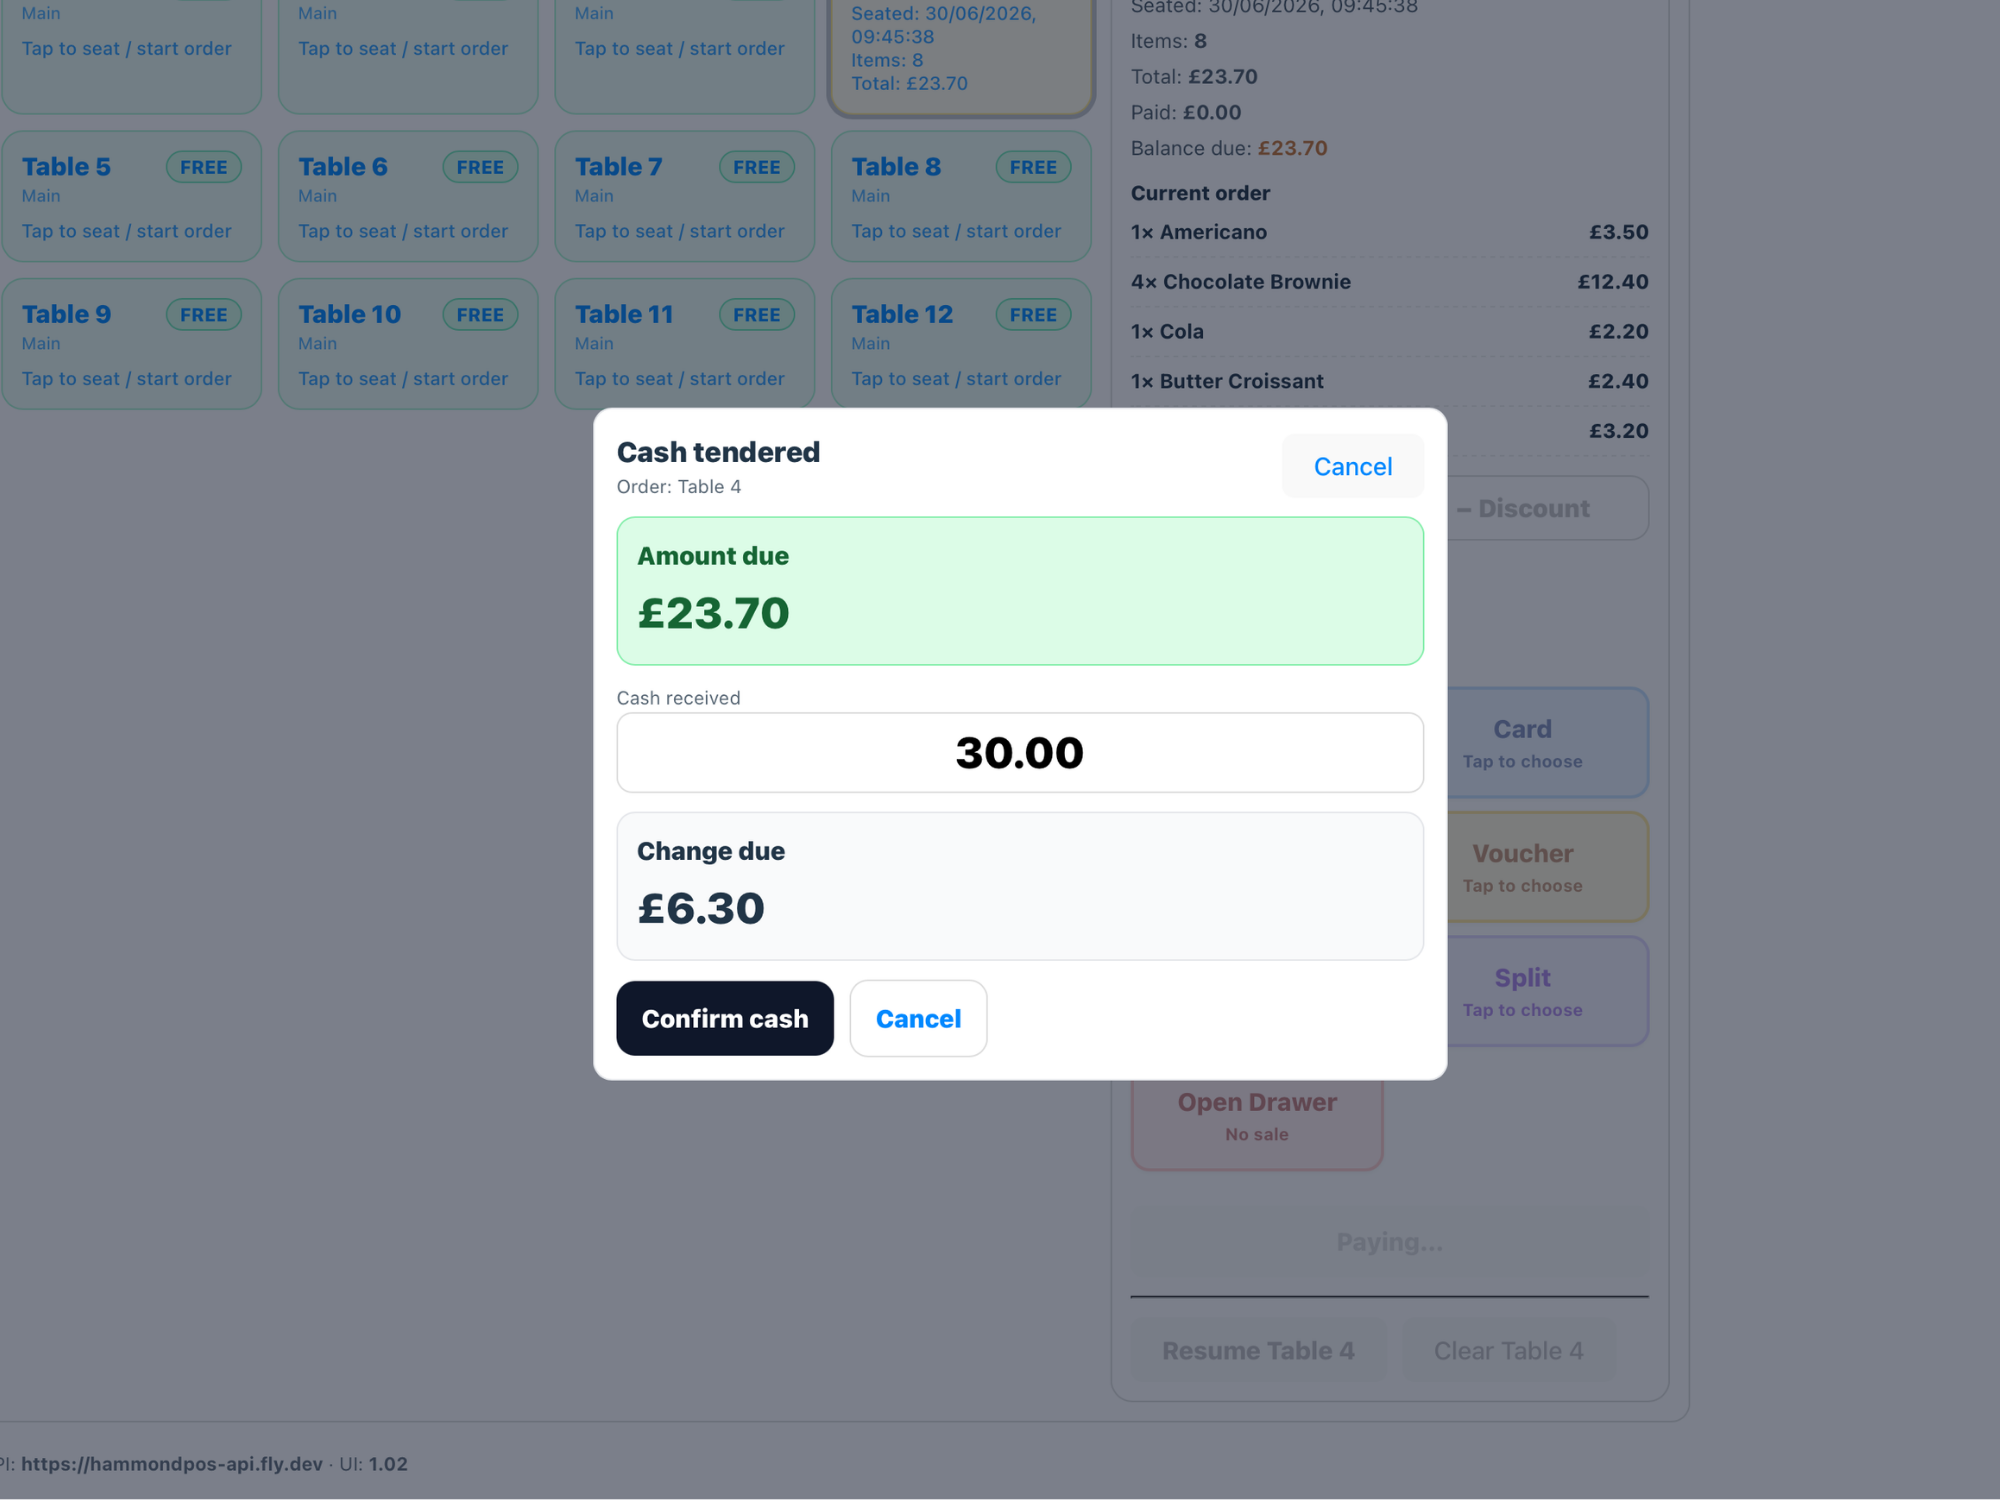
Enter tendered cash if neededFor cash, enter the amount received so change can be calculated.
Use the card terminal promptFor integrated card payments, follow the on-screen and terminal prompts until the result is confirmed.
Split when neededTake part of the total by one method, then repeat payment for the remaining balance.
Complete only when balance is zeroThe order should only close once Paid equals Total To Pay and Balance due is zero.
Parked & Table Orders
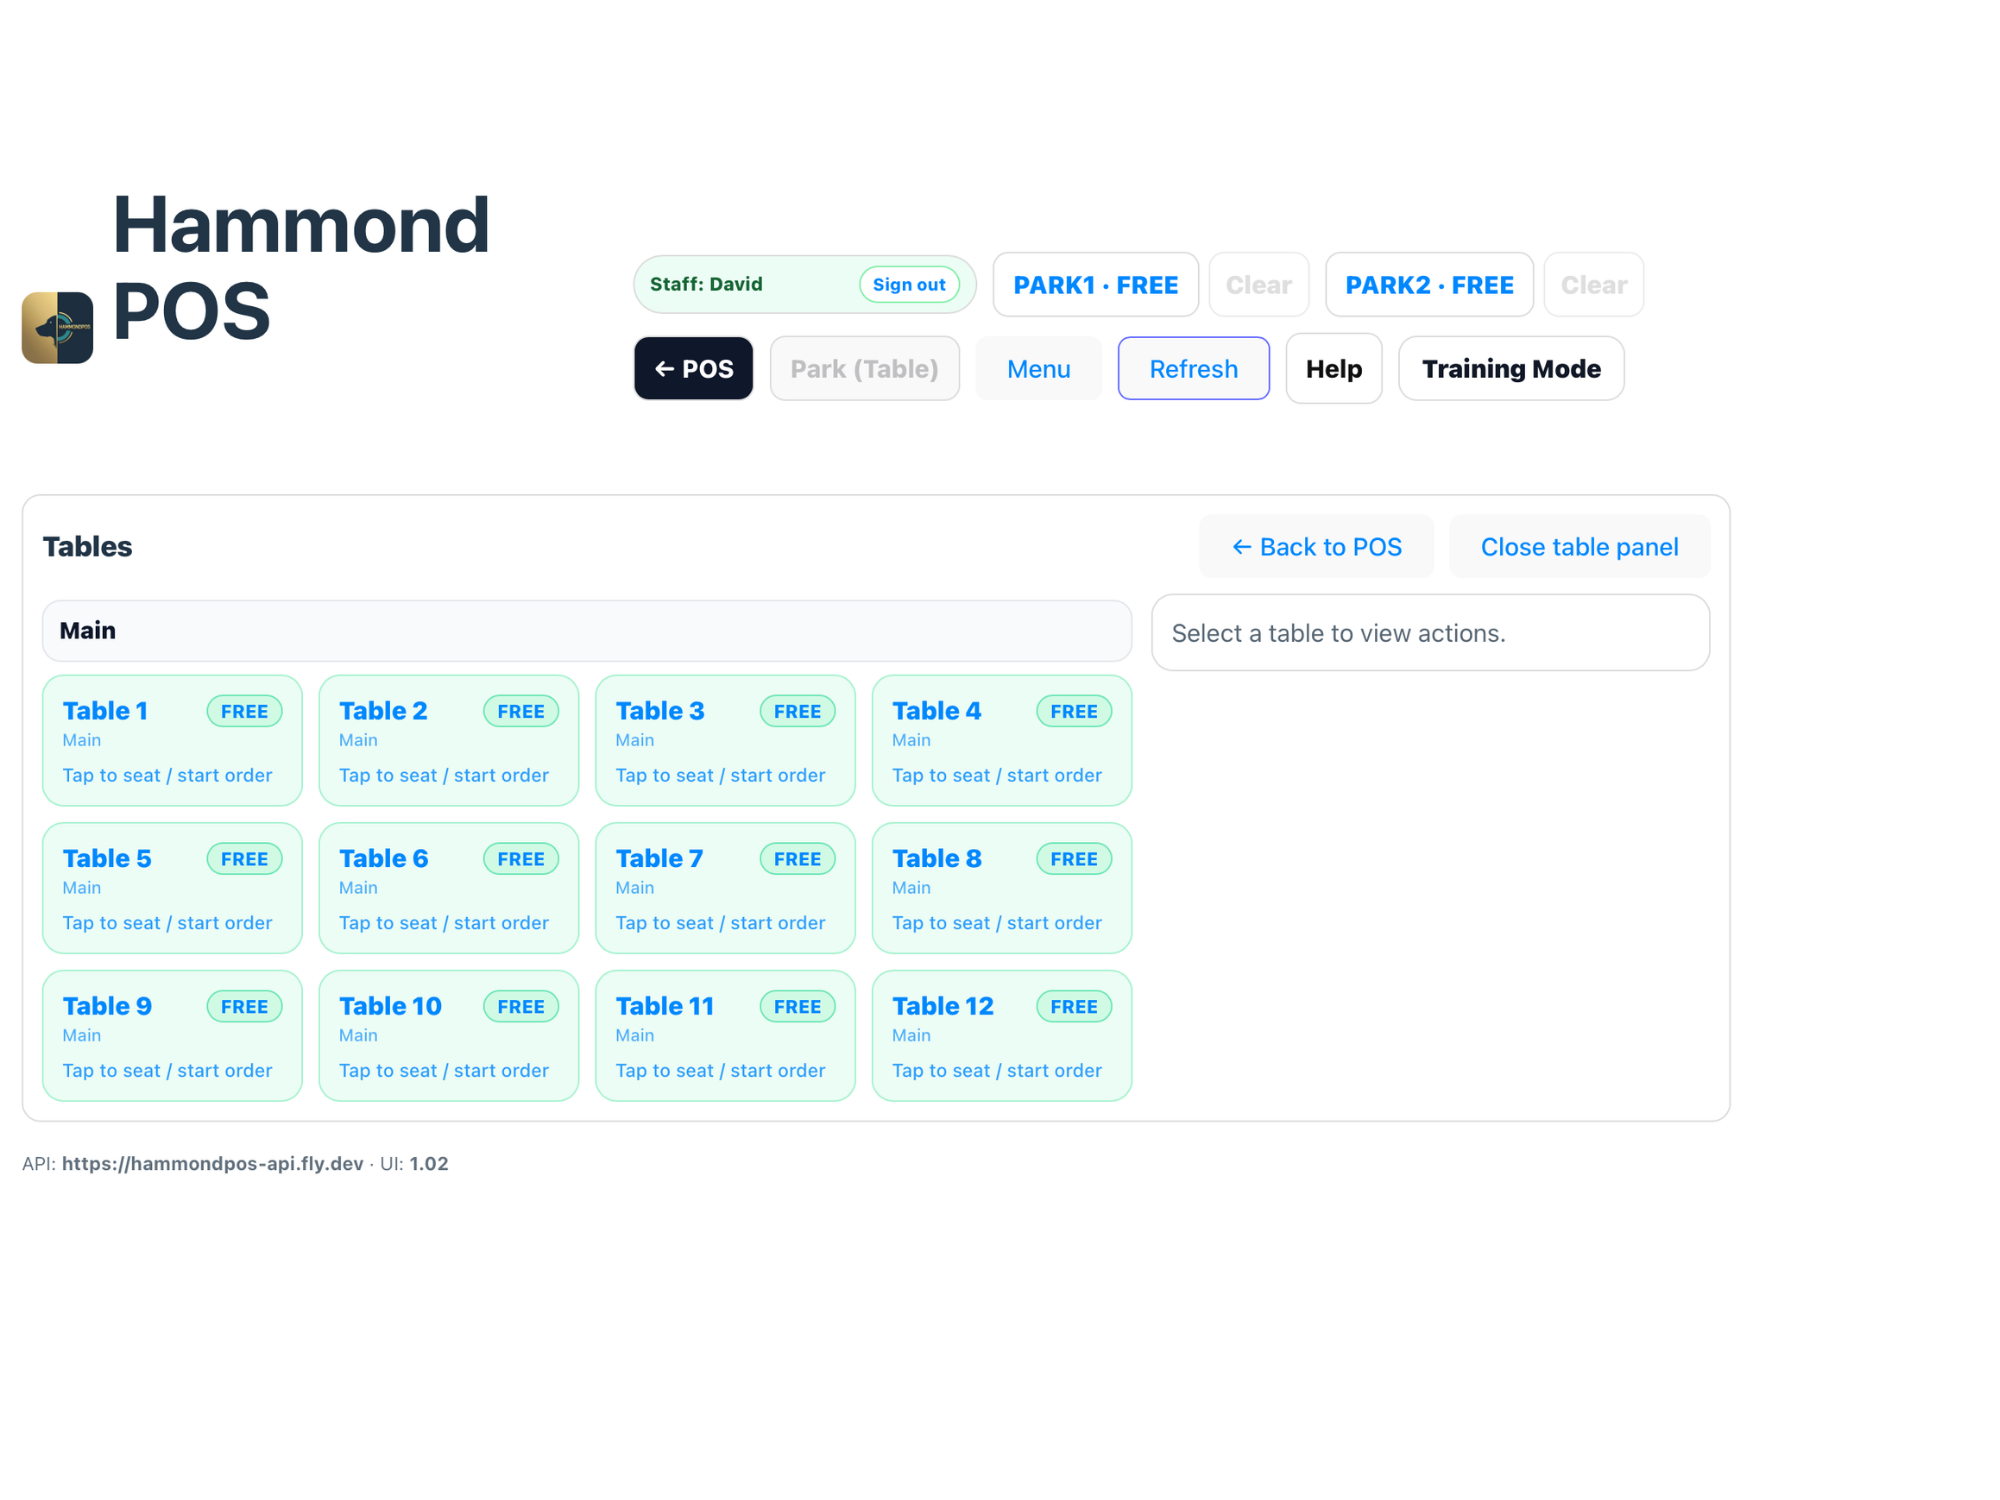
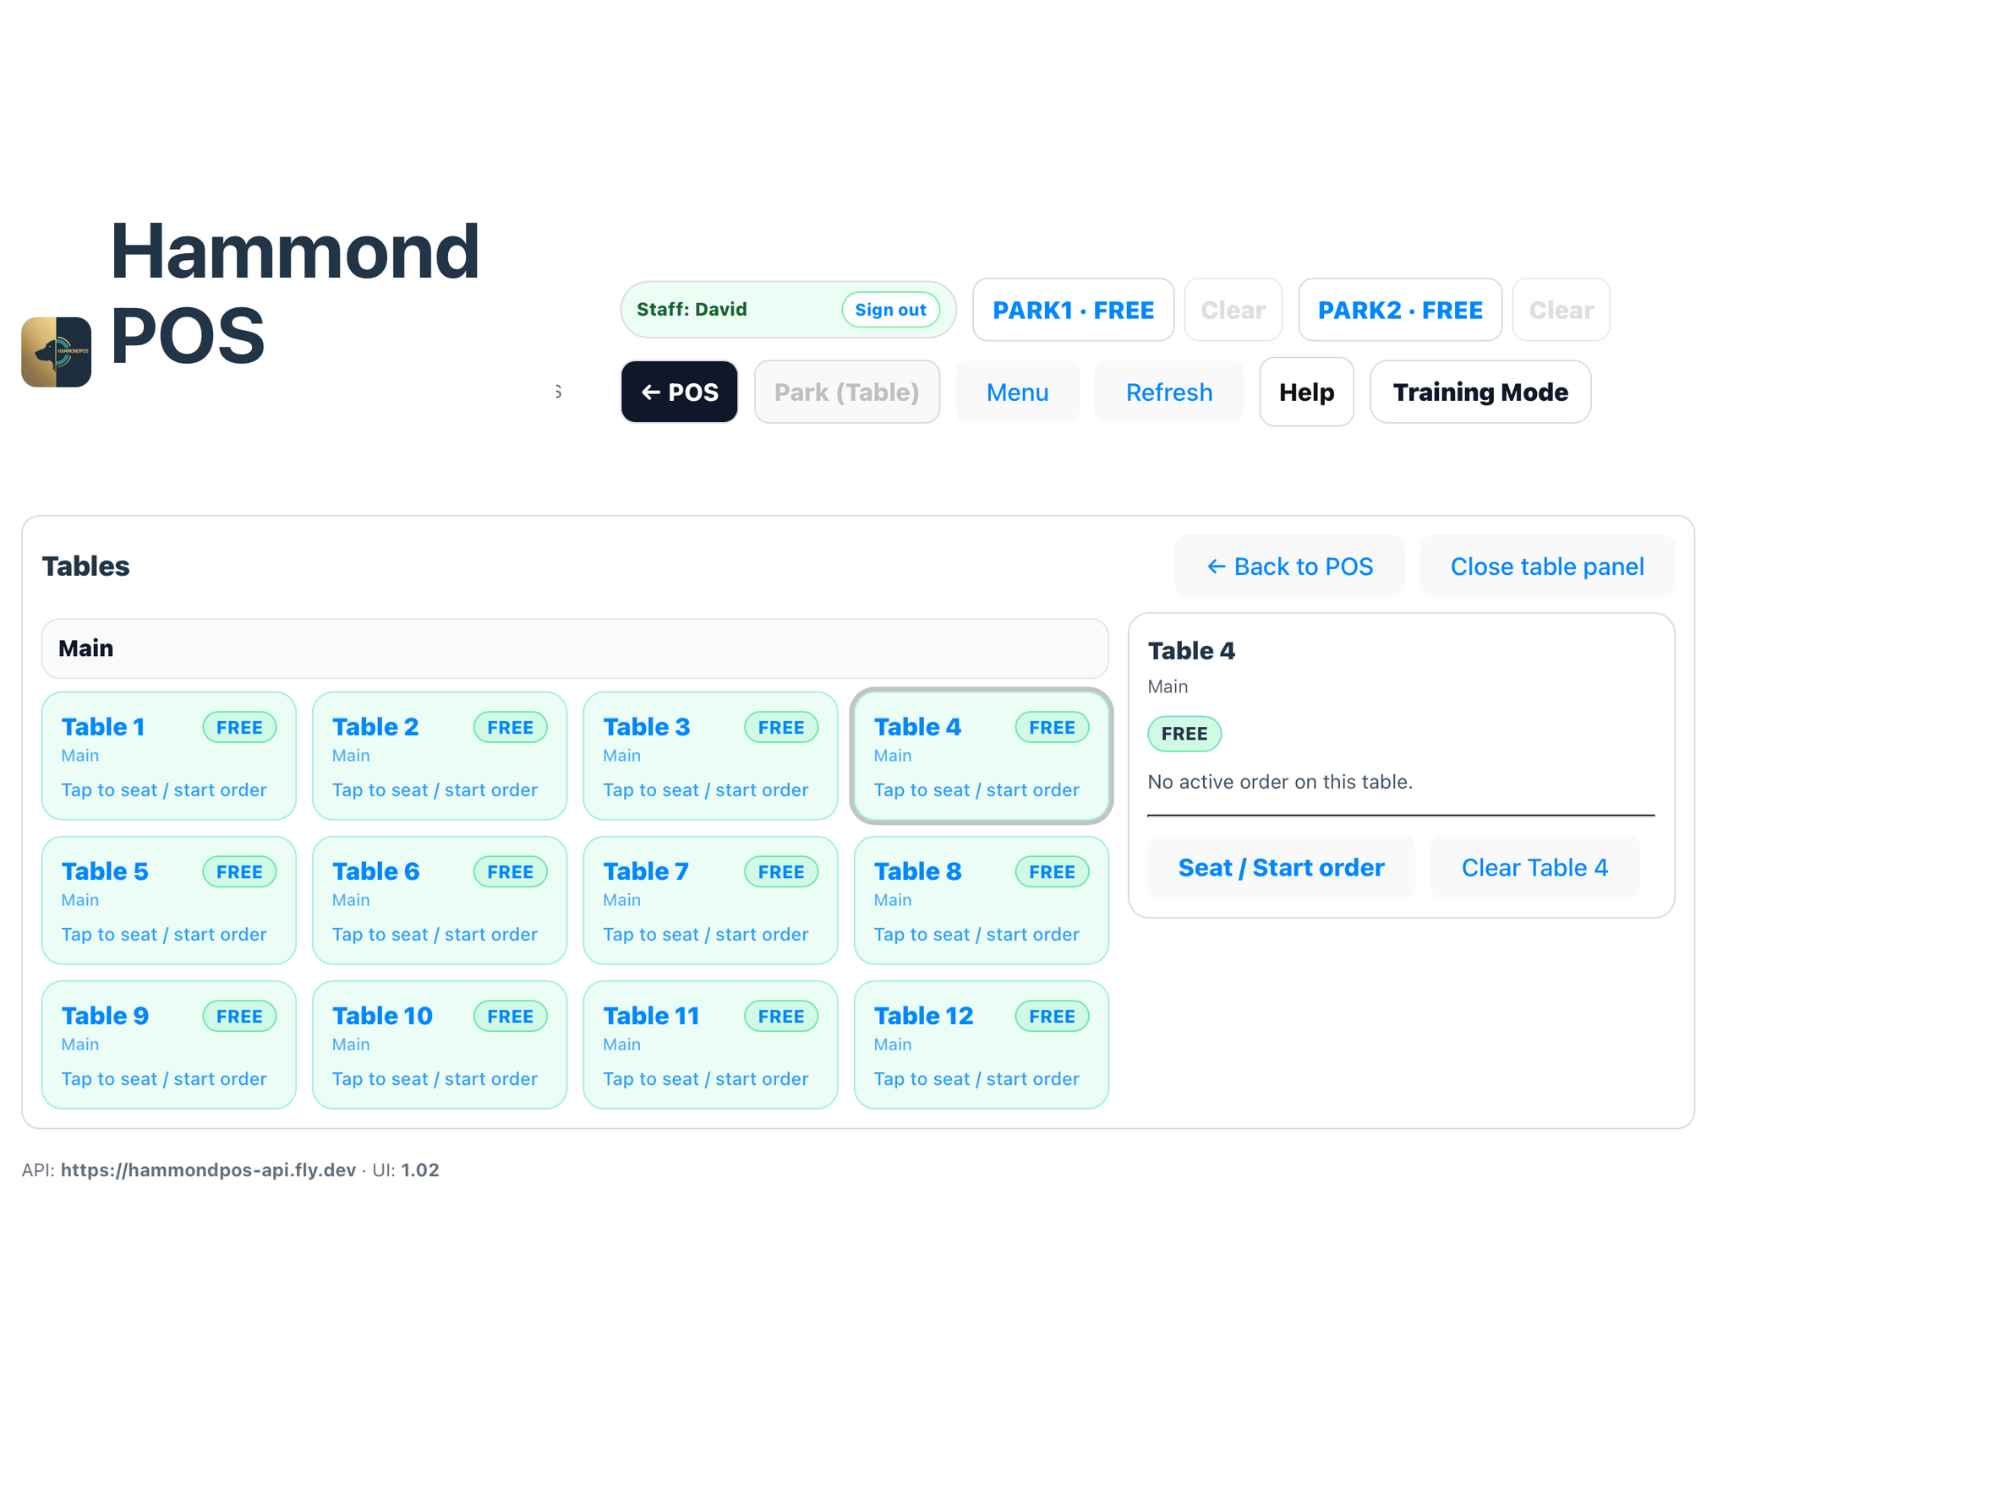
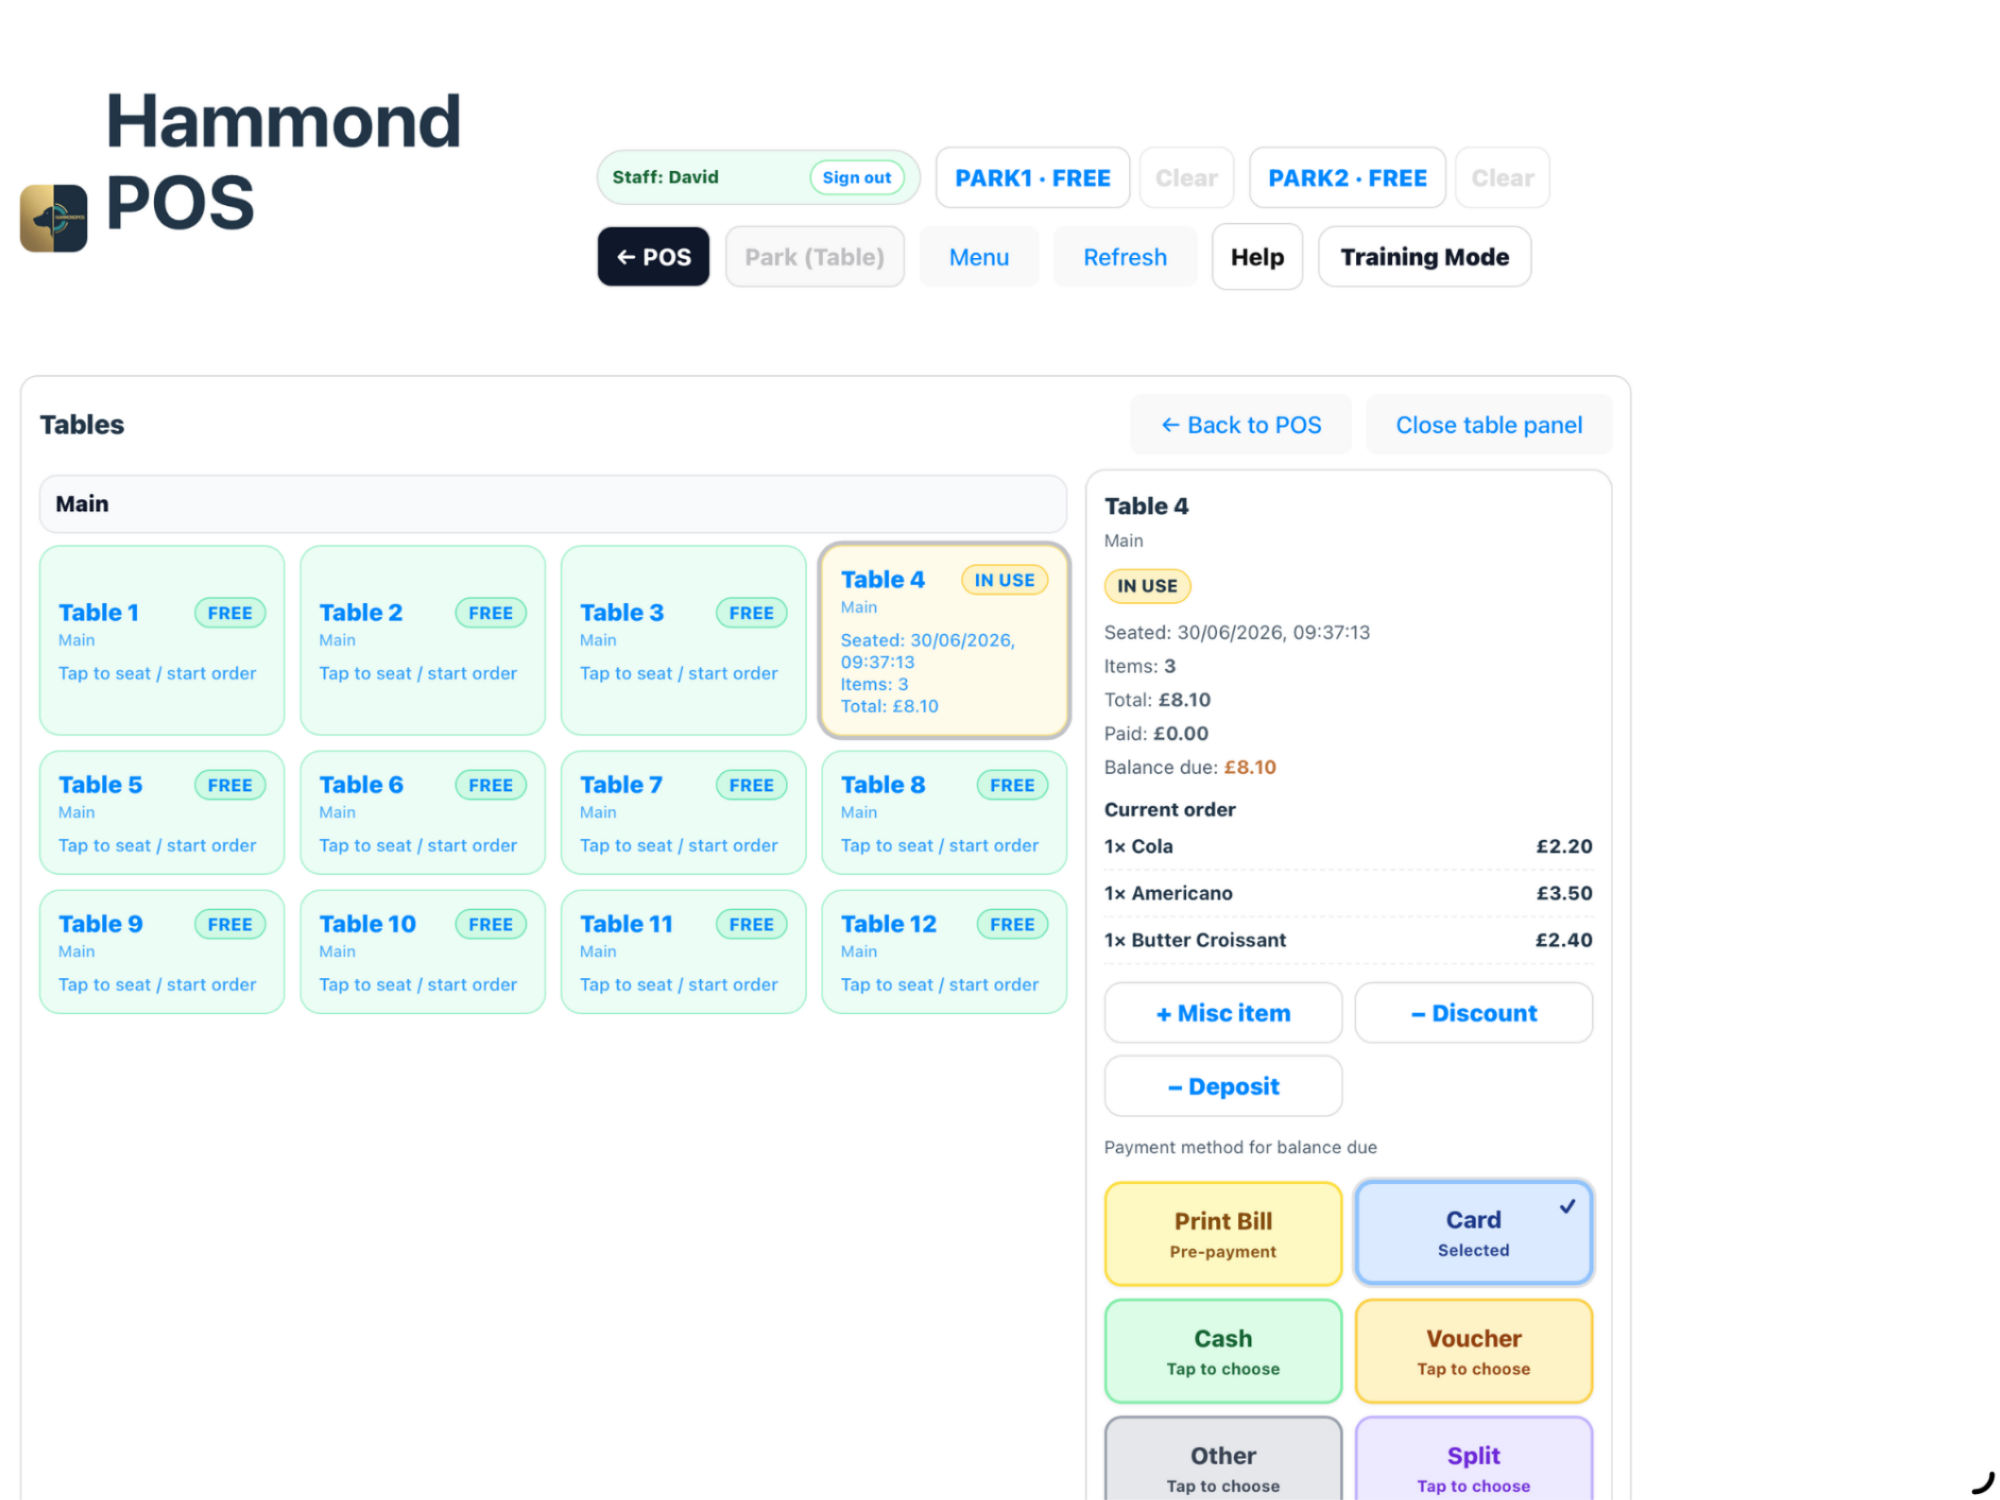
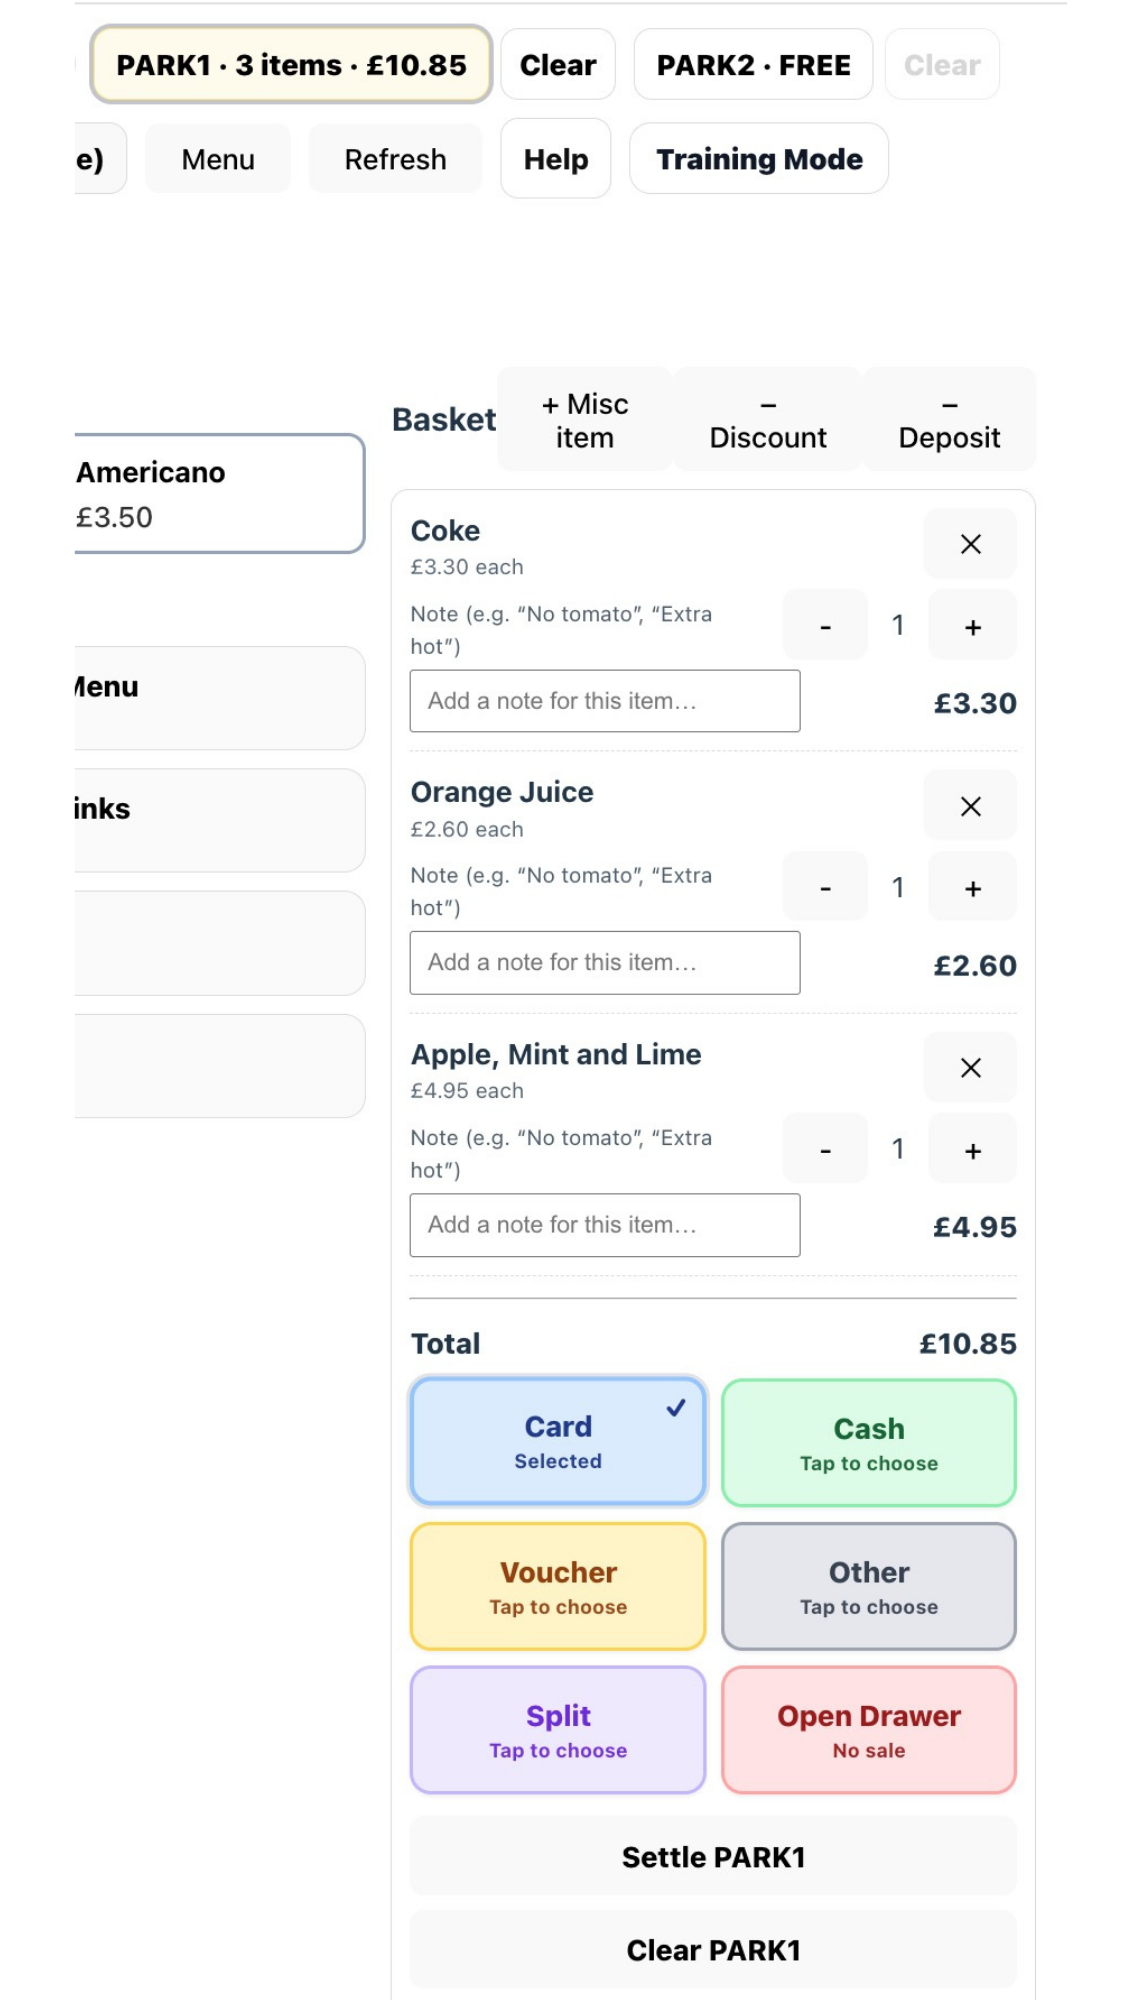
Parked orders and table orders let staff hold an order open, resume it later, print a bill before payment, and complete the balance when the customer is ready.
Step-by-step
Start or select a tableOpen the tables view and choose the table being served.
Build the orderAdd items exactly as you would on the standard POS screen.
Send or park the orderKitchen and drinks tickets can print for new items where configured.
Reopen the table or parked orderUse the table list or parked order list to continue service.
Print Bill if neededUse Print Bill to give the customer a pre-payment bill without closing the order.
Take final paymentOpen payment and settle the balance in full or via split payment.
Receipts & Kitchen Tickets
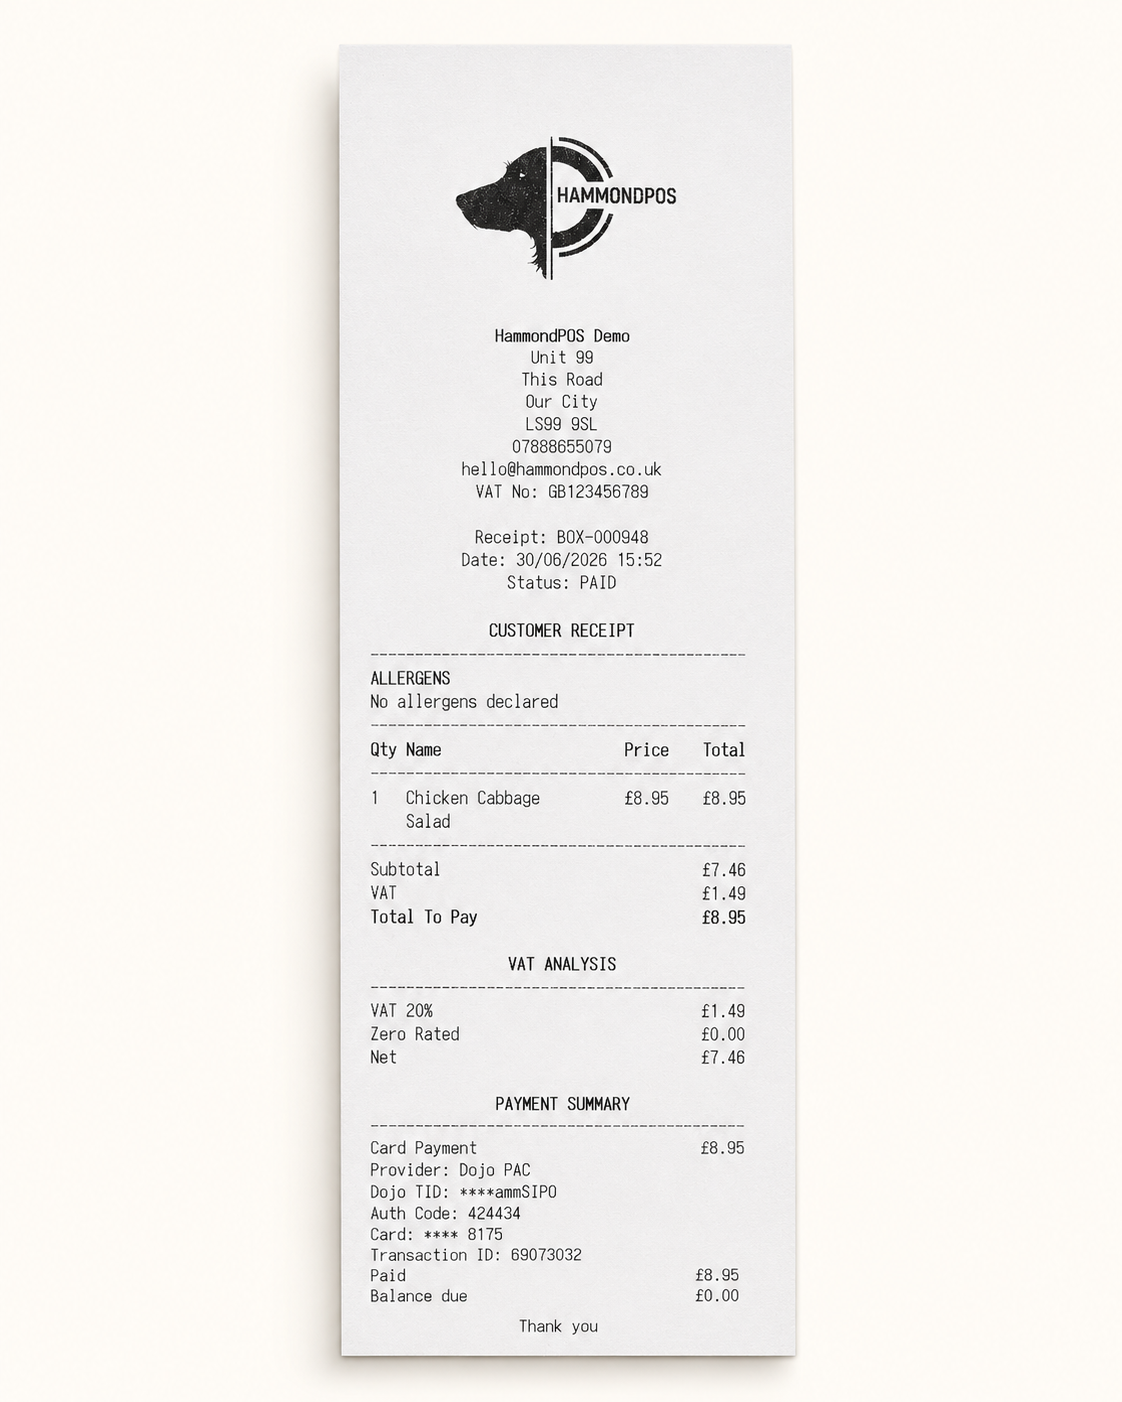
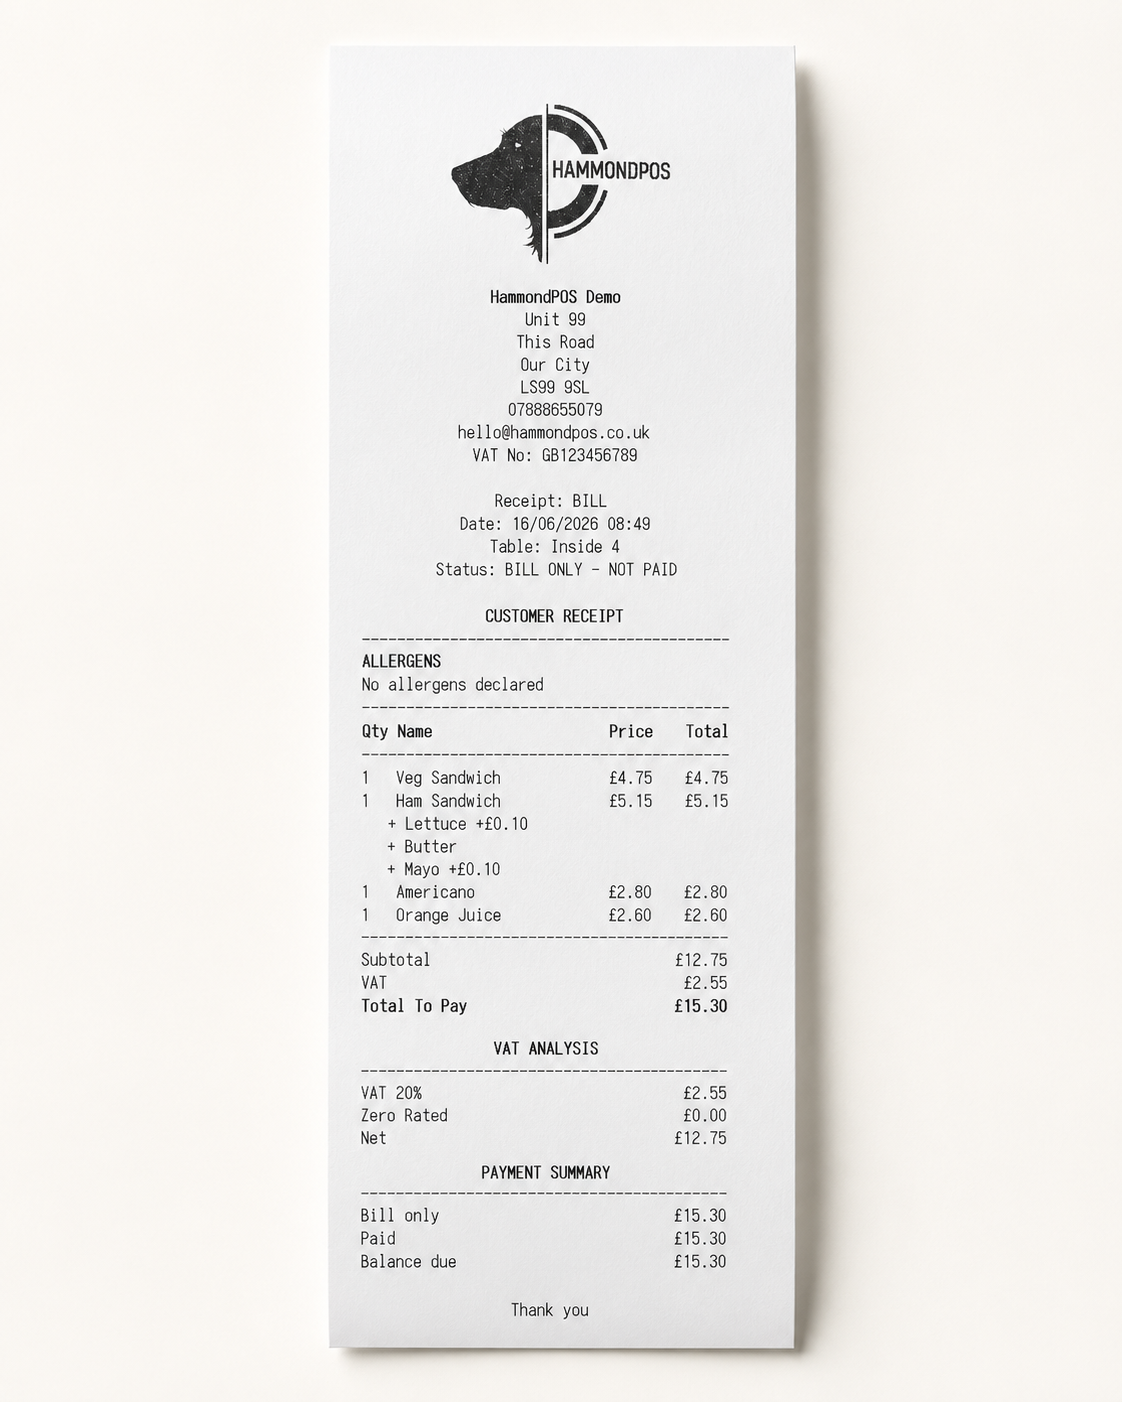
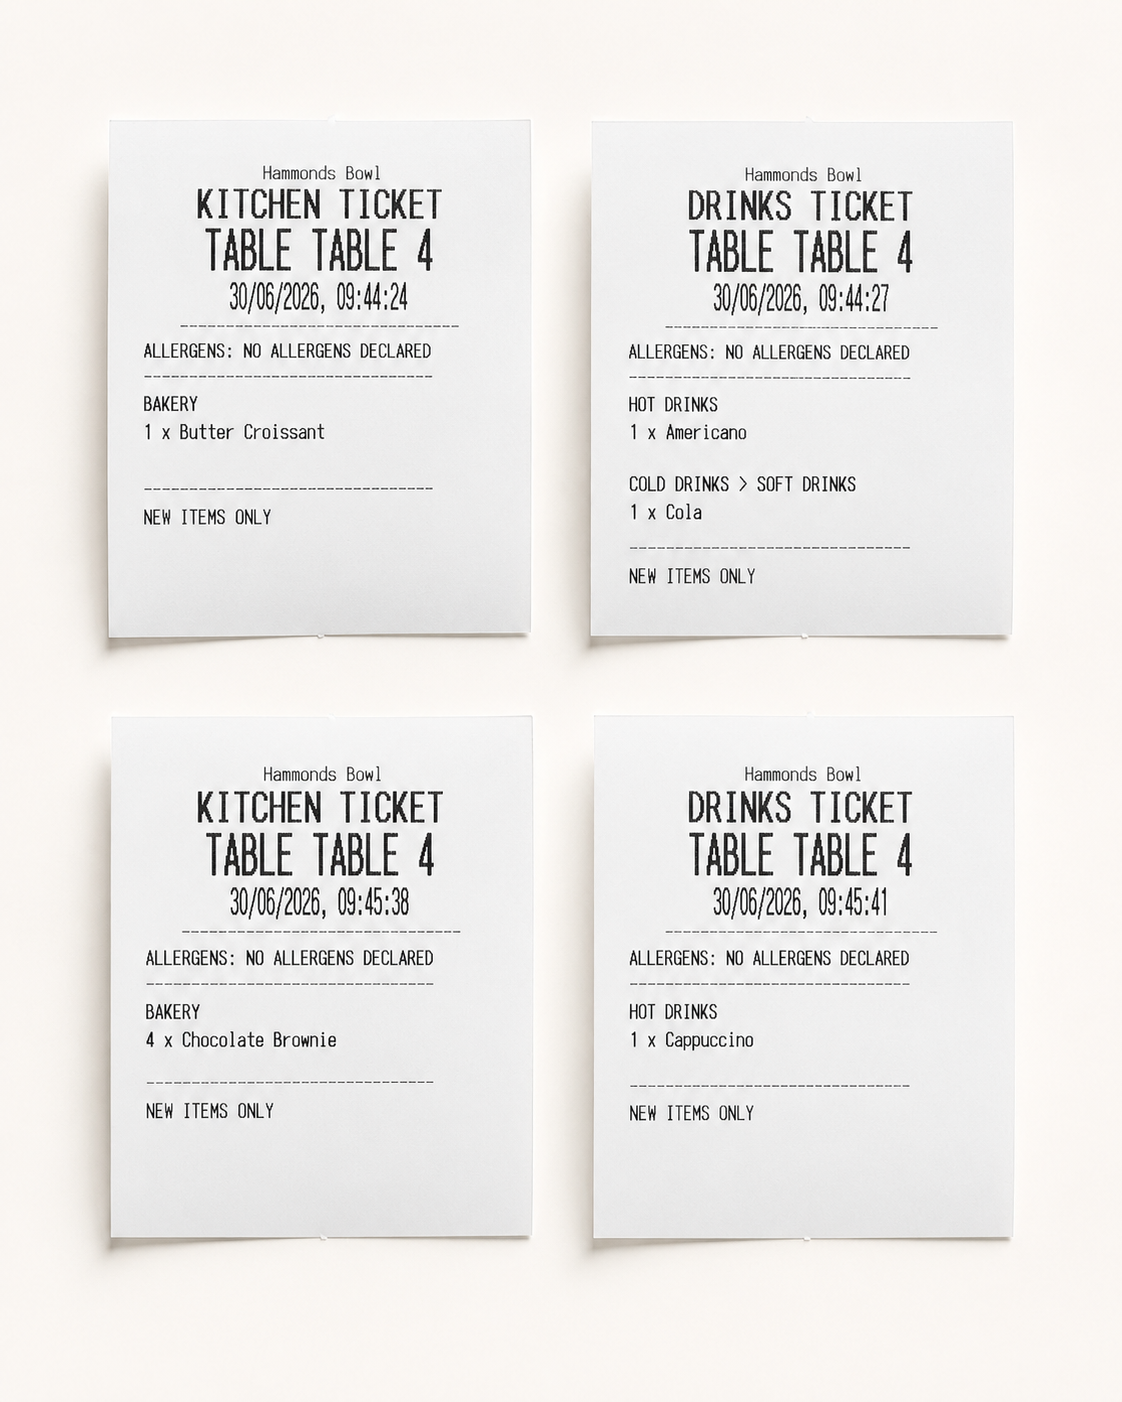
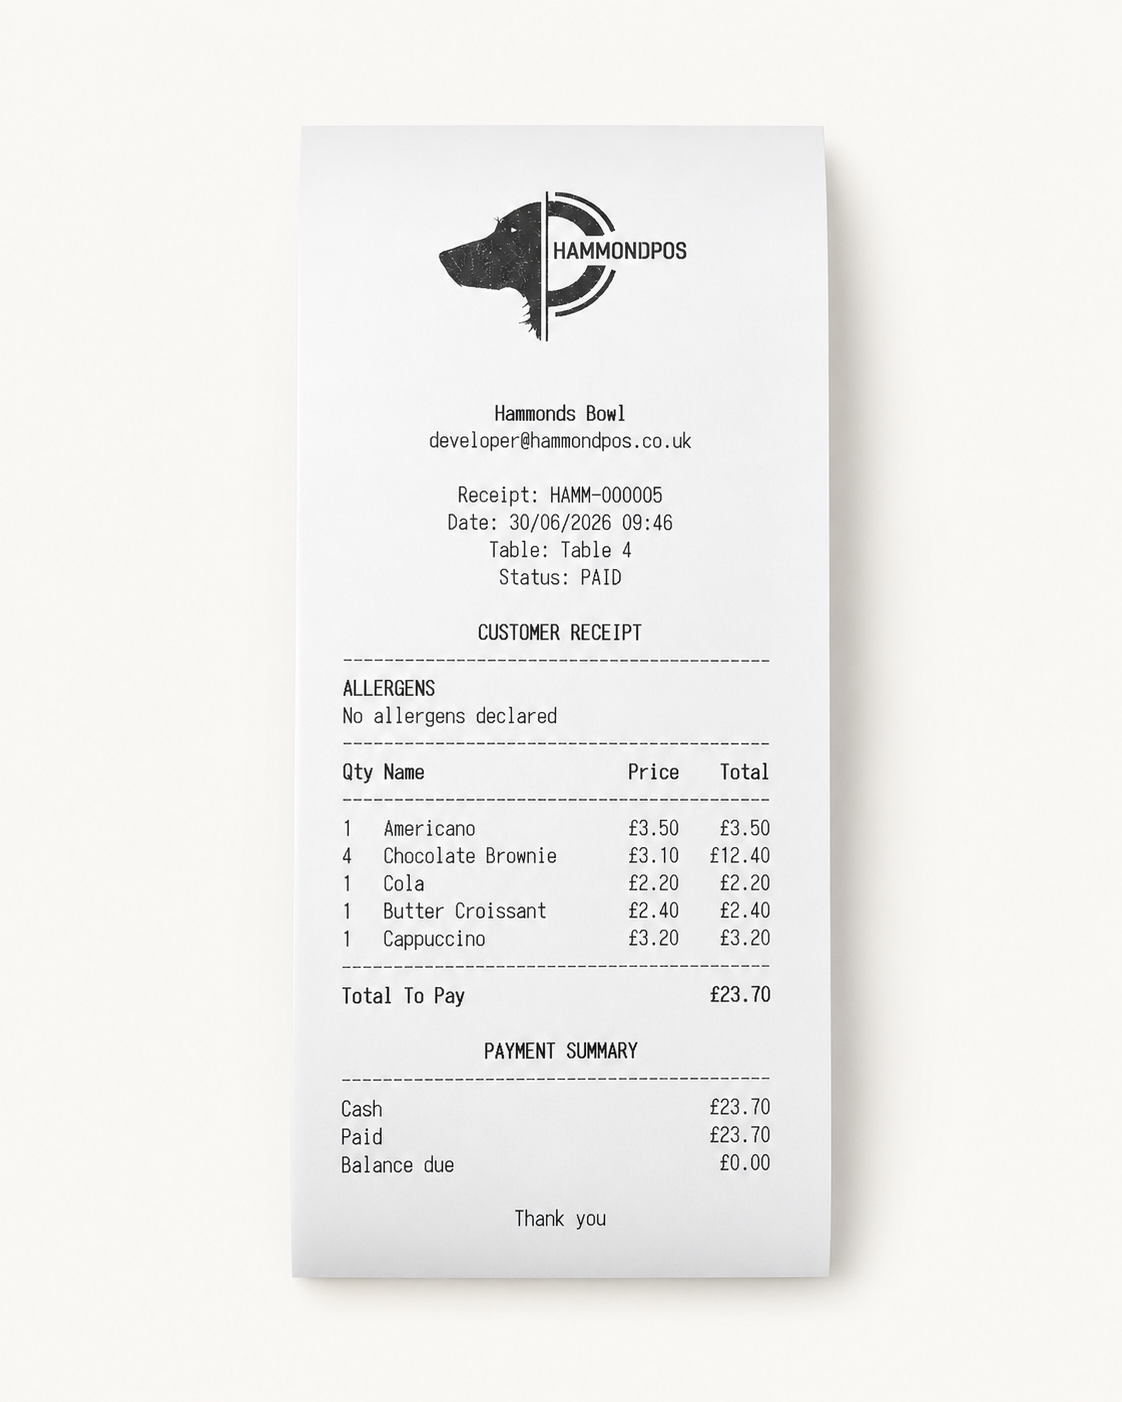
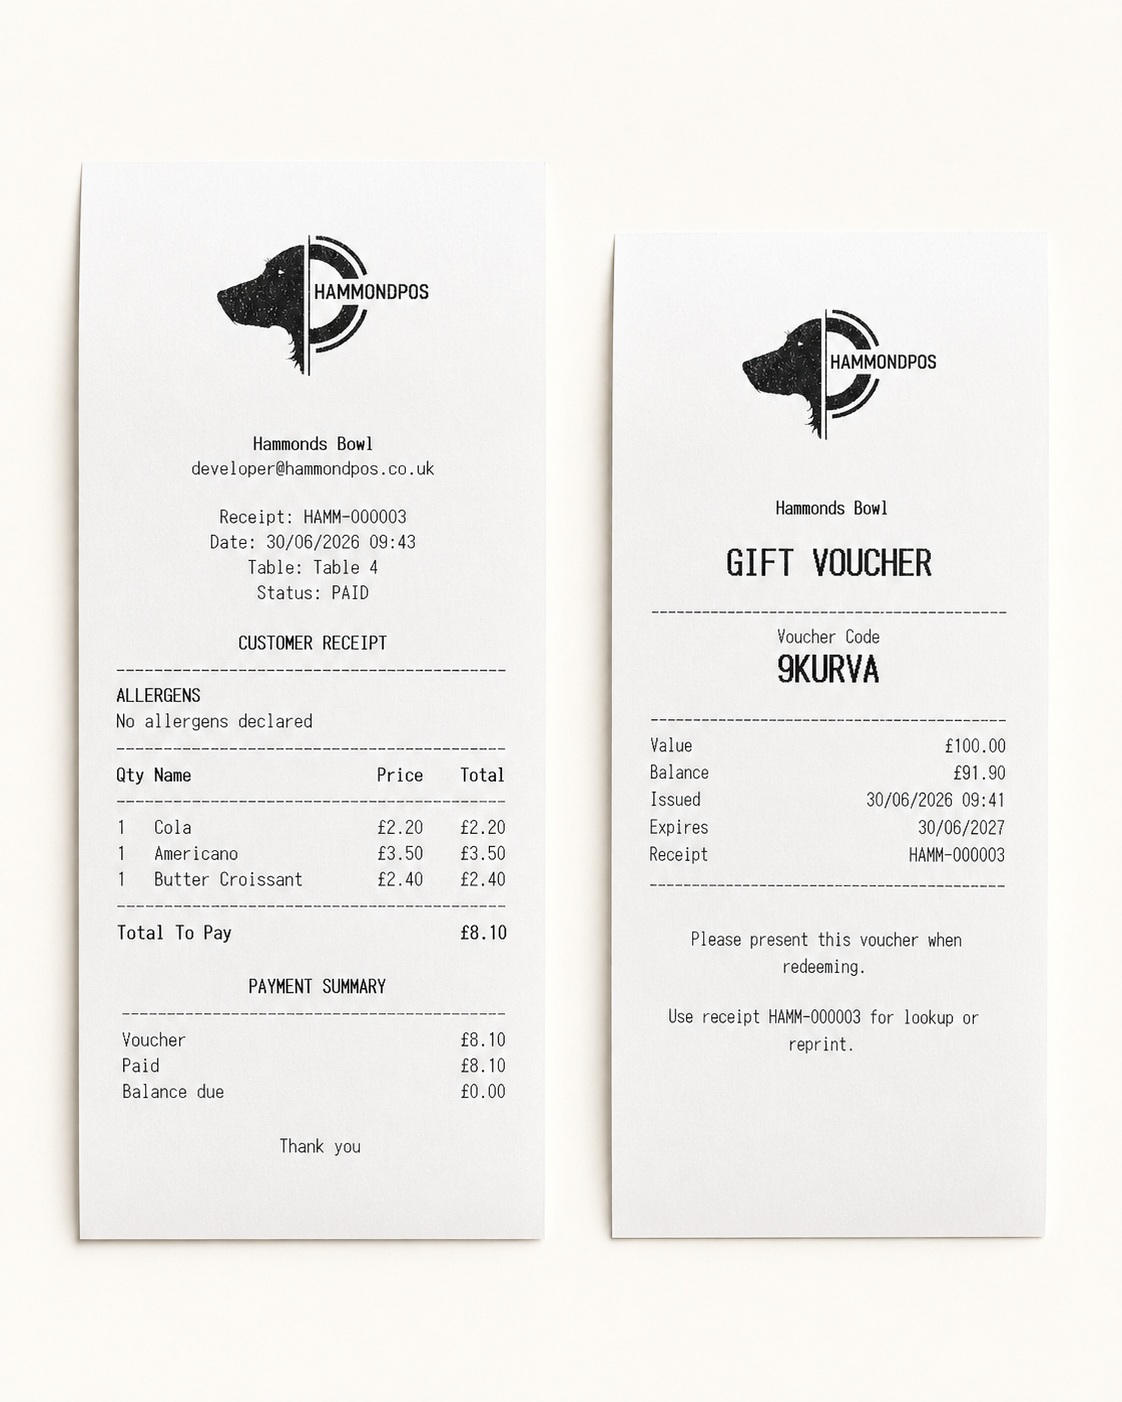
Customer receipts, bill-only receipts, gift voucher receipts and prep tickets all serve different purposes. Kitchen, drinks and pass tickets can be routed separately and printed in multiple copies where configured.
Step-by-step
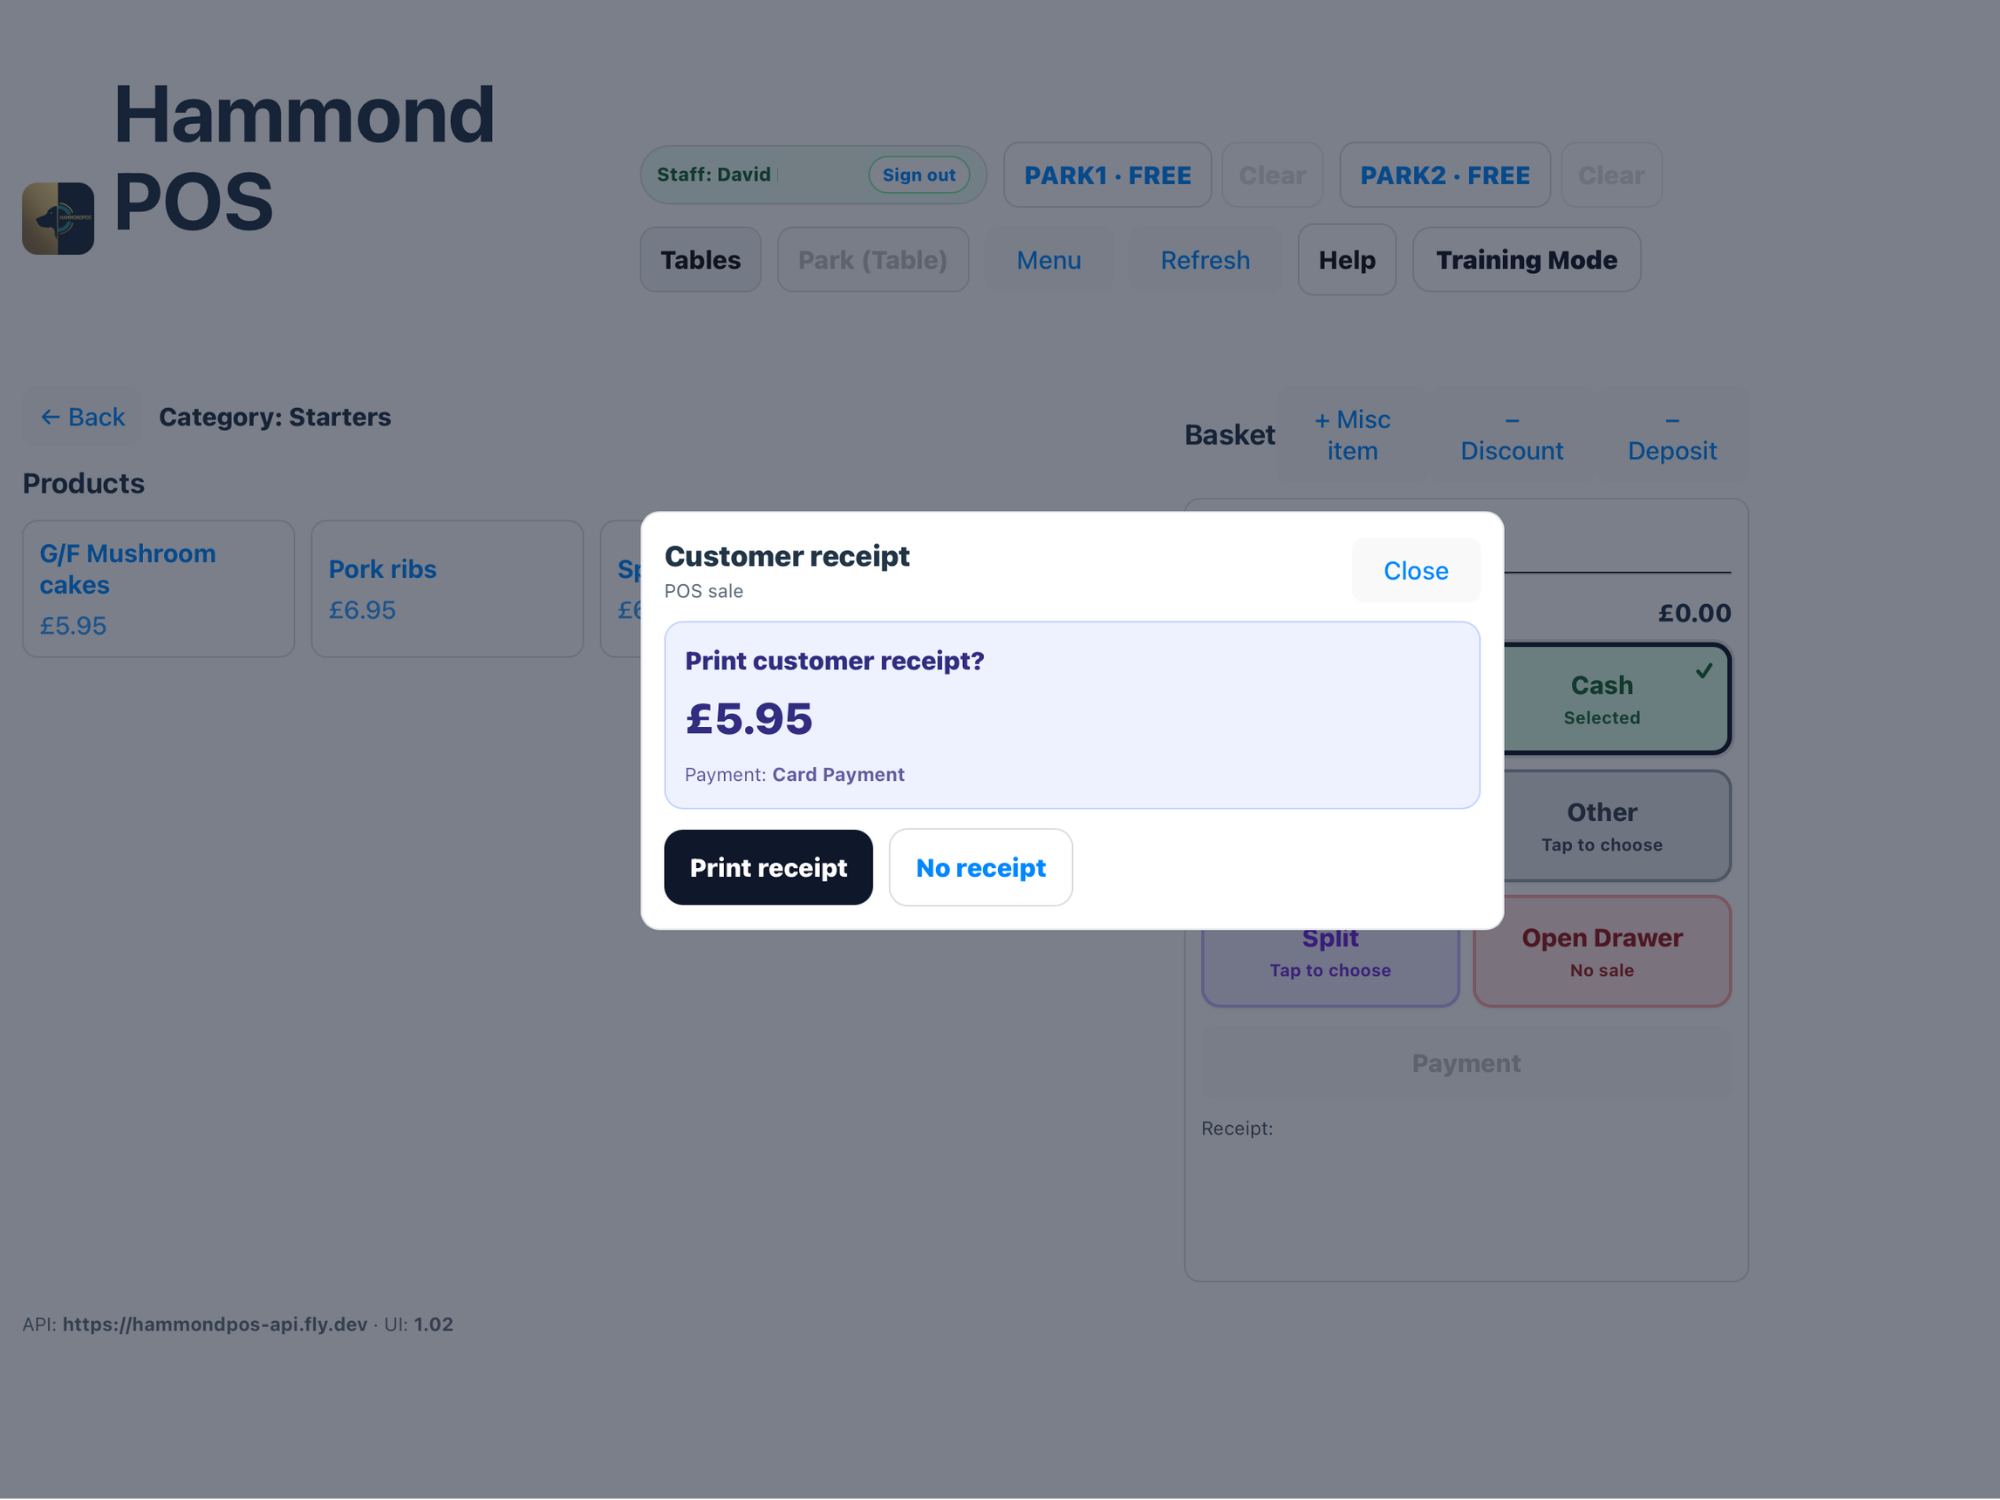
Customer receiptPrinted after payment, showing items, totals, VAT where relevant and payment summary.
Bill-only receiptPrinted before payment for table service and clearly marked as not paid.
Prep ticketsKitchen, drinks and pass tickets show production information rather than customer payment information.
Multiple copiesBusiness Settings can control how many prep tickets print per station.
Check printer routingConfirm each station is mapped to the correct LAN printer before live service.
Gift Vouchers
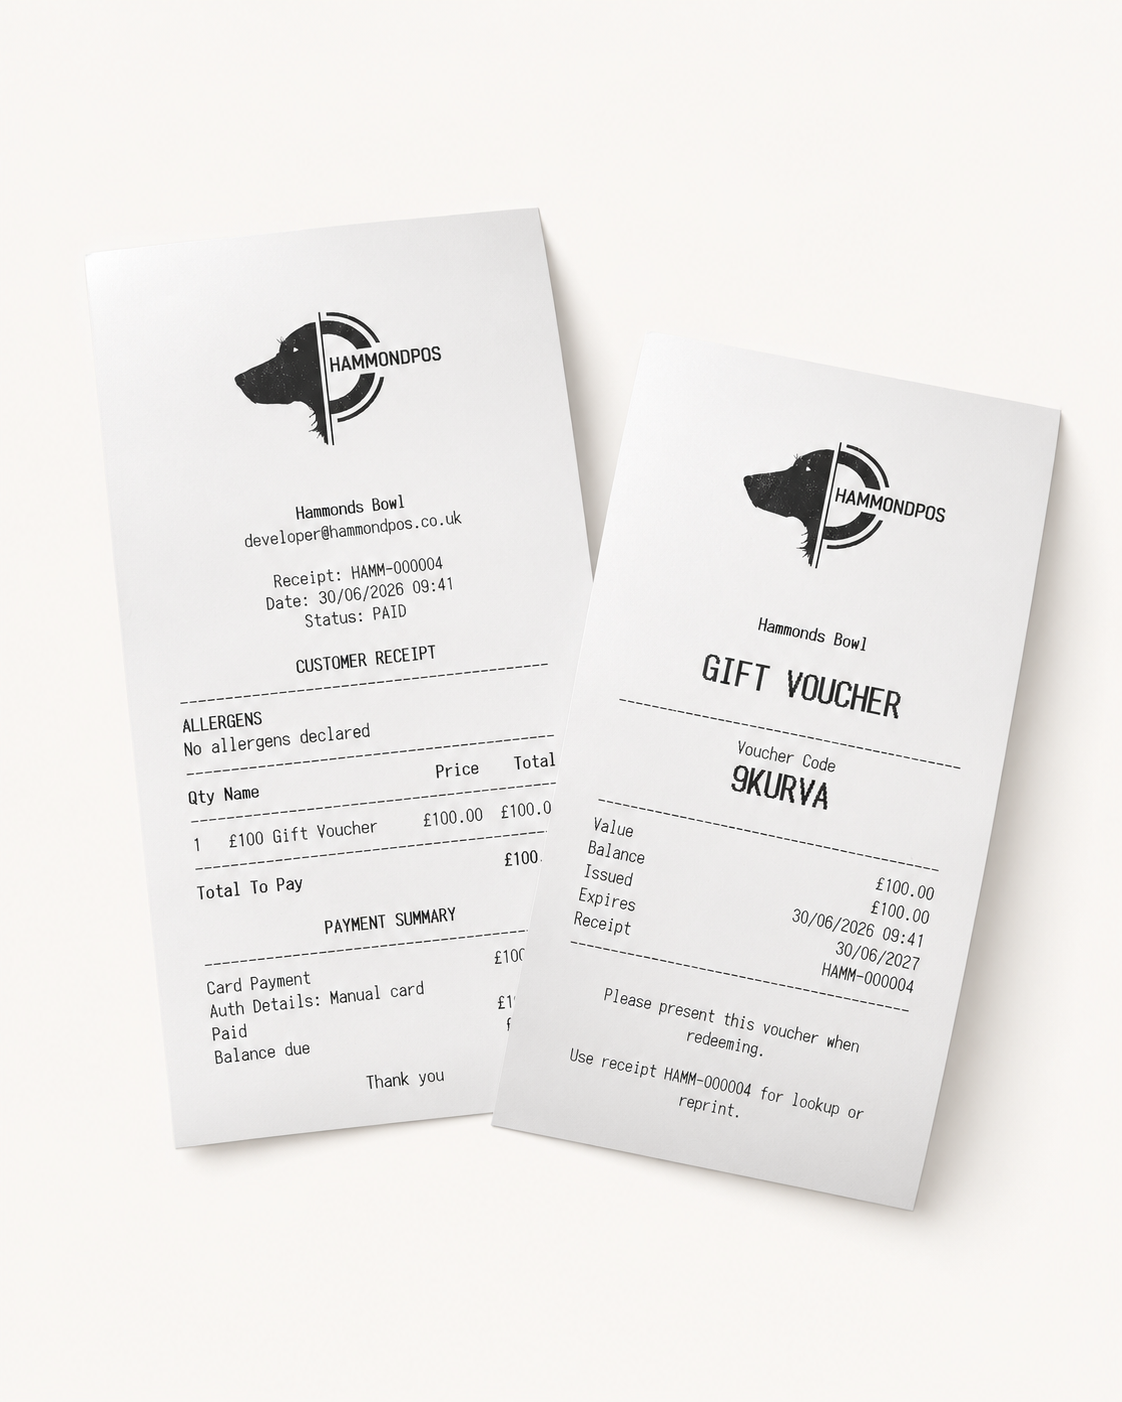
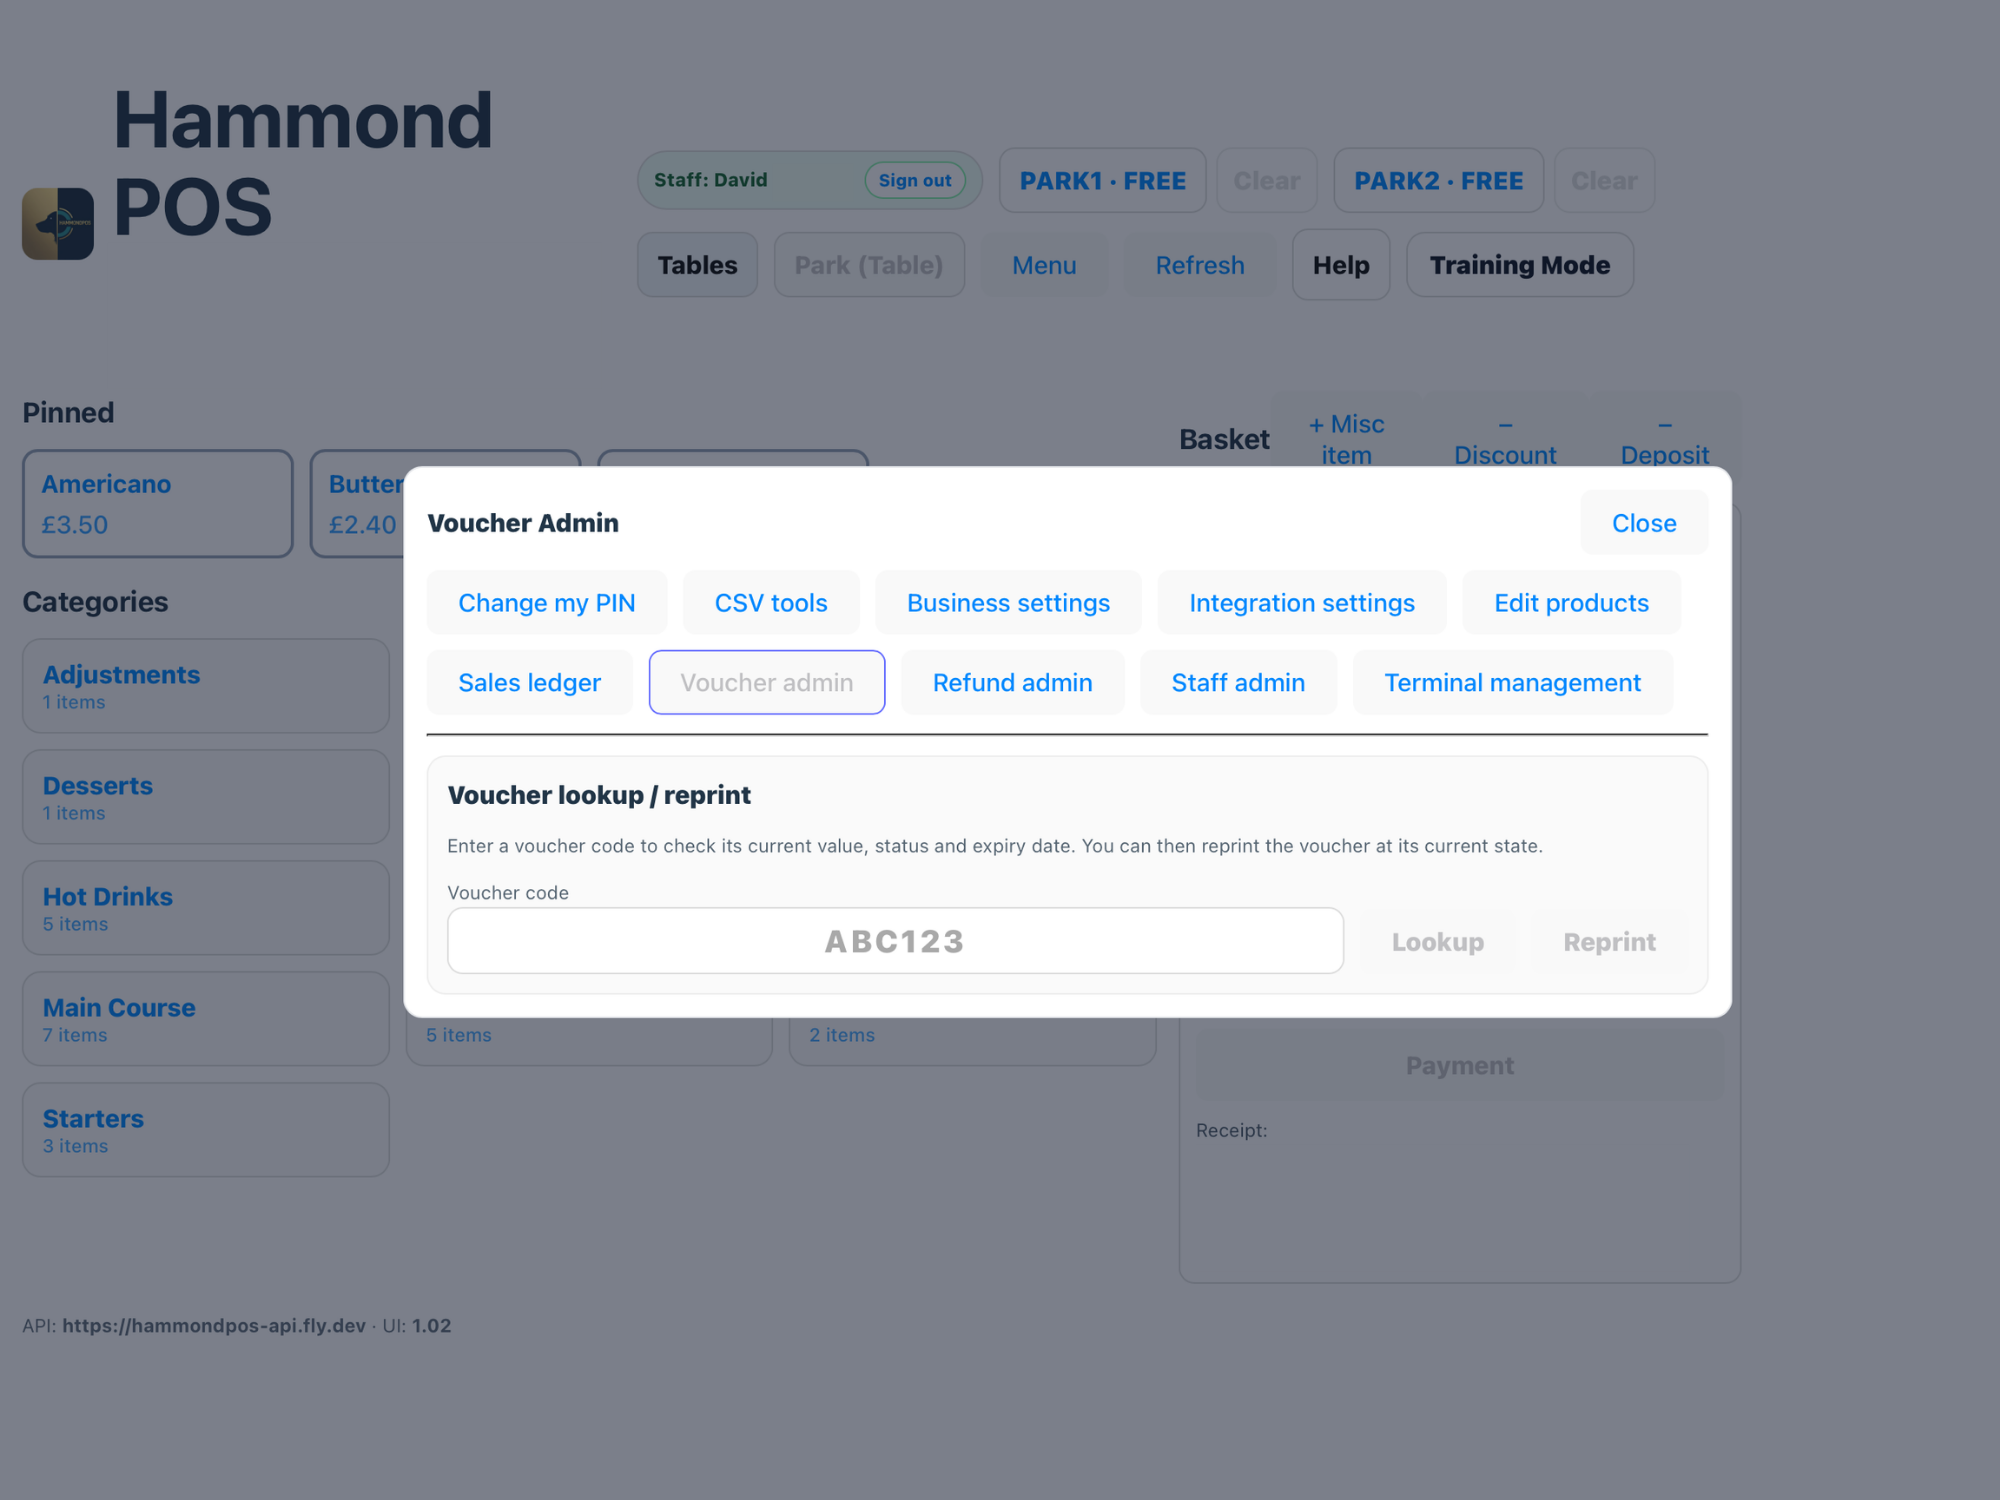
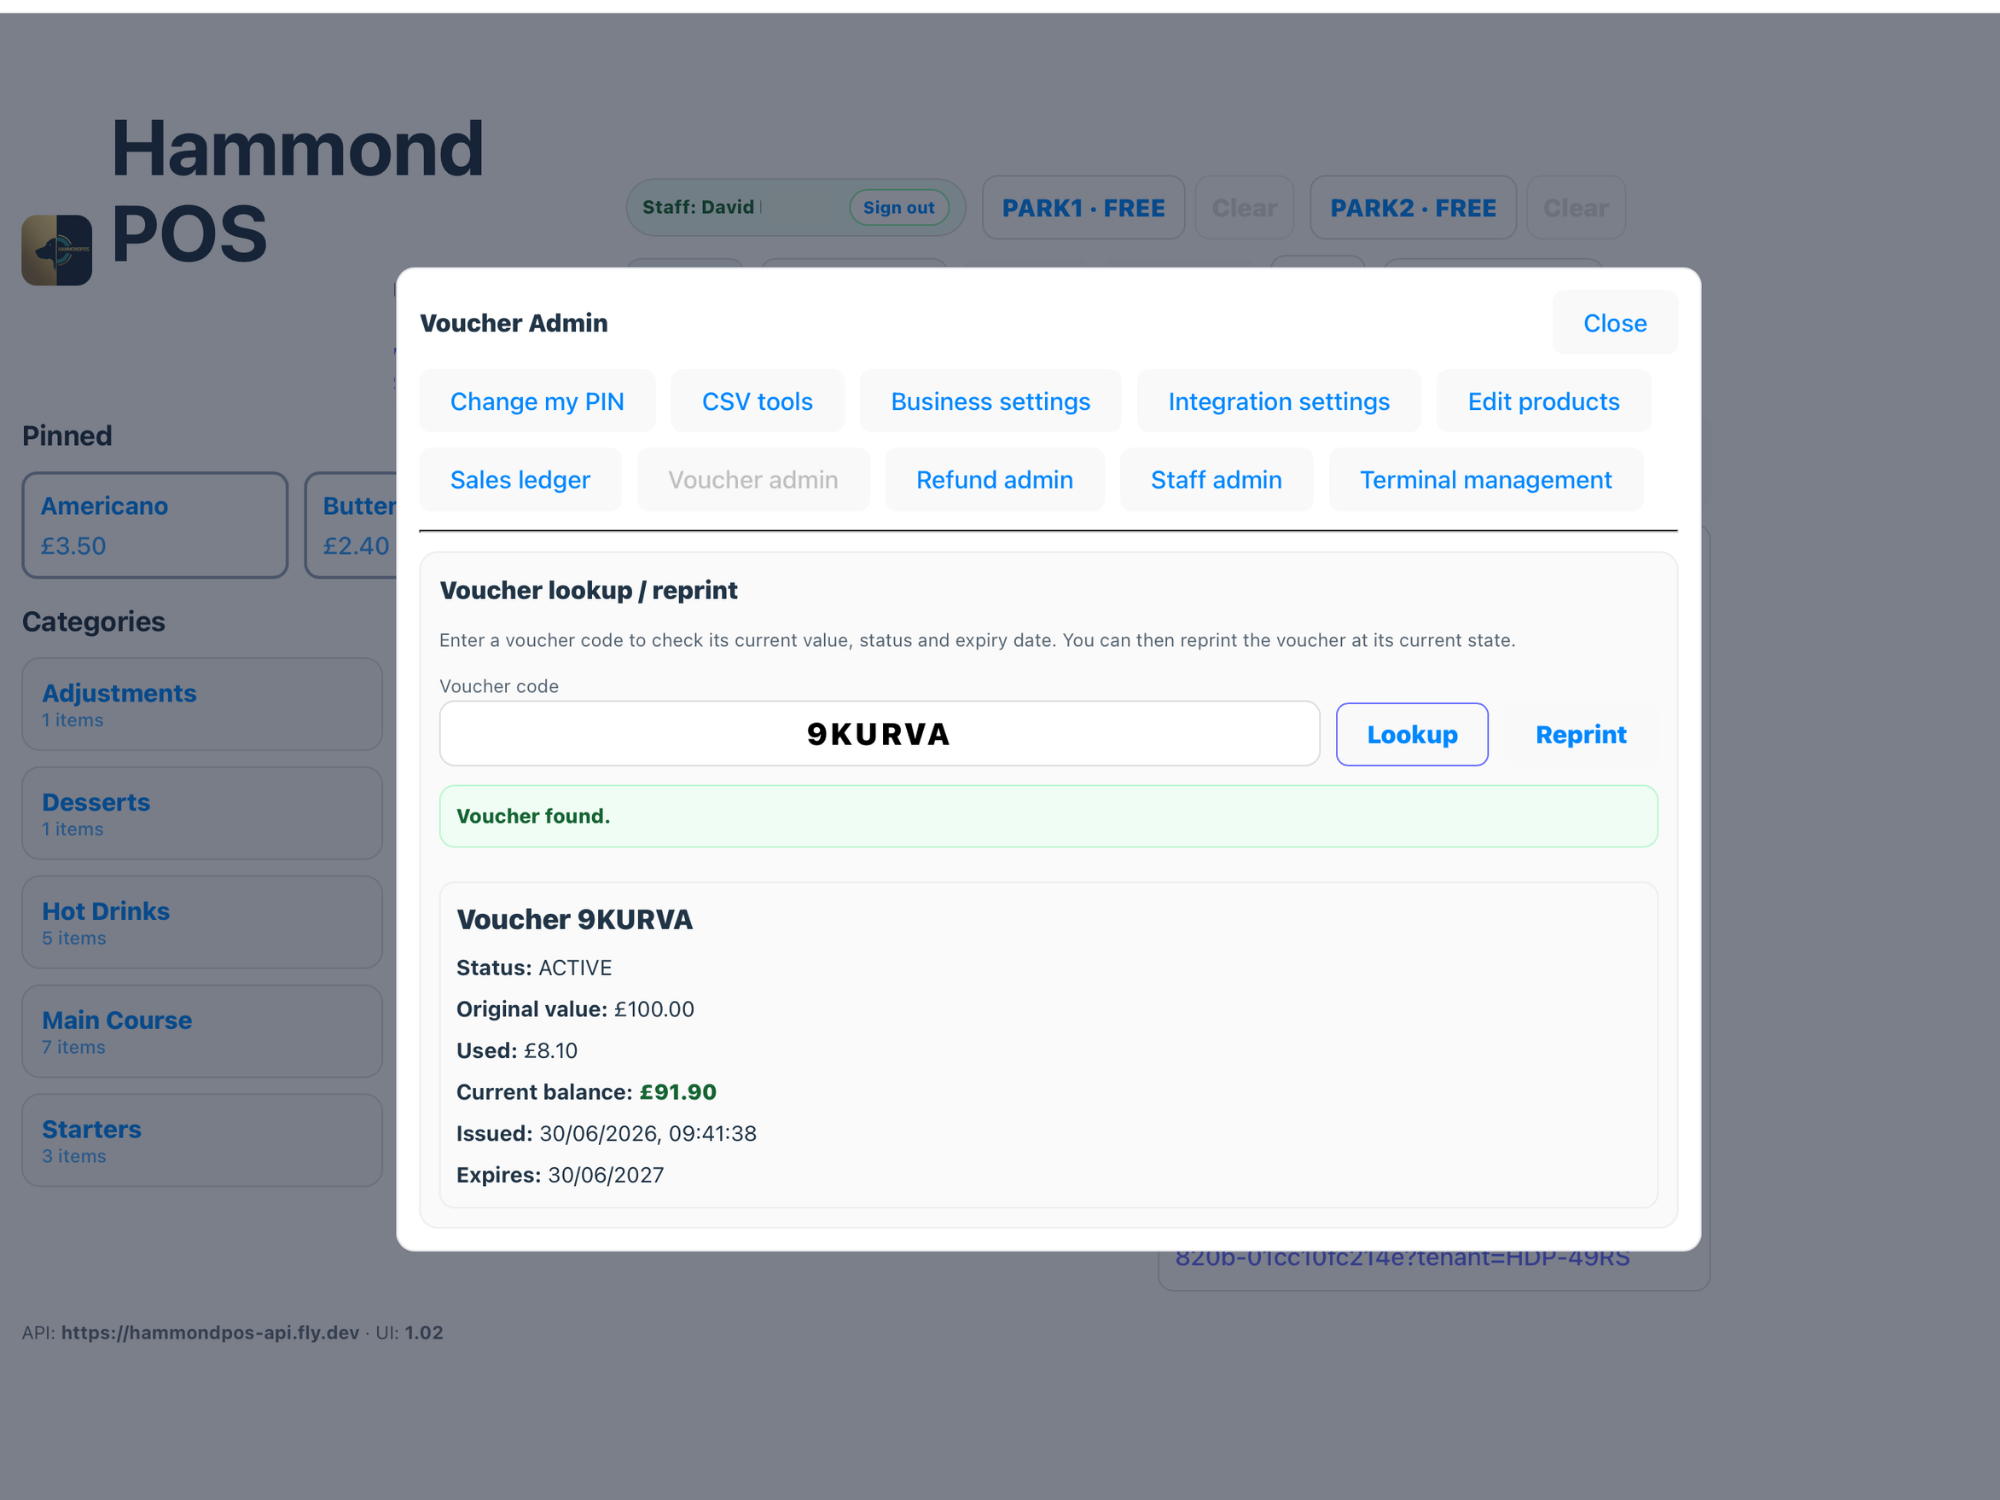
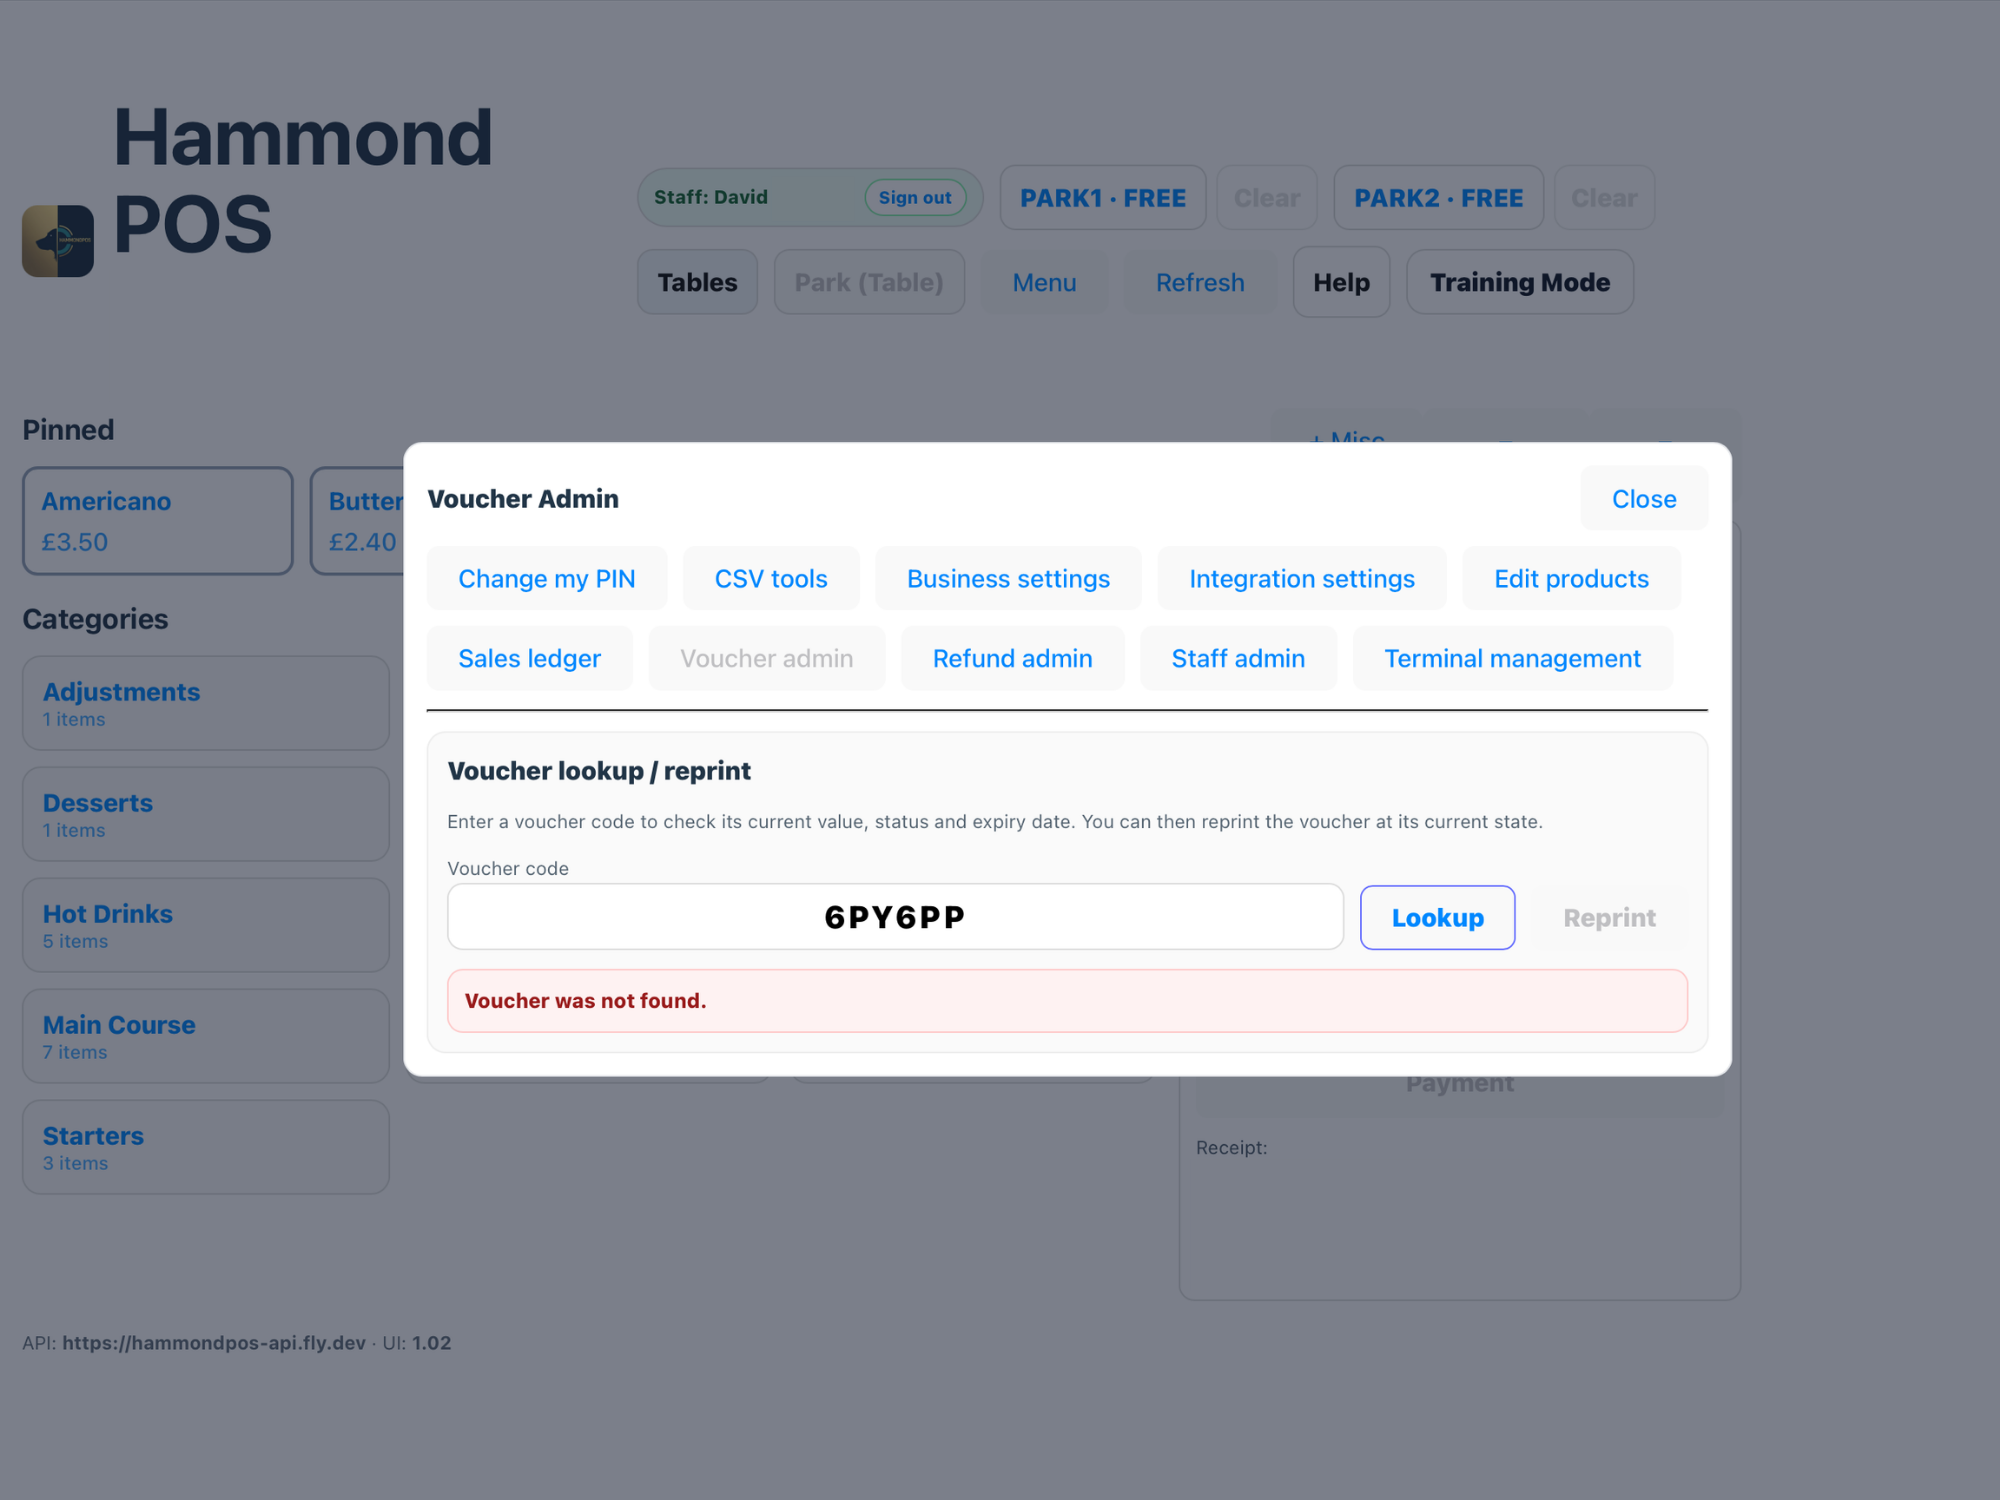
Gift vouchers can be issued, printed, redeemed and checked by code. The printed voucher carries the voucher code, balance, issue date, expiry date and linked receipt for lookup or reprint.
Step-by-step
Issue the voucherAdd the configured gift voucher product or open the voucher issue flow.
Complete paymentTake payment for the voucher as normal.
Print and hand over the voucherGive the customer the voucher printout with the code visible.
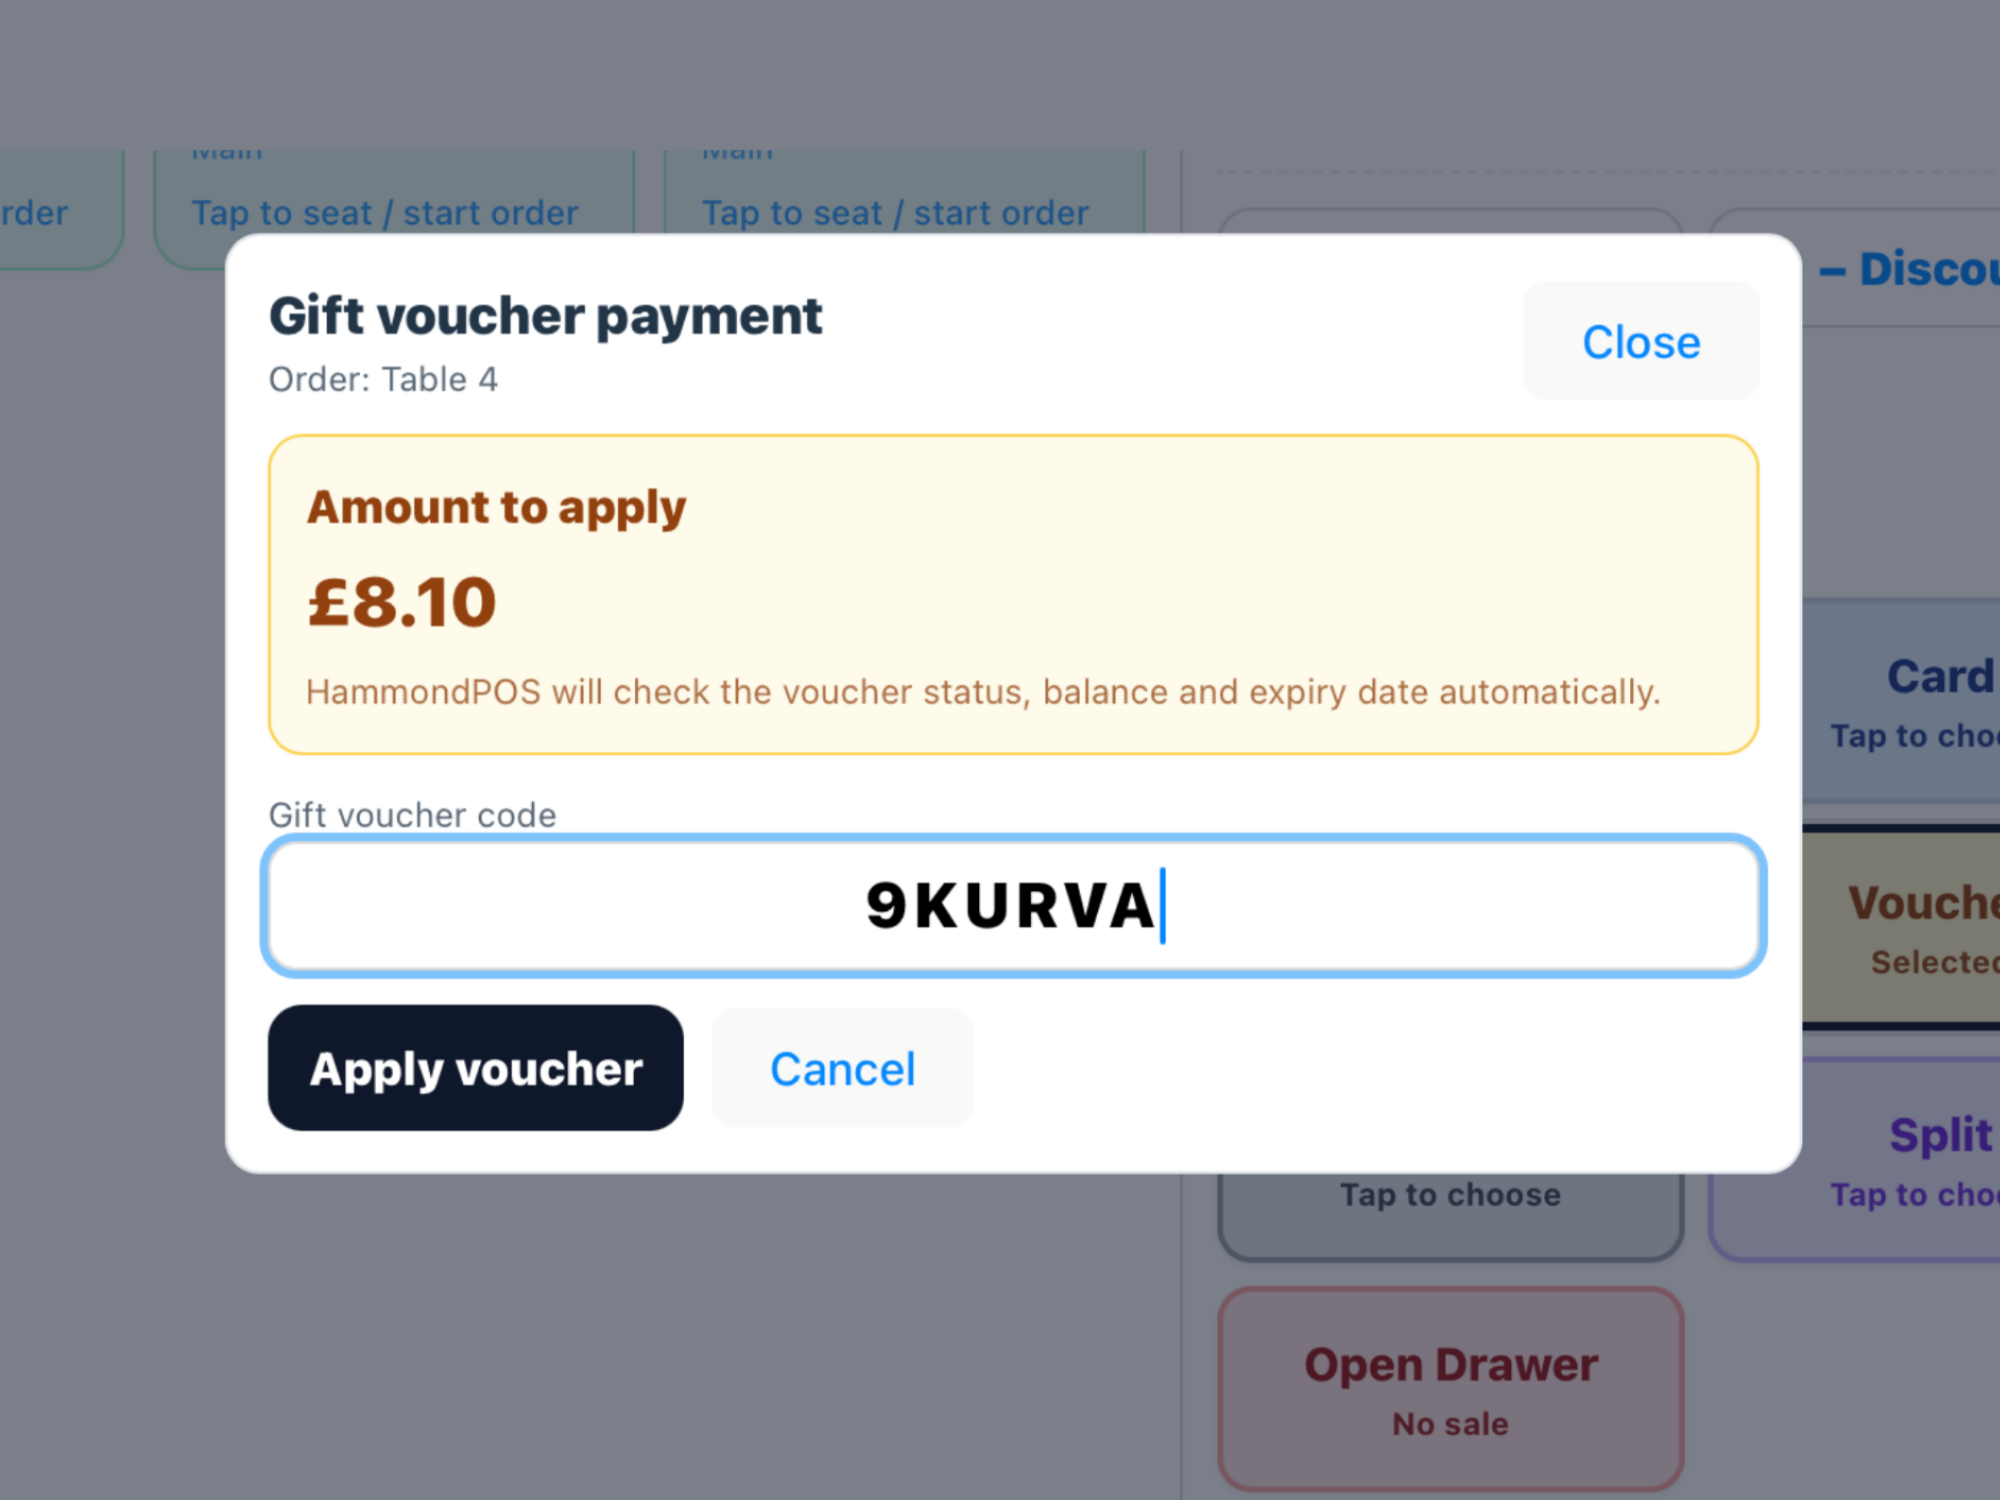
Redeem laterUse the voucher payment option and enter or scan the voucher code.
Check remaining balanceIf the voucher is part-used, confirm the new balance after payment.
Products & Categories
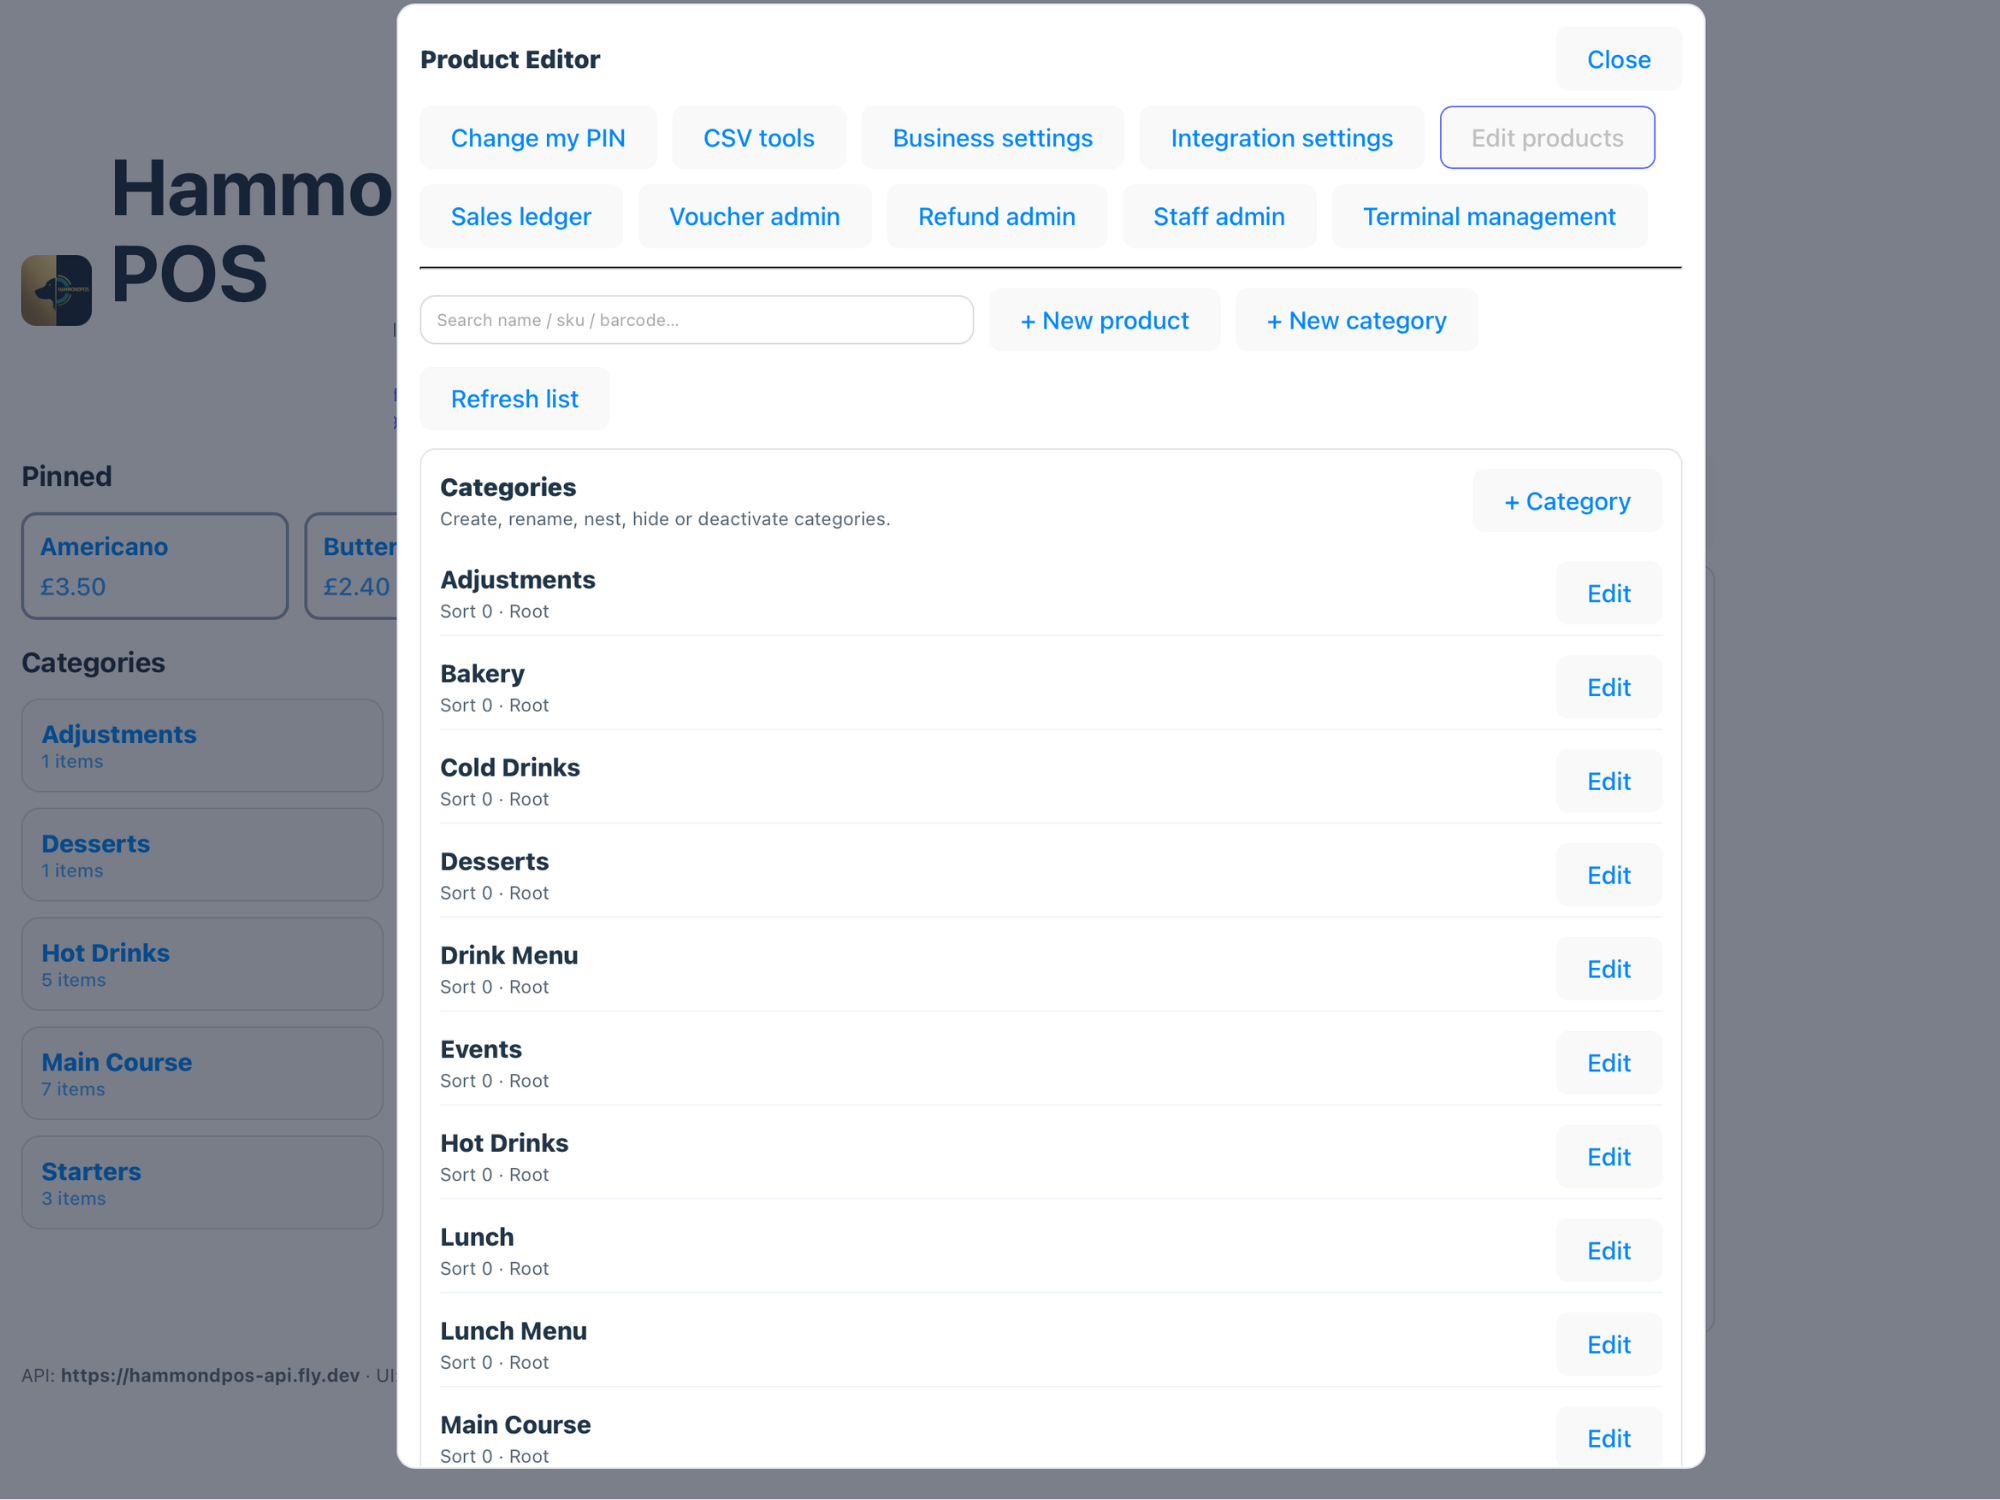
Products and categories control what staff see on the POS. HammondPOS supports nested categories, product editing and modifier assignment so large menus can stay usable in busy service.
Step-by-step
Create parent categoriesUse broad categories such as Drinks, Food, Bakery or Merchandise.
Add child categoriesUse nested categories to reduce tile clutter, such as Drinks > Hot Drinks.
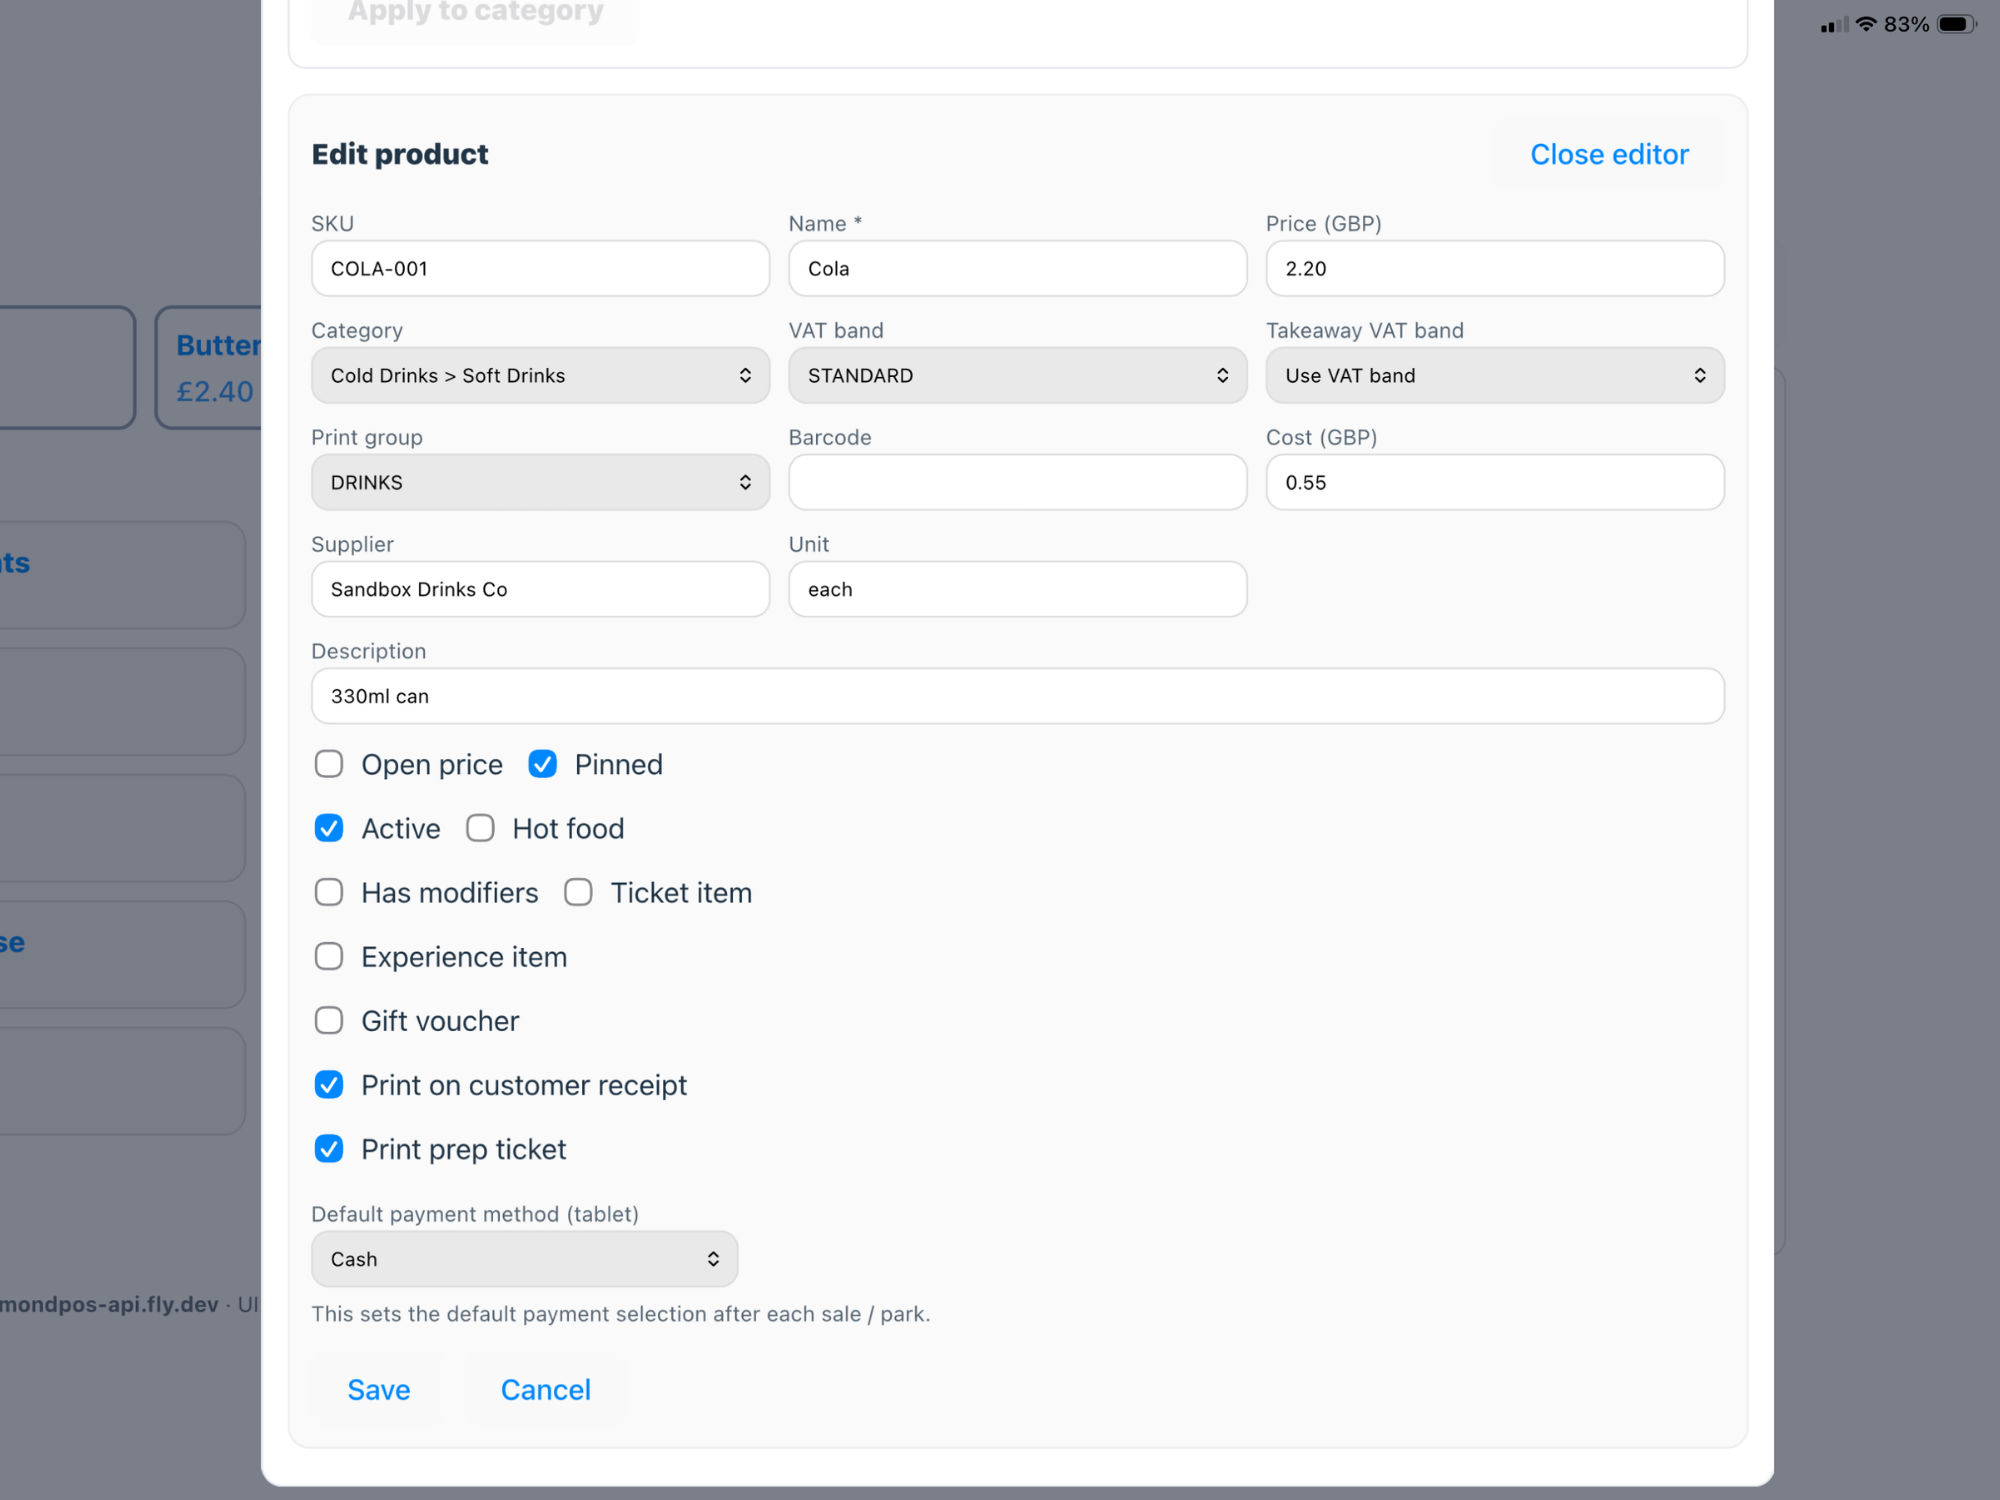
Edit productsSet name, price, VAT band, active status and print routing.
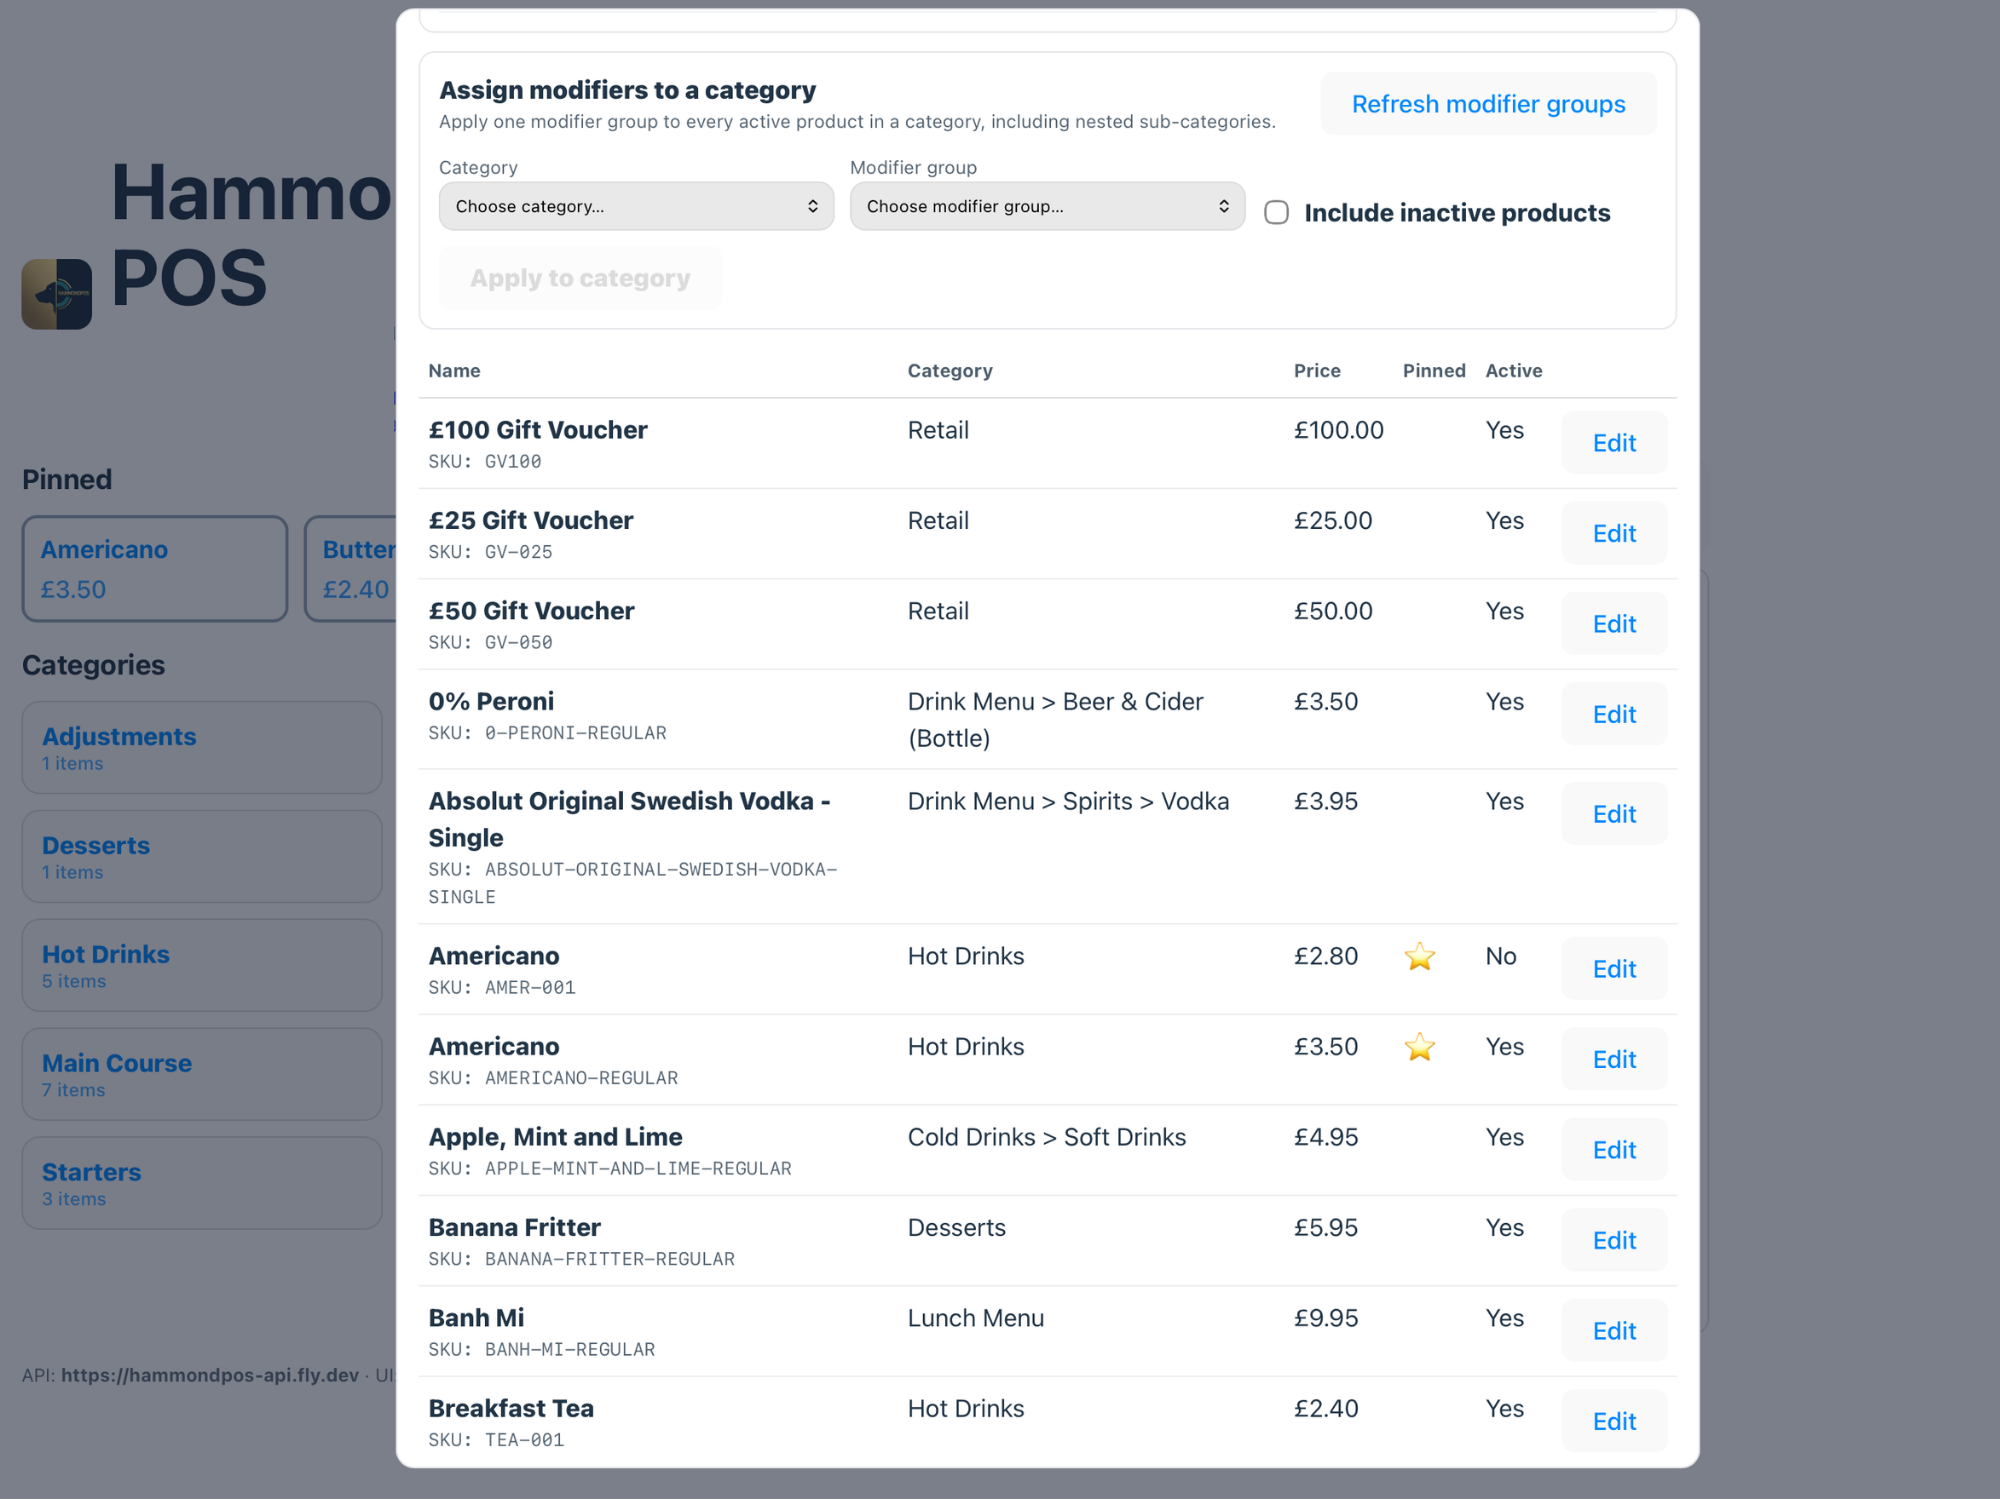
Assign modifiersAttach modifier groups to products or categories where options are needed.
Test on POSCheck that the product appears in the right category and prints to the right station.
Staff & Security
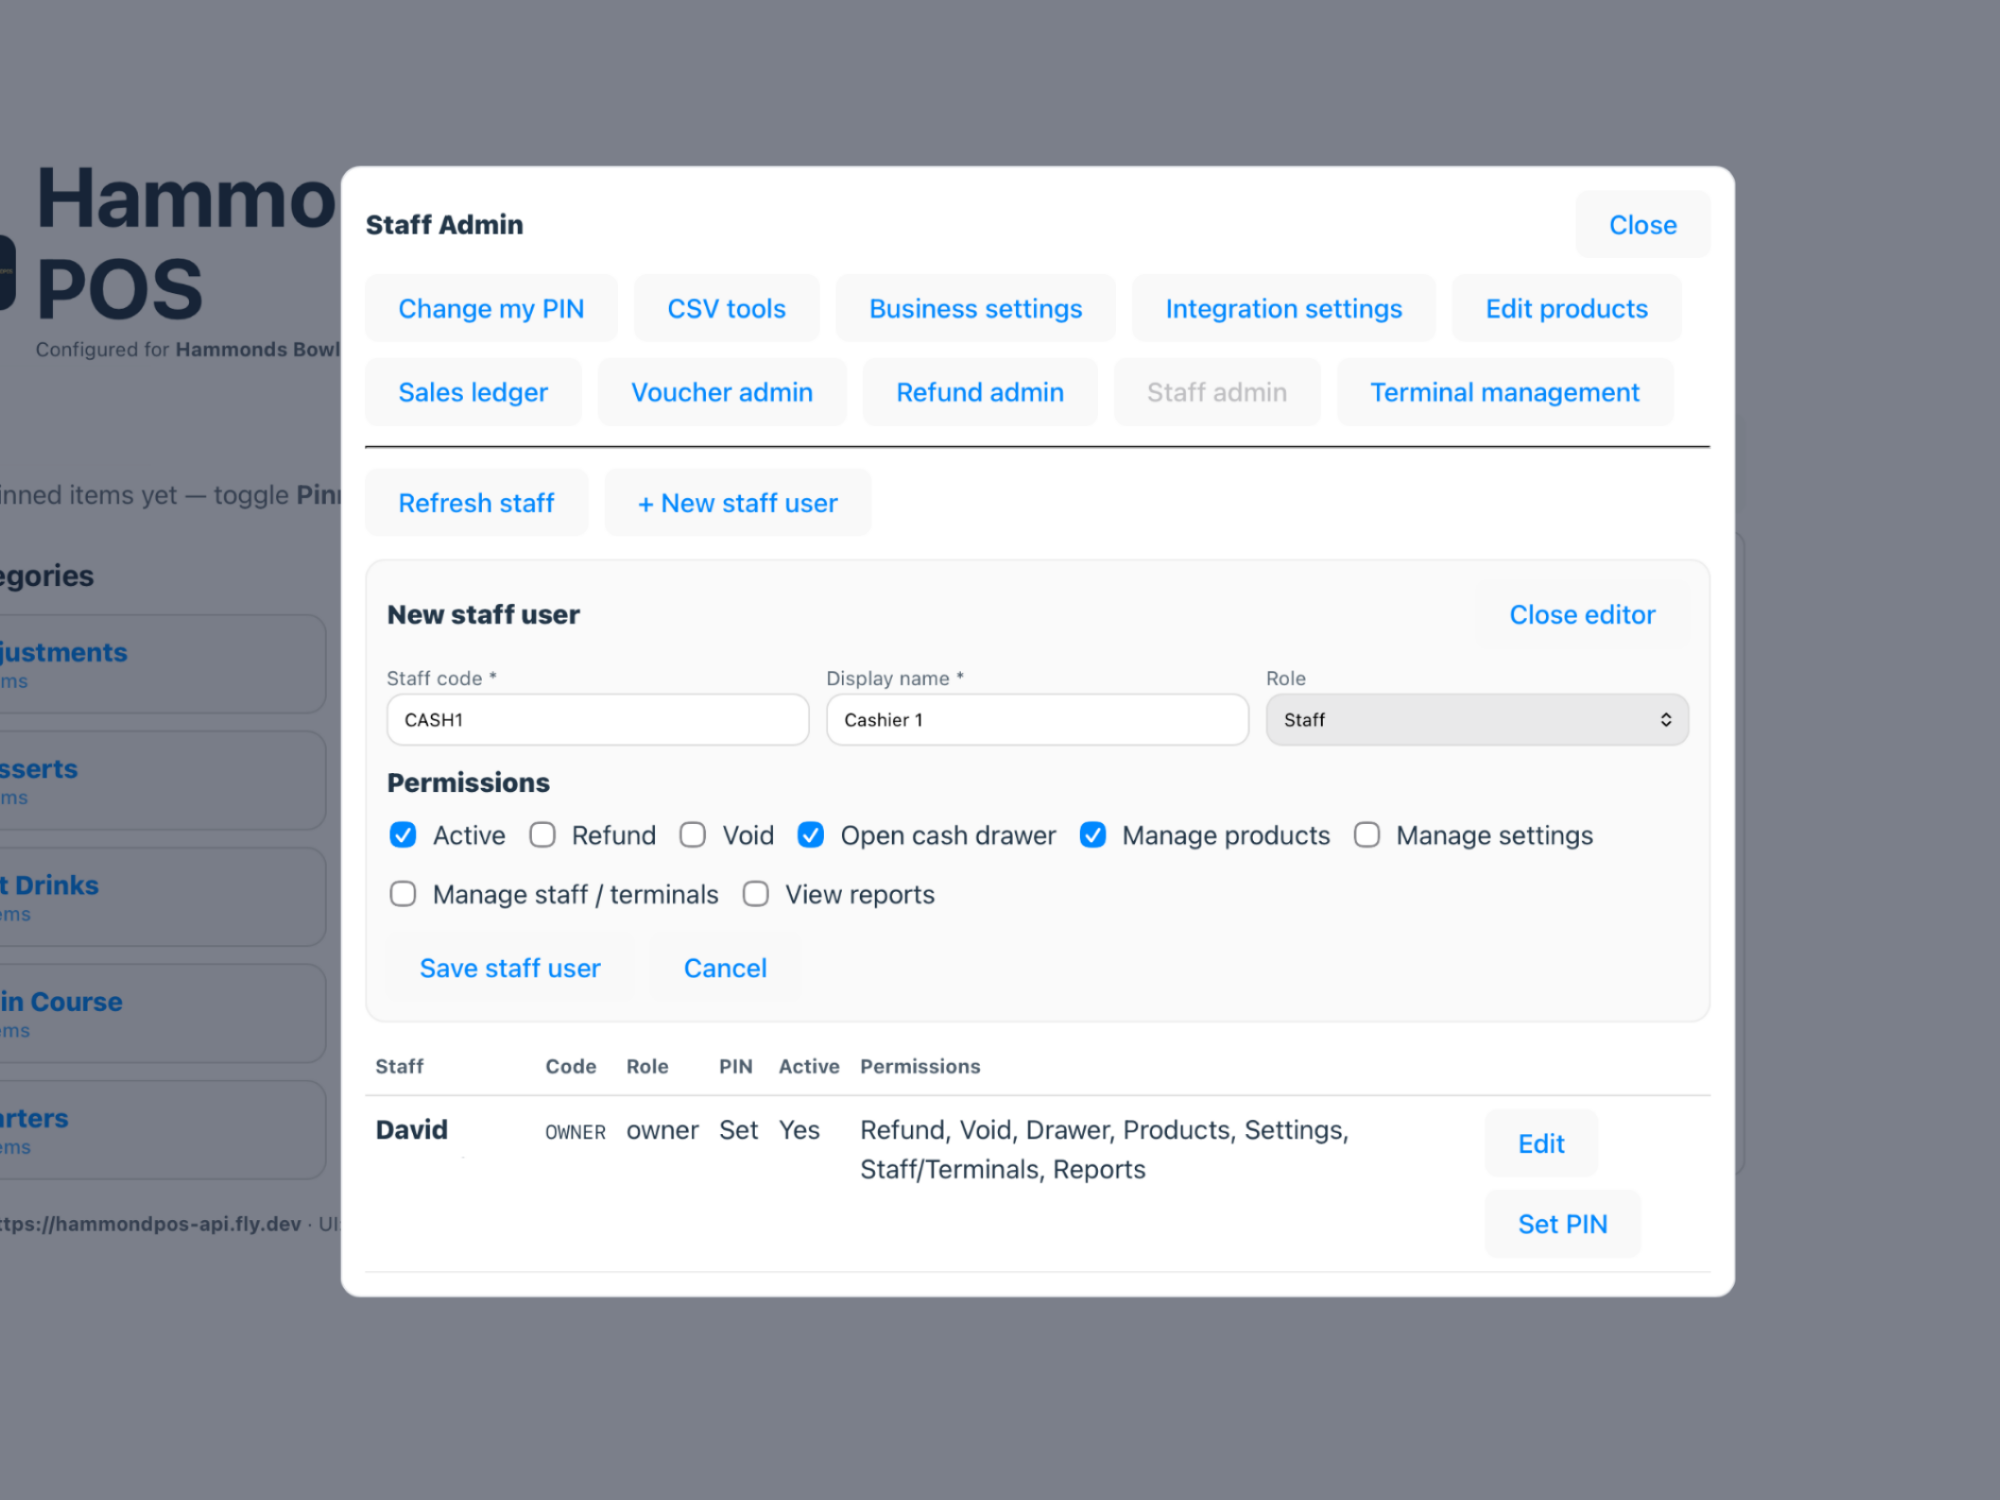
Staff management controls who can sign in and which actions they can perform. Owner and admin roles should be used carefully because they can change settings, products, terminals and sensitive actions.
Step-by-step
Open Staff adminUse the management menu while signed in as an authorised user.
Add or edit staffCreate staff names, roles and PINs.
Set permissionsOnly give refund, settings, products or staff-management permissions to users who need them.
Change PINs securelyUse the PIN change screen and avoid shared or obvious PINs.
Deactivate old usersRemove access for staff who leave or no longer need POS access.
Terminal Management
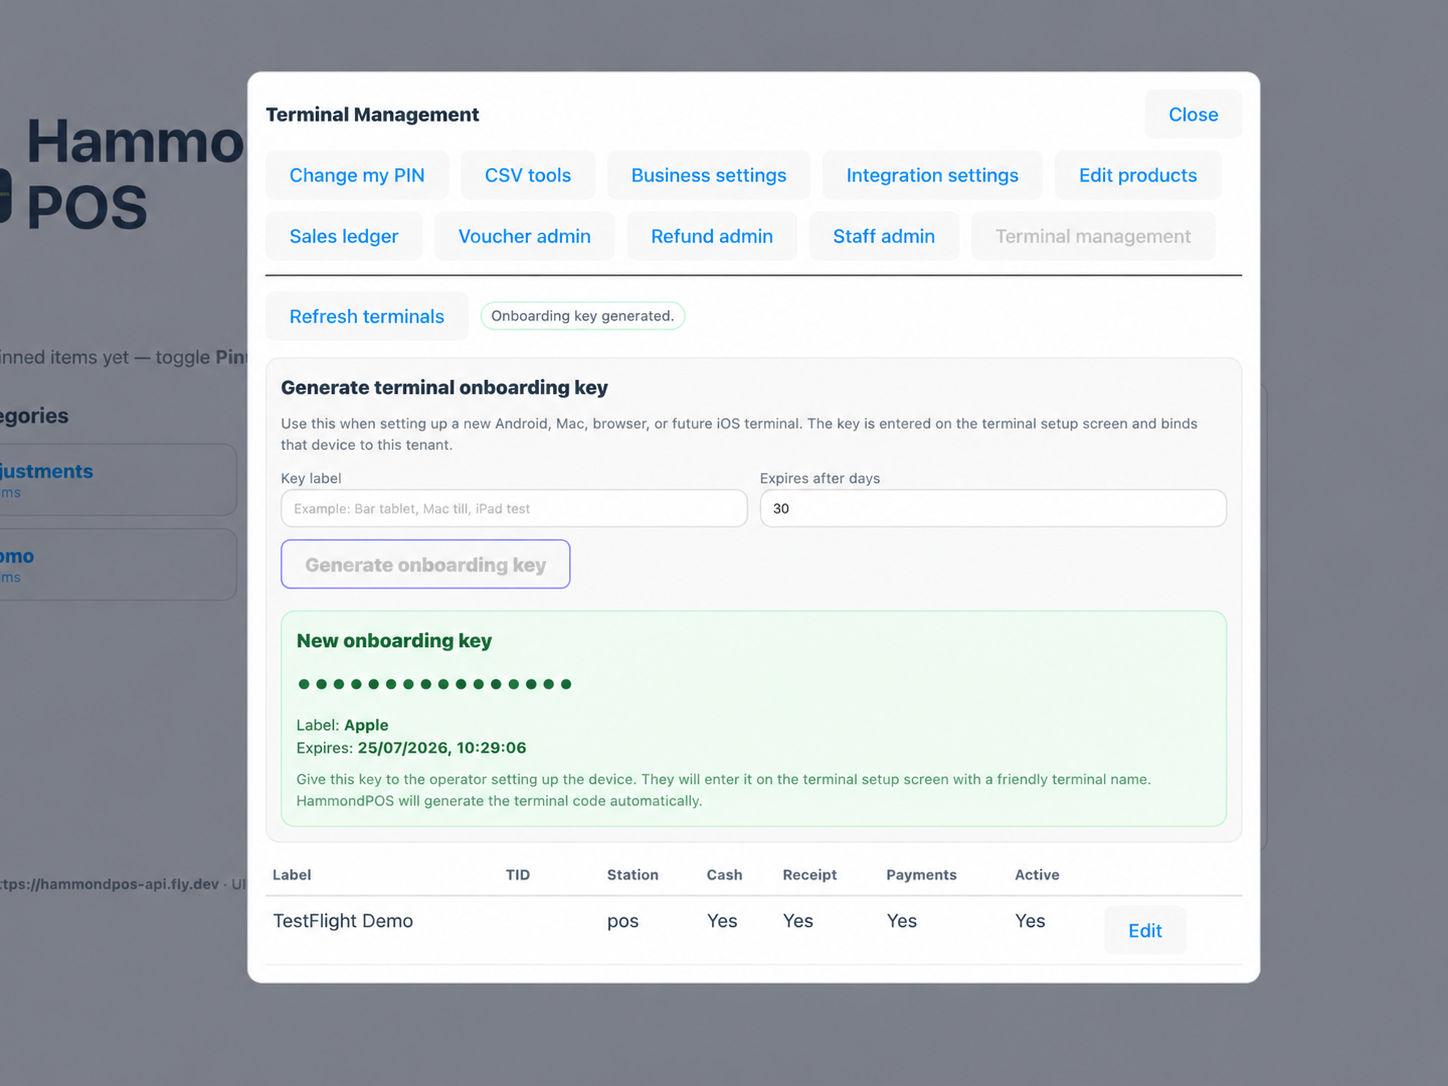
Terminal Management is used to create onboarding keys, bind new devices, refresh terminal lists and remove terminals that should no longer access the tenant.
Step-by-step
Open Terminal ManagementUse the management menu as owner/admin.
Generate an onboarding keyEnter a useful label and expiry period.
Give the key or link to the installerUse it only for the device being set up.
Bind the deviceComplete setup on the new terminal using the onboarding screen.
Review terminal accessDeactivate old, lost or replaced devices promptly.
Business Settings
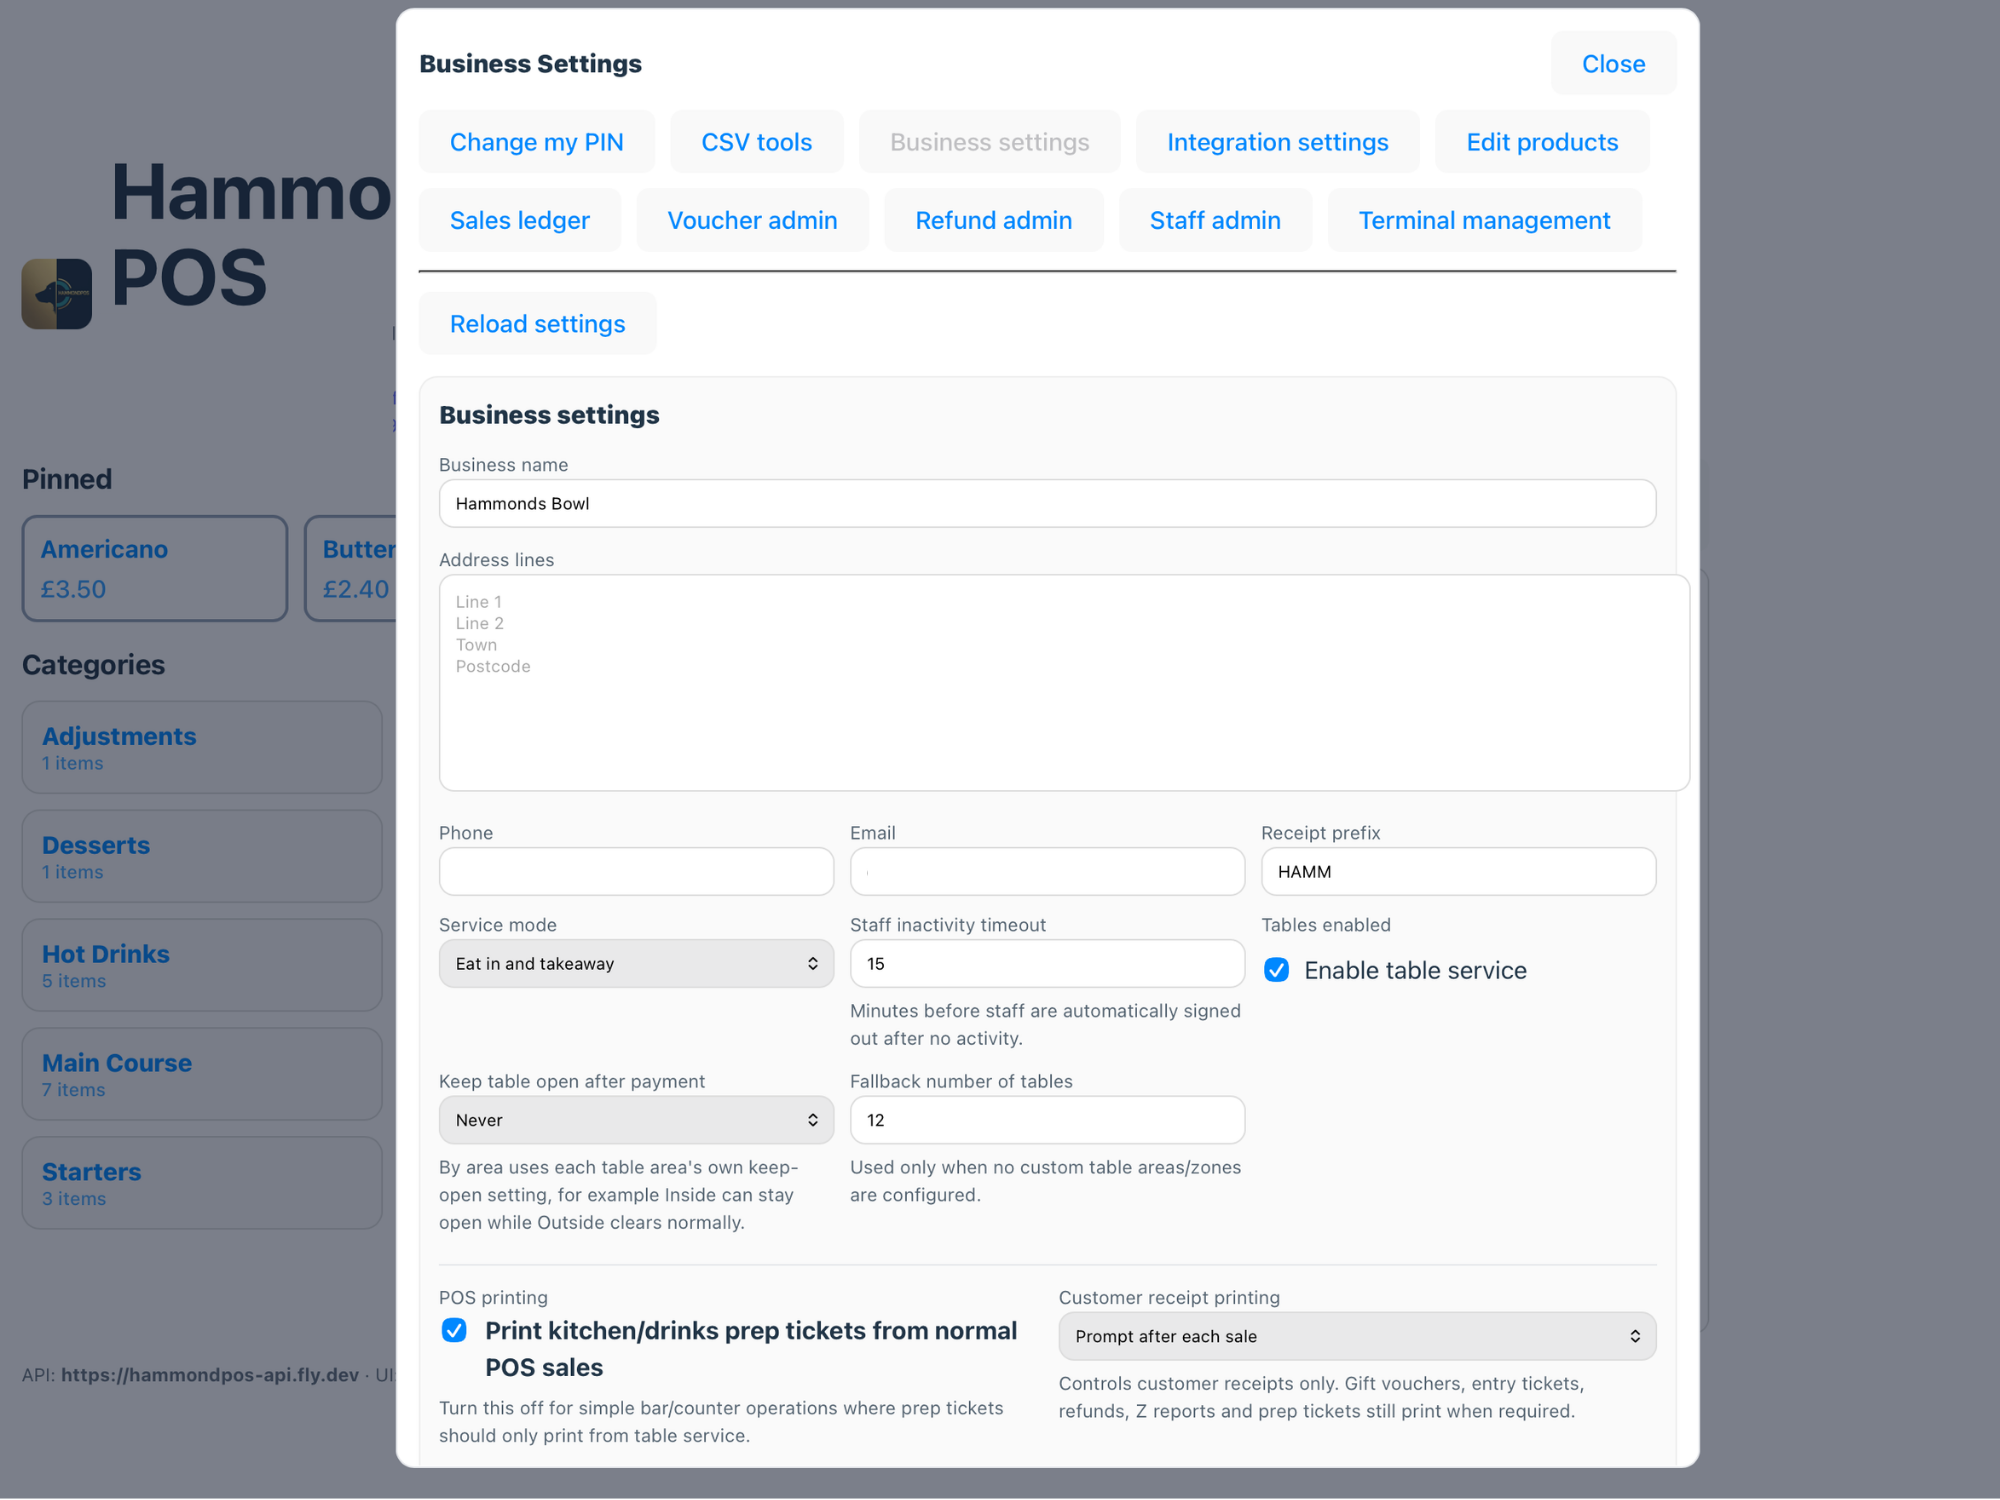
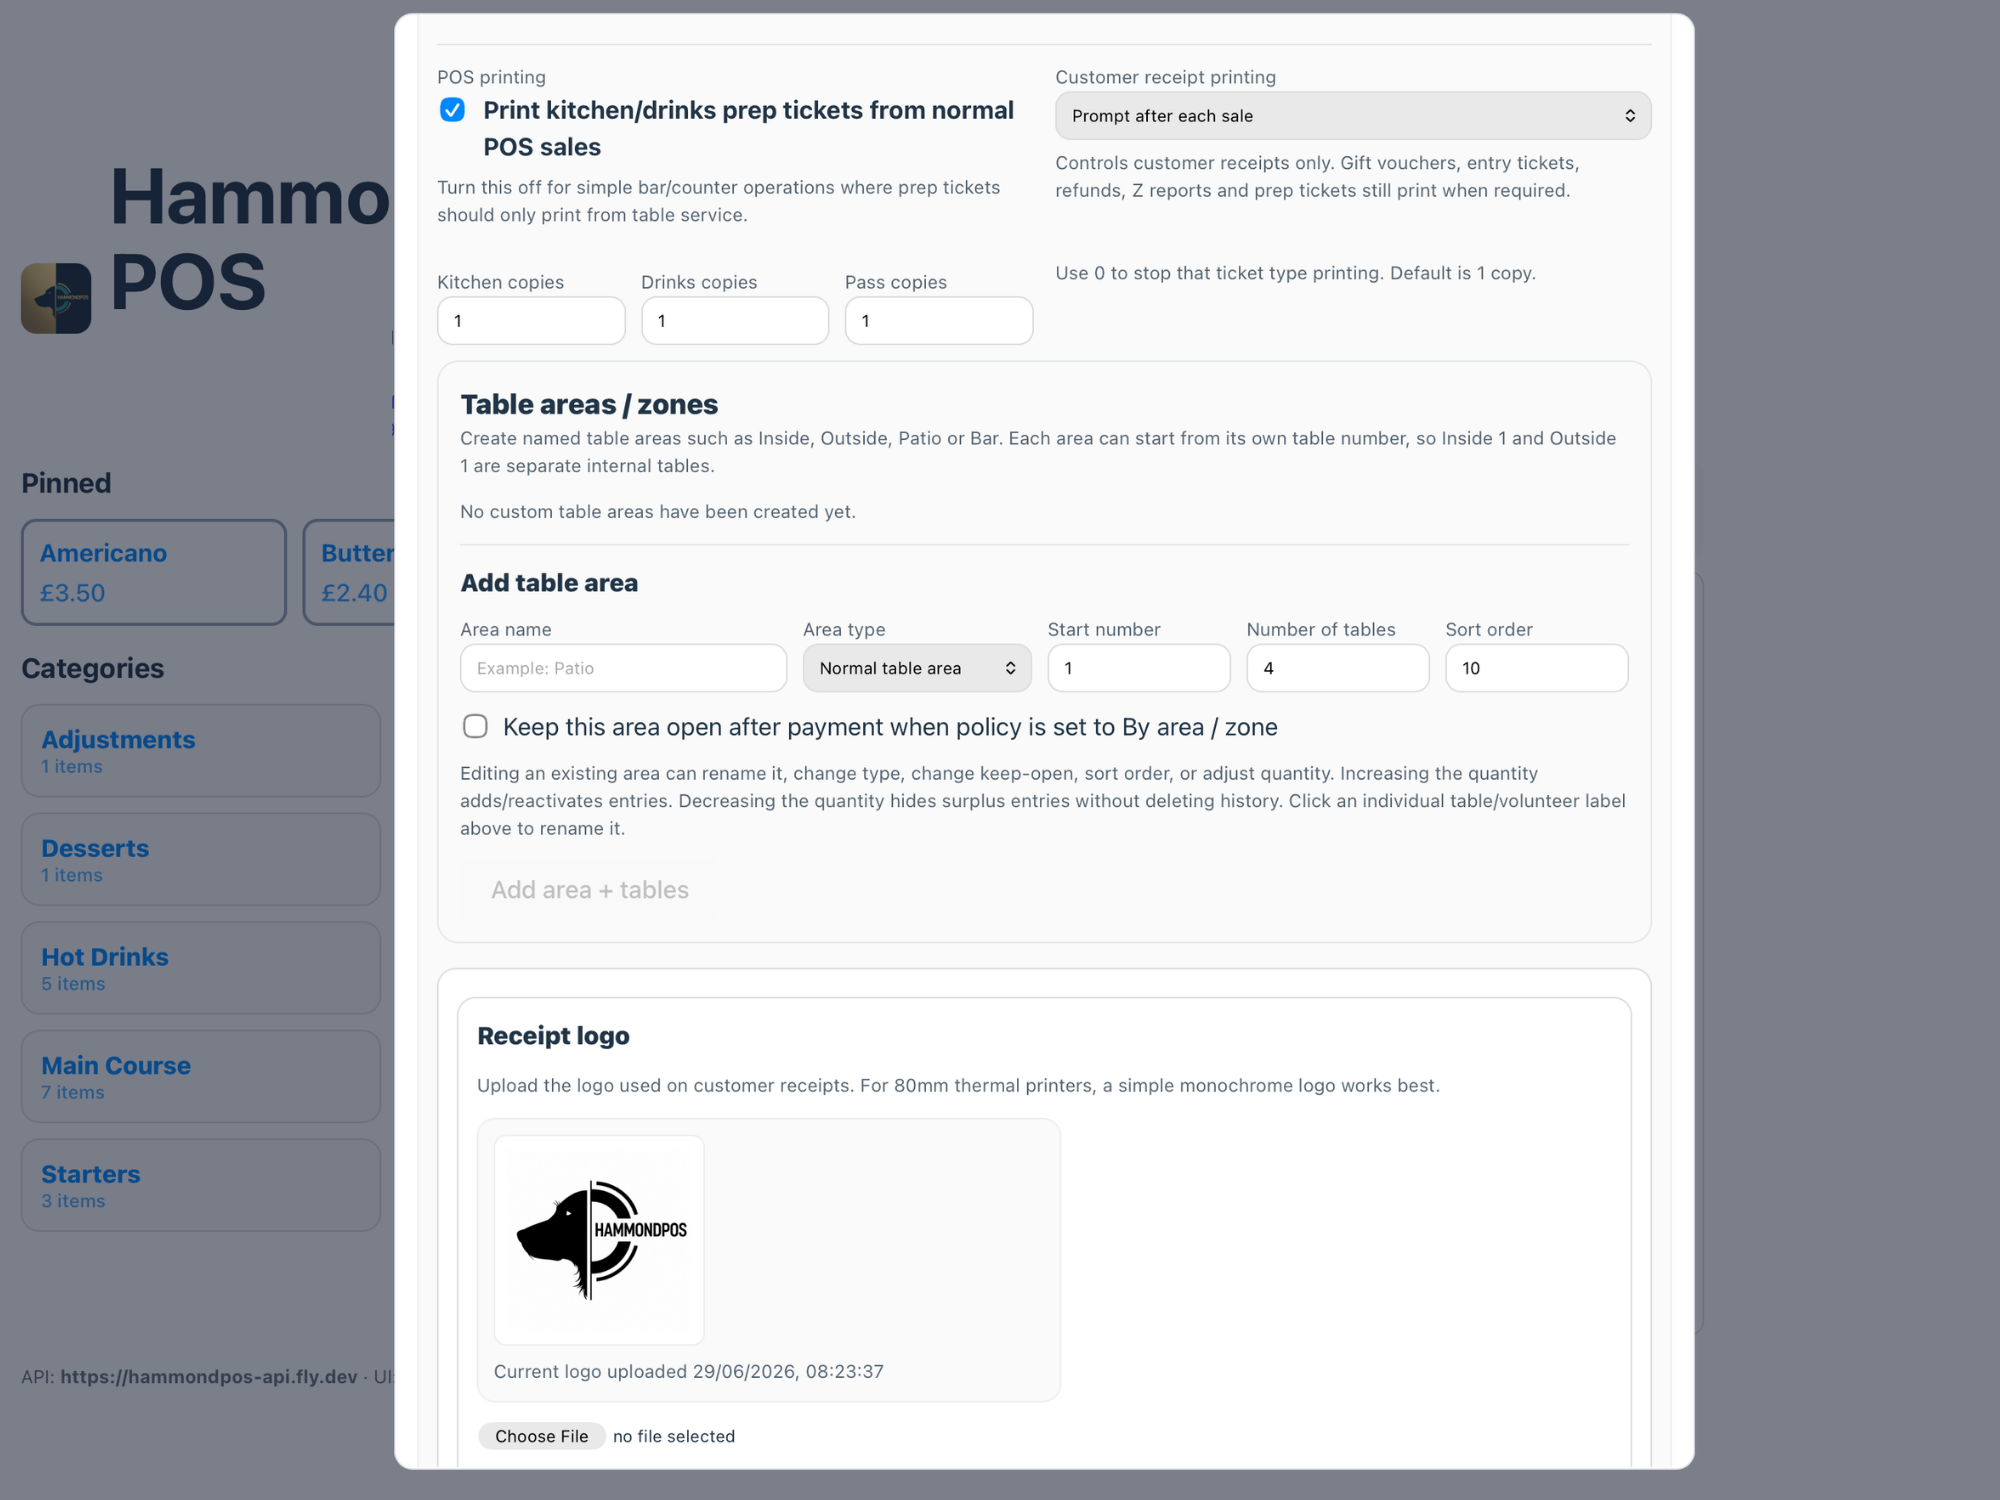
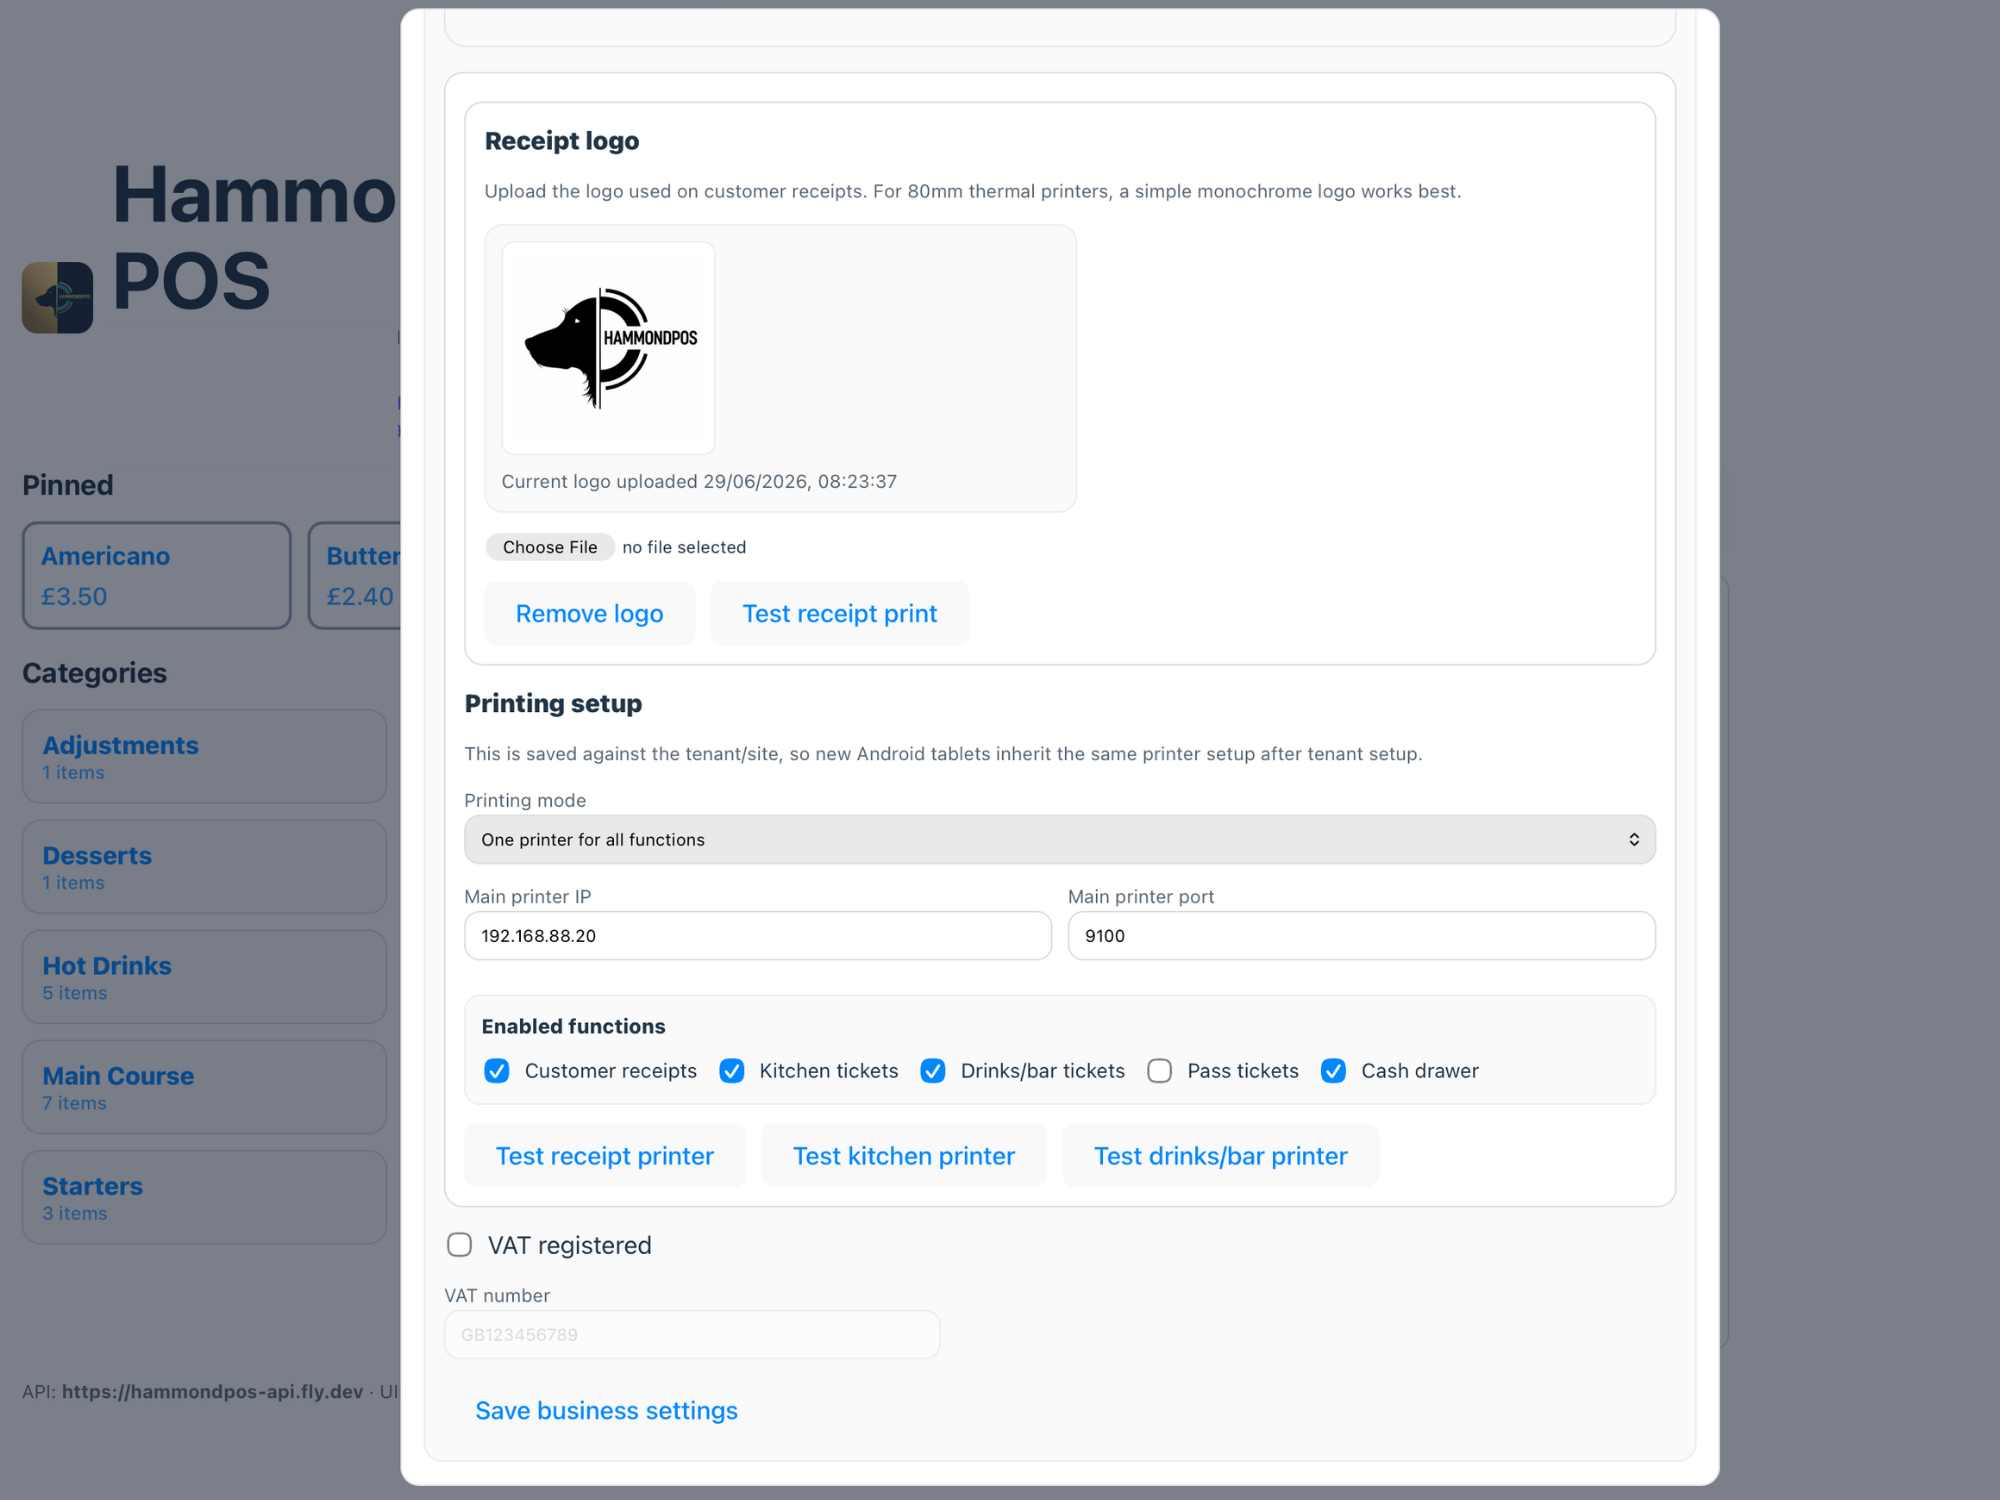
Business Settings controls receipt details, VAT information, printer configuration, receipt behaviour and prep ticket copy counts. These settings should be checked before every go-live.
Step-by-step
Confirm business detailsCheck business name, address, phone, email and VAT number where applicable.
Check receipt policyChoose whether receipts print automatically, prompt, or do not print by default.
Set printer routesConfigure receipt, kitchen, drinks and pass printer destinations.
Set prep ticket copiesChoose copy counts for each station.
Save and testUse test print or a small order to confirm changes persist and print correctly.
Training Mode
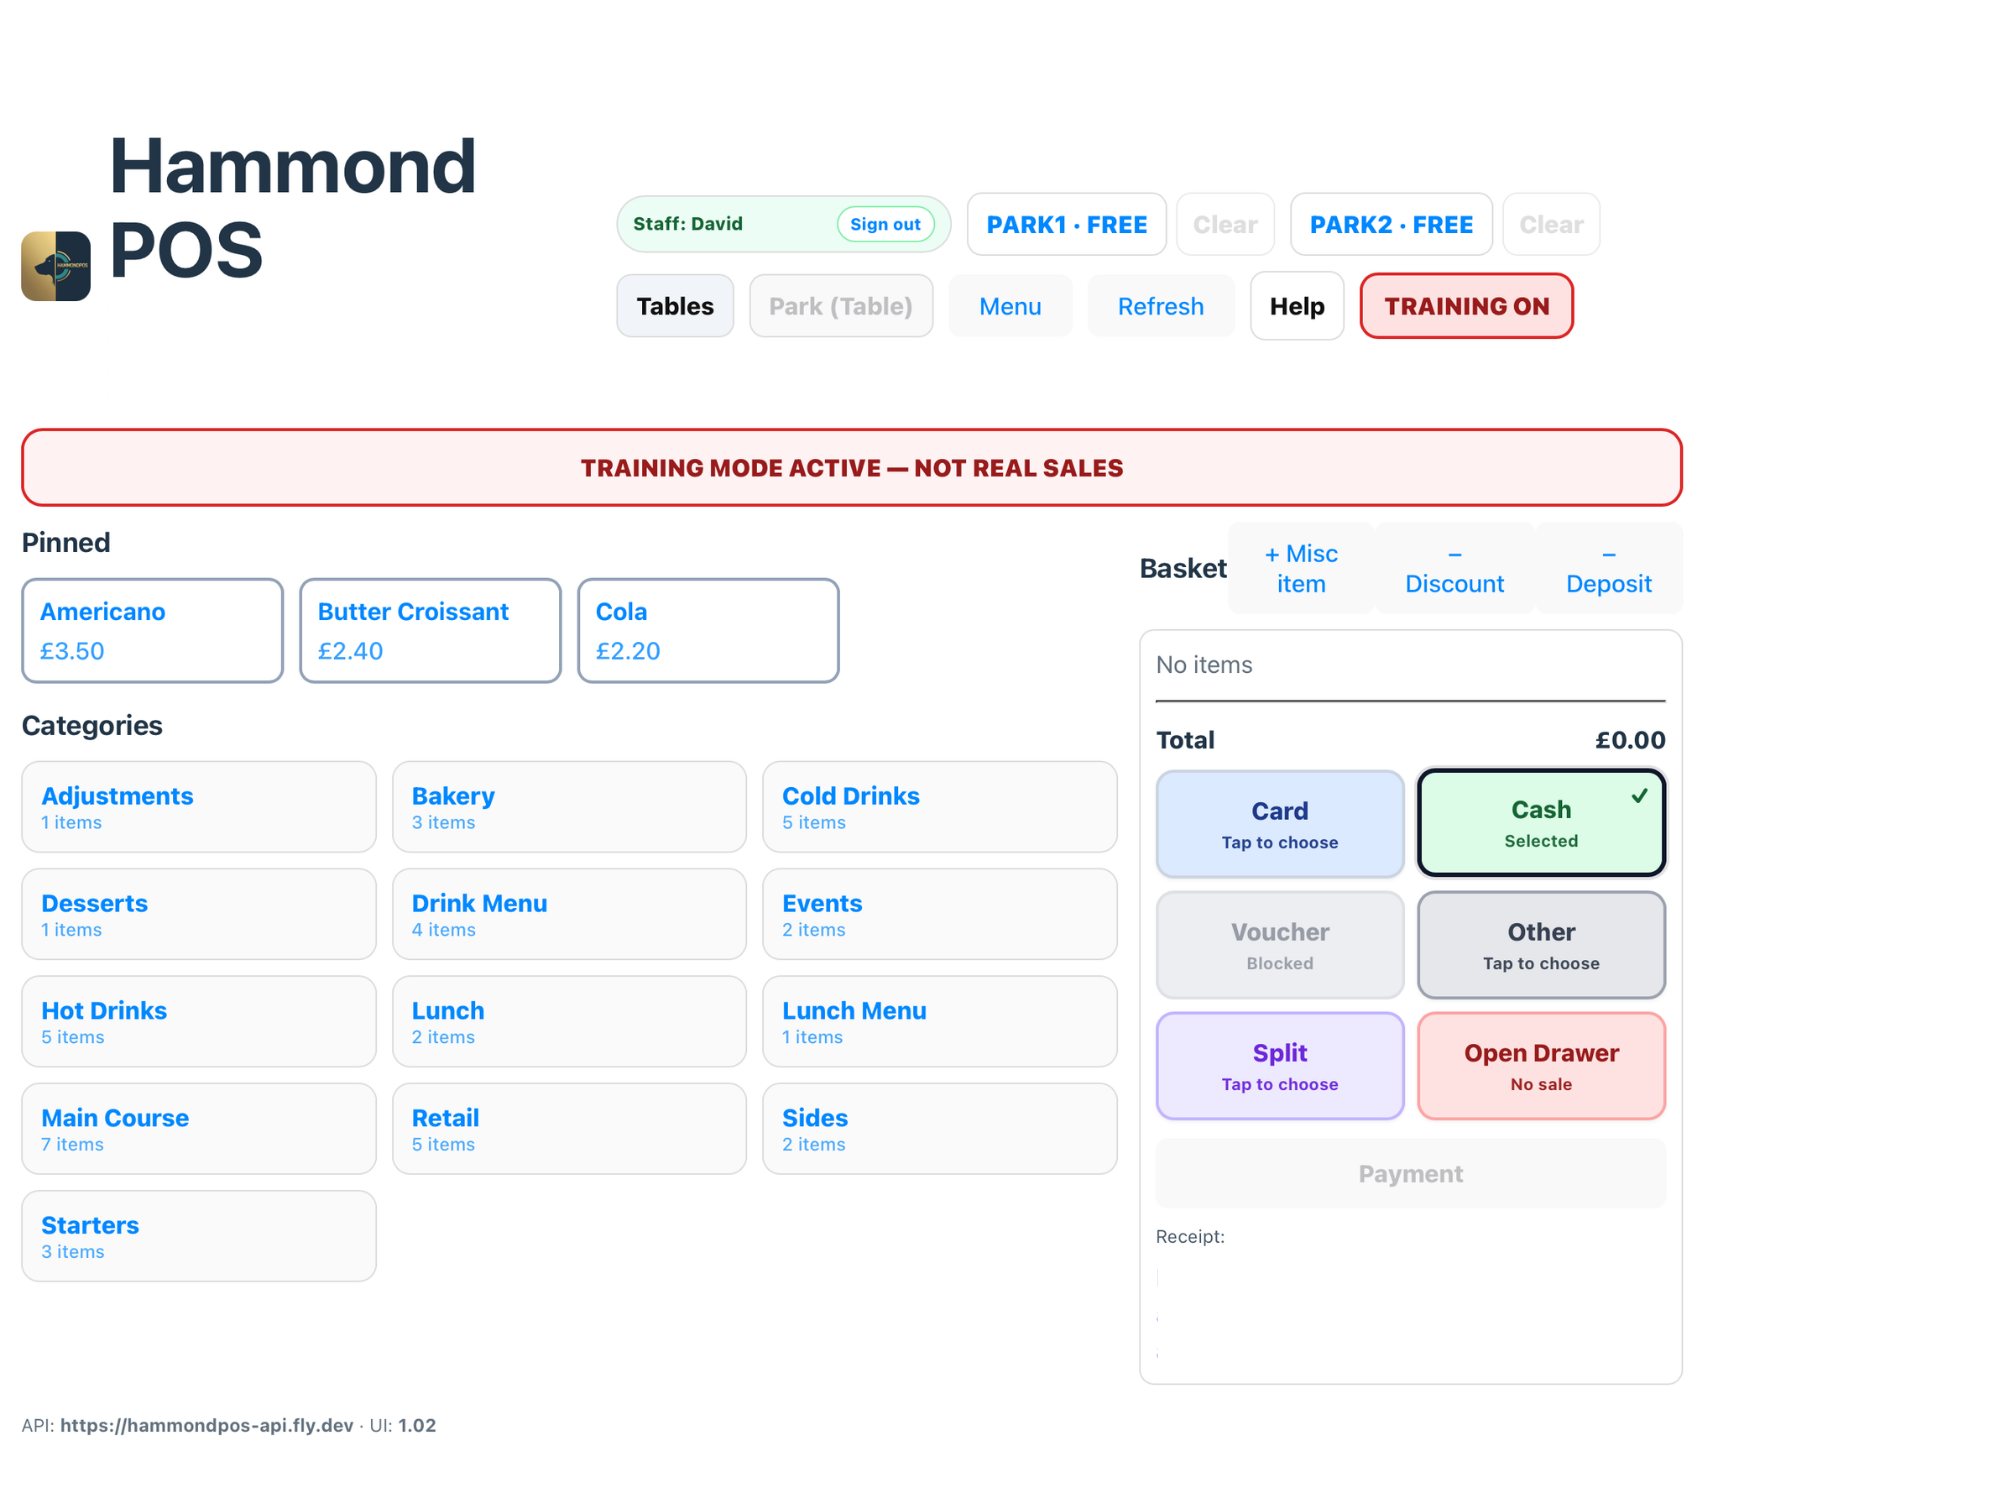
Training Mode lets staff practise without affecting normal trading reports. Training sales are clearly marked and should be excluded from normal Sales Ledger, Day Report and Z report totals.
Step-by-step
Enable as owner/adminOnly authorised users should toggle Training Mode.
Check the bannerConfirm the Training Mode indicator is visible before testing.
Run practice ordersUse manual card only and avoid real customer payments.
Do not issue vouchersVoucher issue and redemption should be blocked while training.
Turn it offDisable Training Mode before the venue starts normal service.
Reports
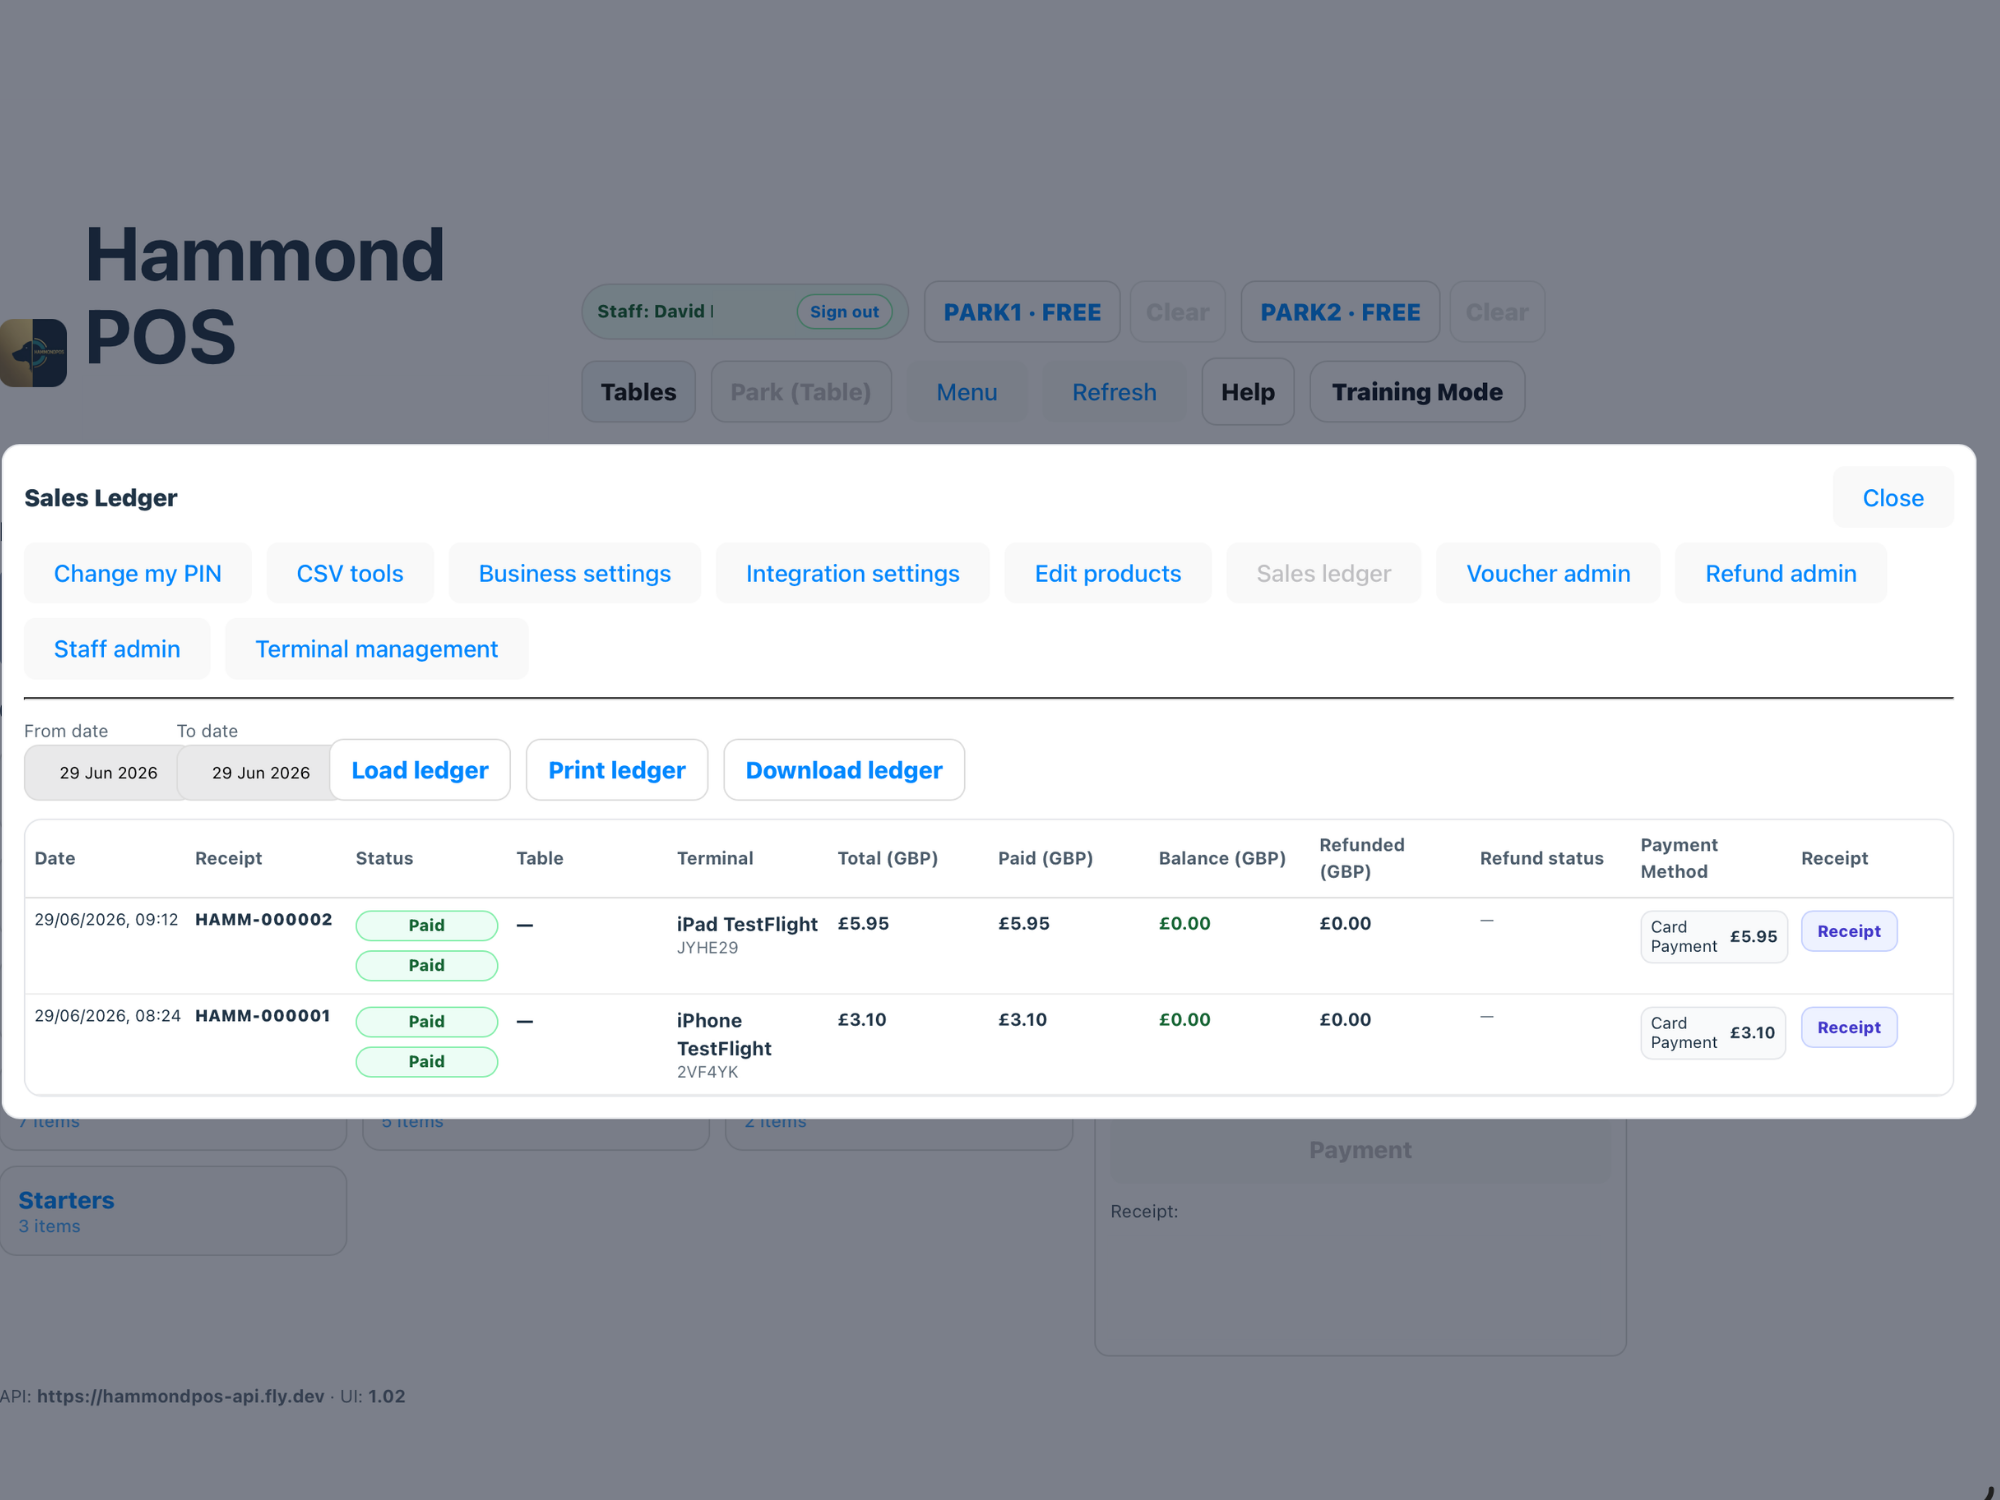
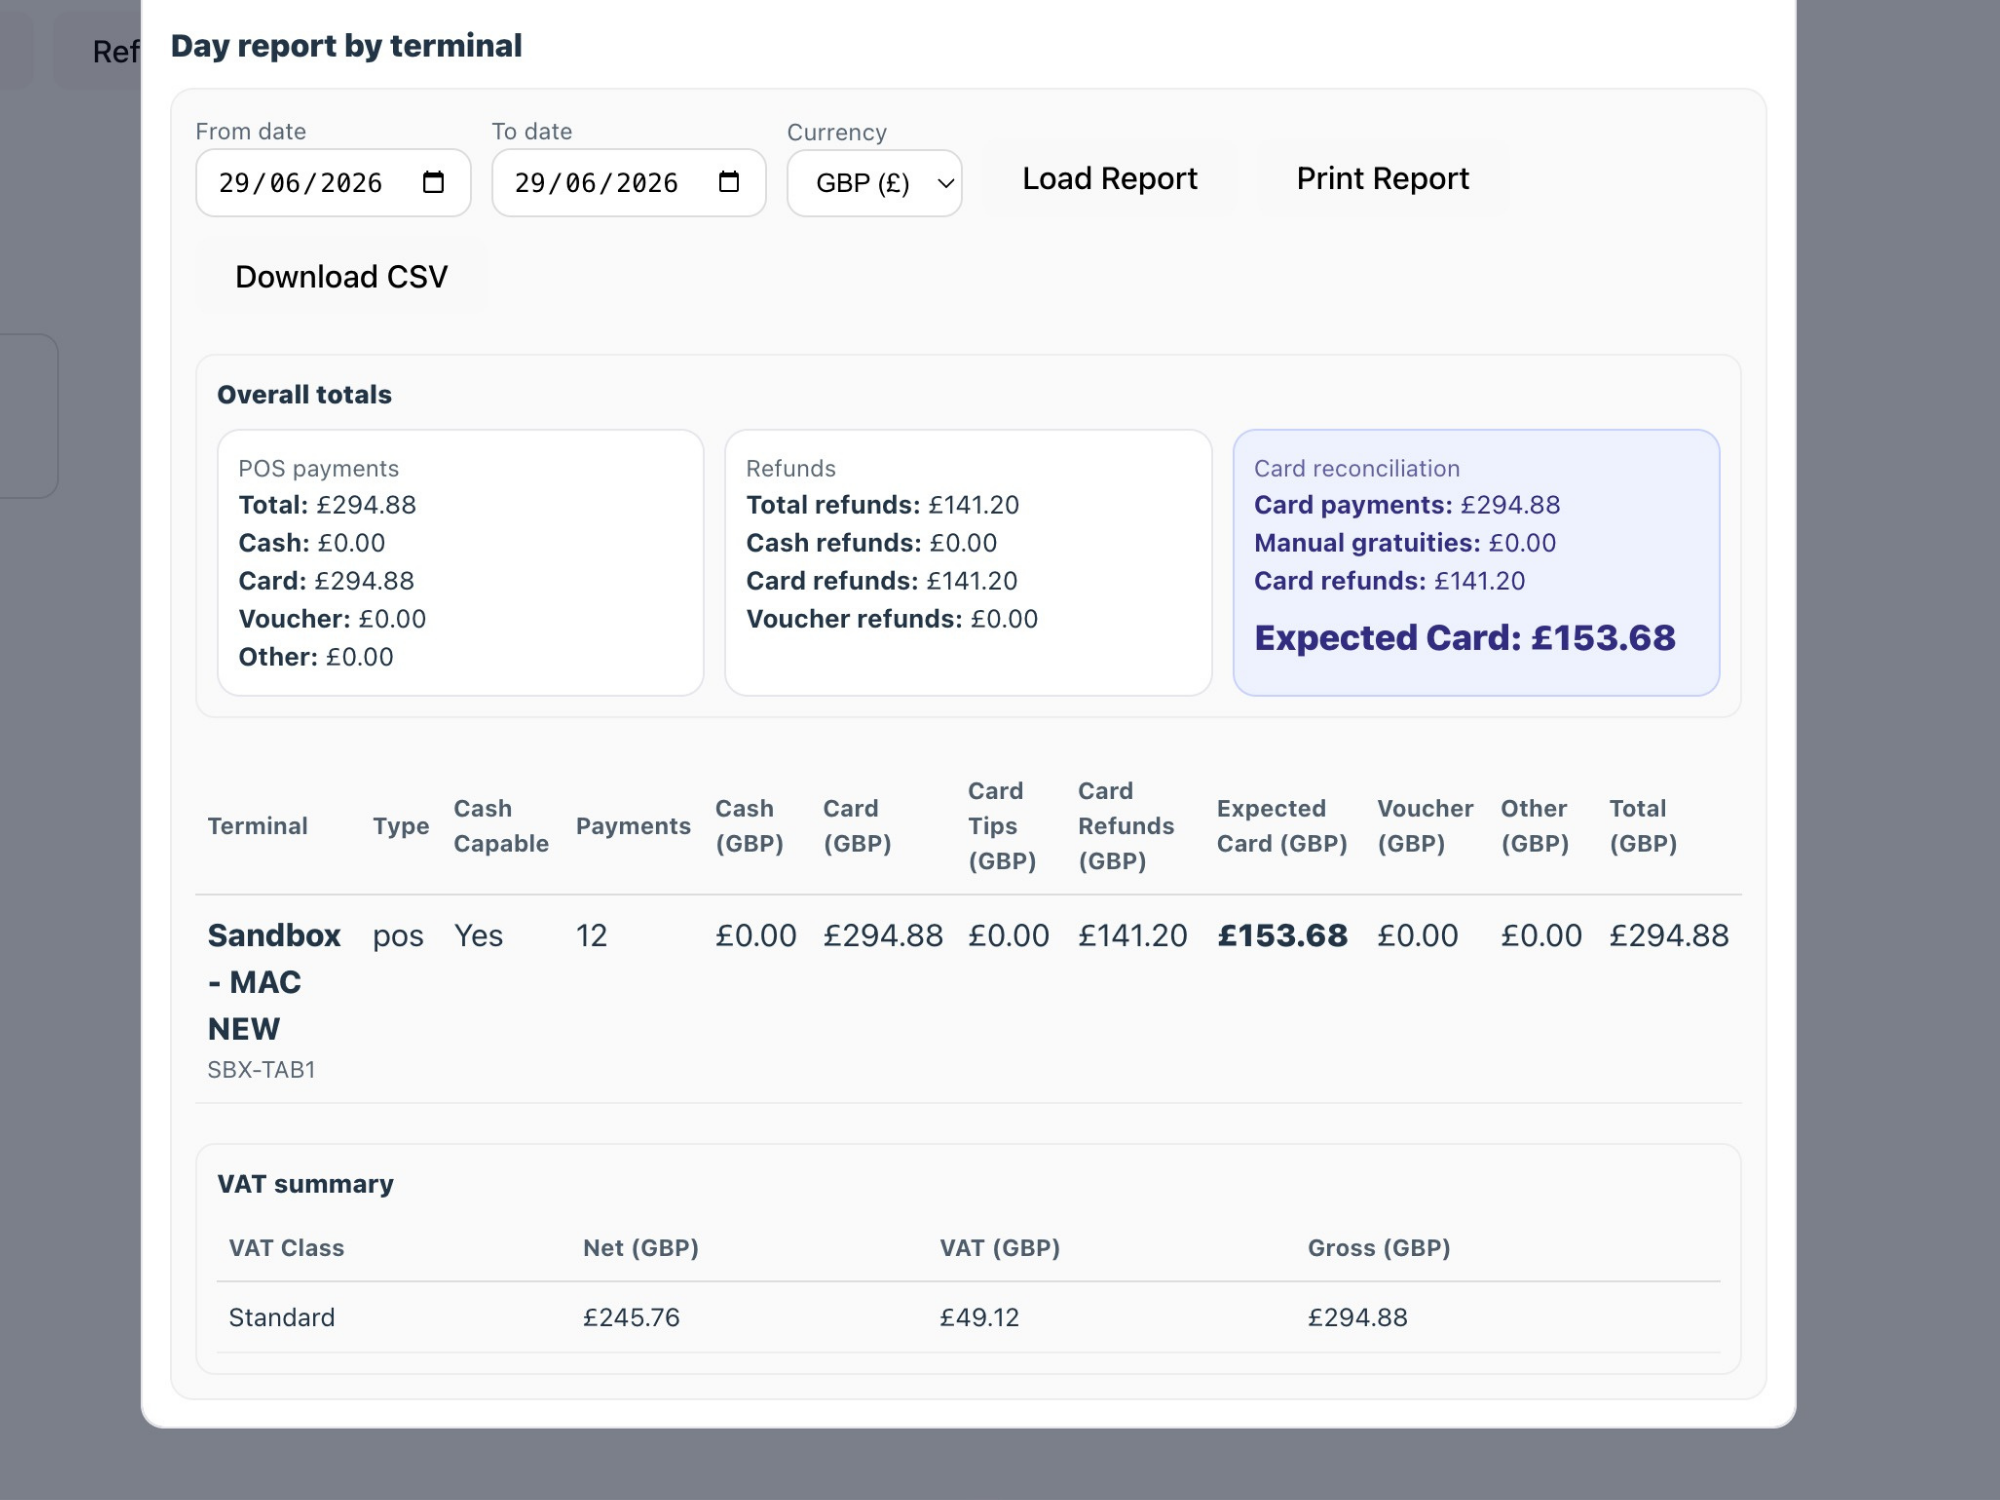
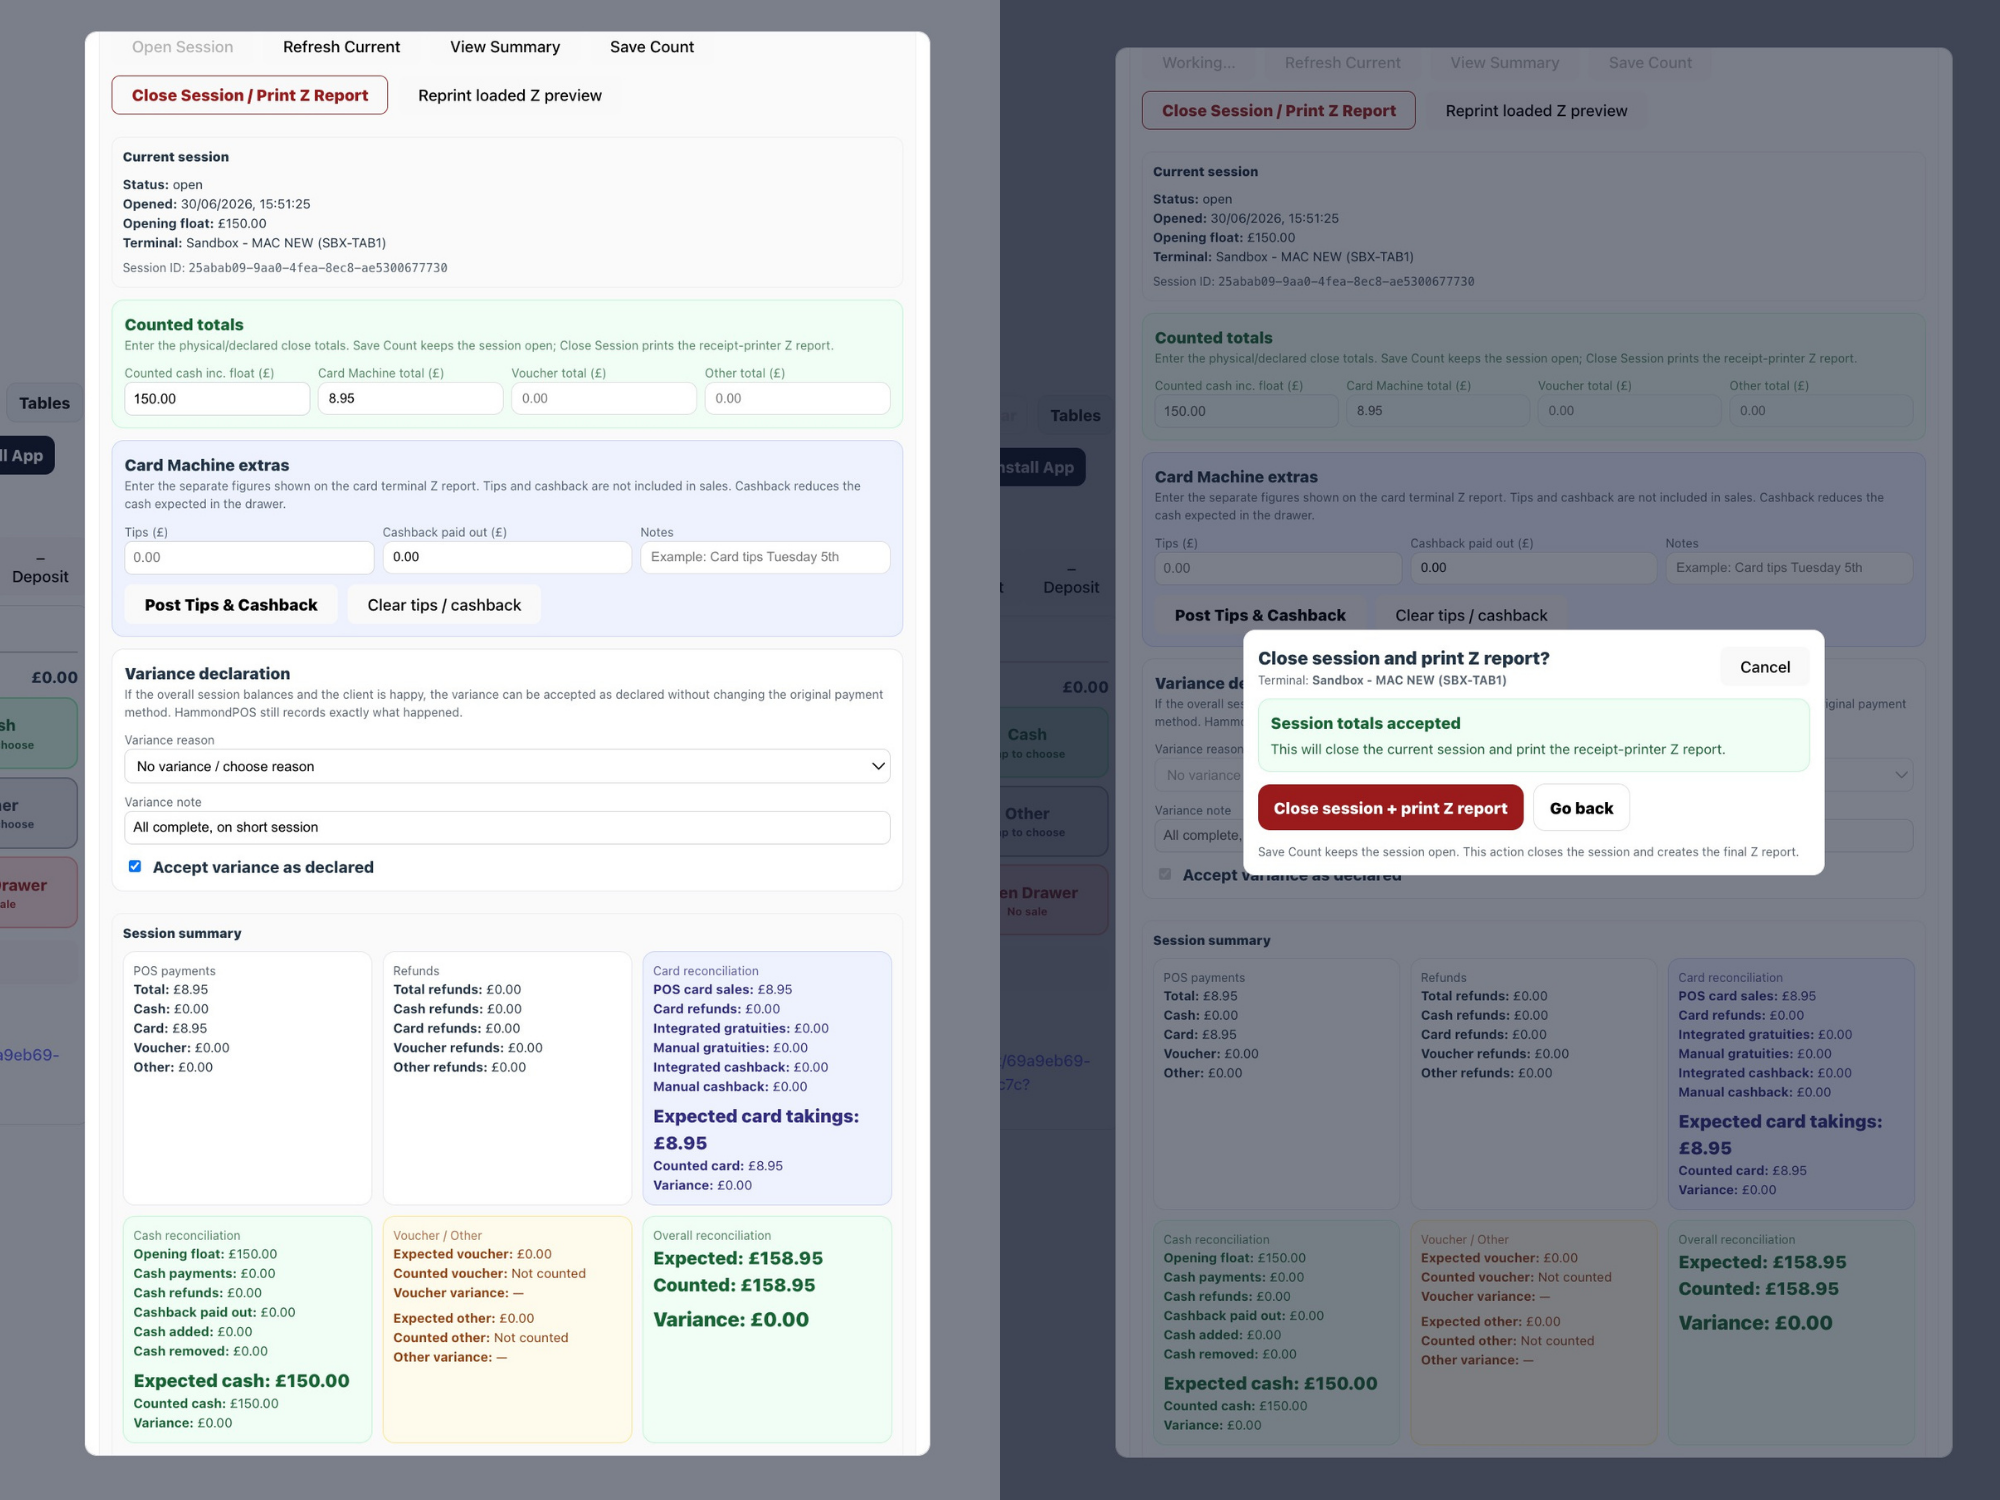
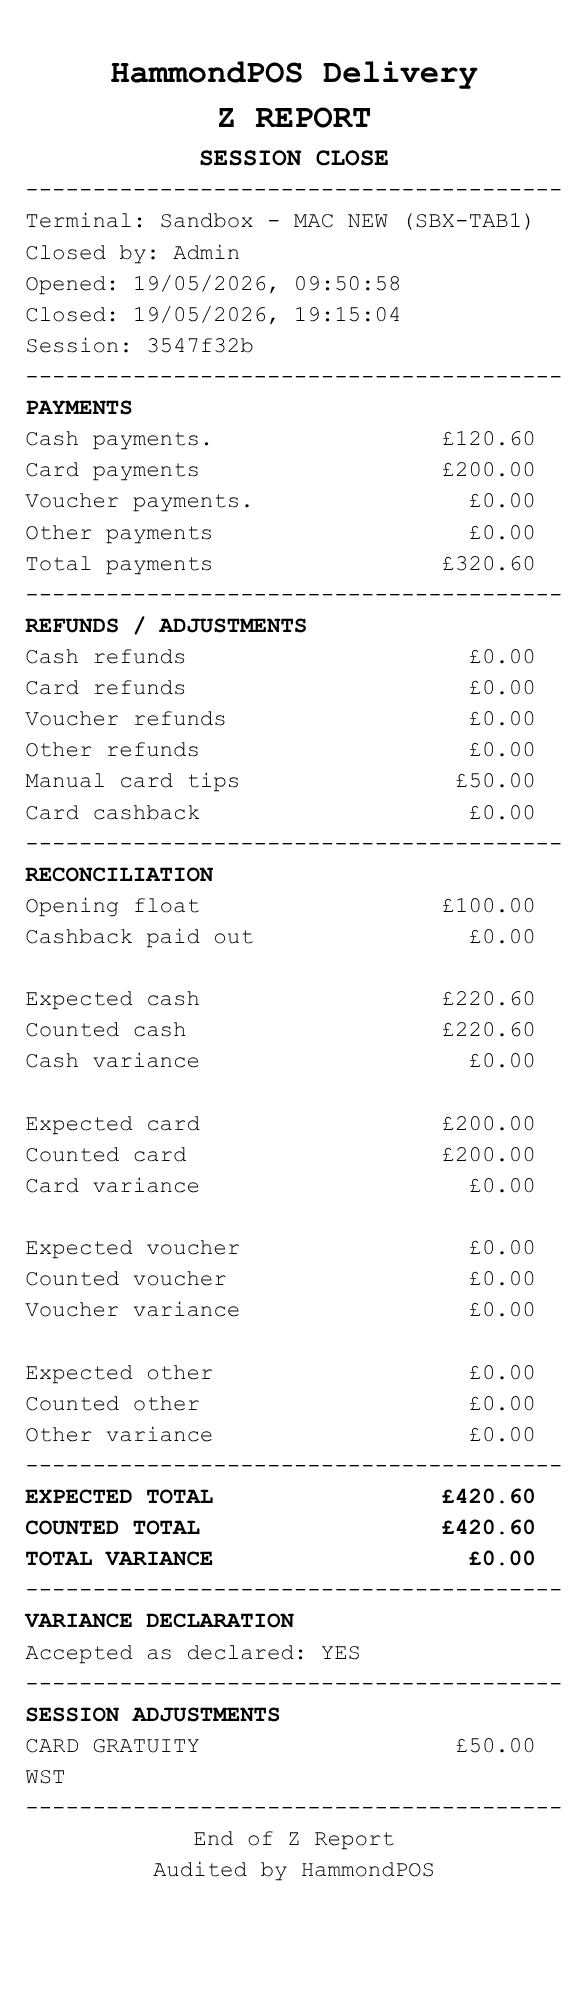
Reports help owners and managers reconcile trade, review sales, close sessions and investigate refunds. Normal trading reports should exclude Training Mode sales.
Step-by-step
Open the report areaUse the management menu while signed in with the correct permission.
Choose the reportUse Sales Ledger, Day Report, Z Report or session close depending on the job.
Check date and terminal scopeConfirm the correct business day, terminal or session.
Review payment totalsCheck cash, card, voucher, refunds and balance figures.
Close the sessionWhen using Z/session close, record variance notes where required.
Refunds
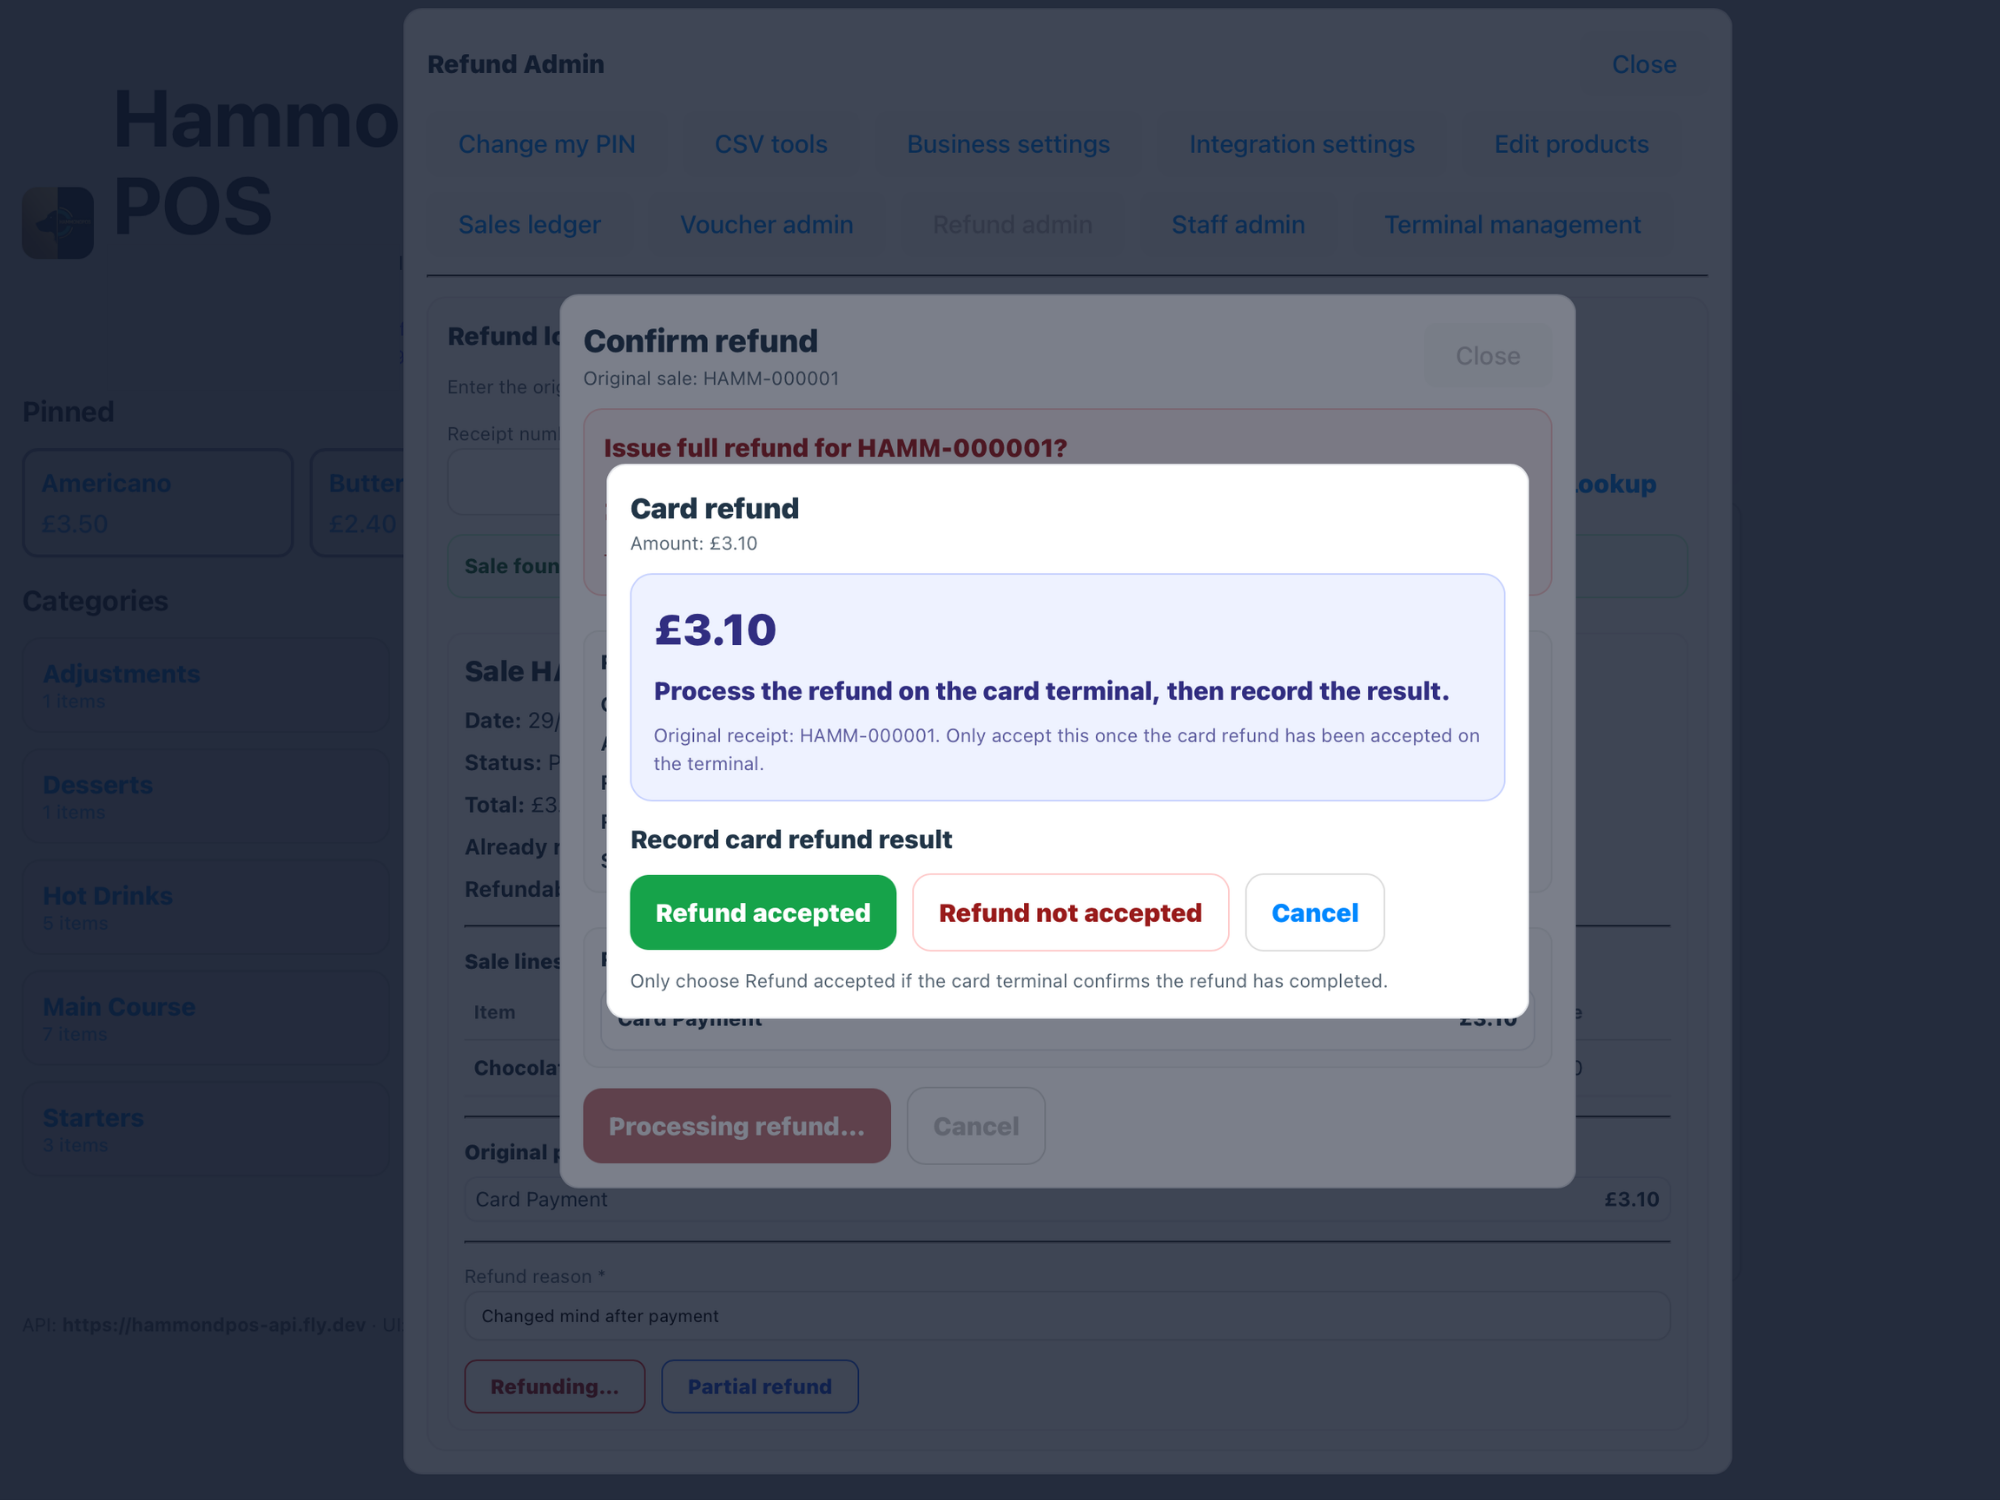
Refunds should be controlled, traceable and matched to the original sale where possible. Integrated card refunds follow the provider-supported route when enabled.
Step-by-step
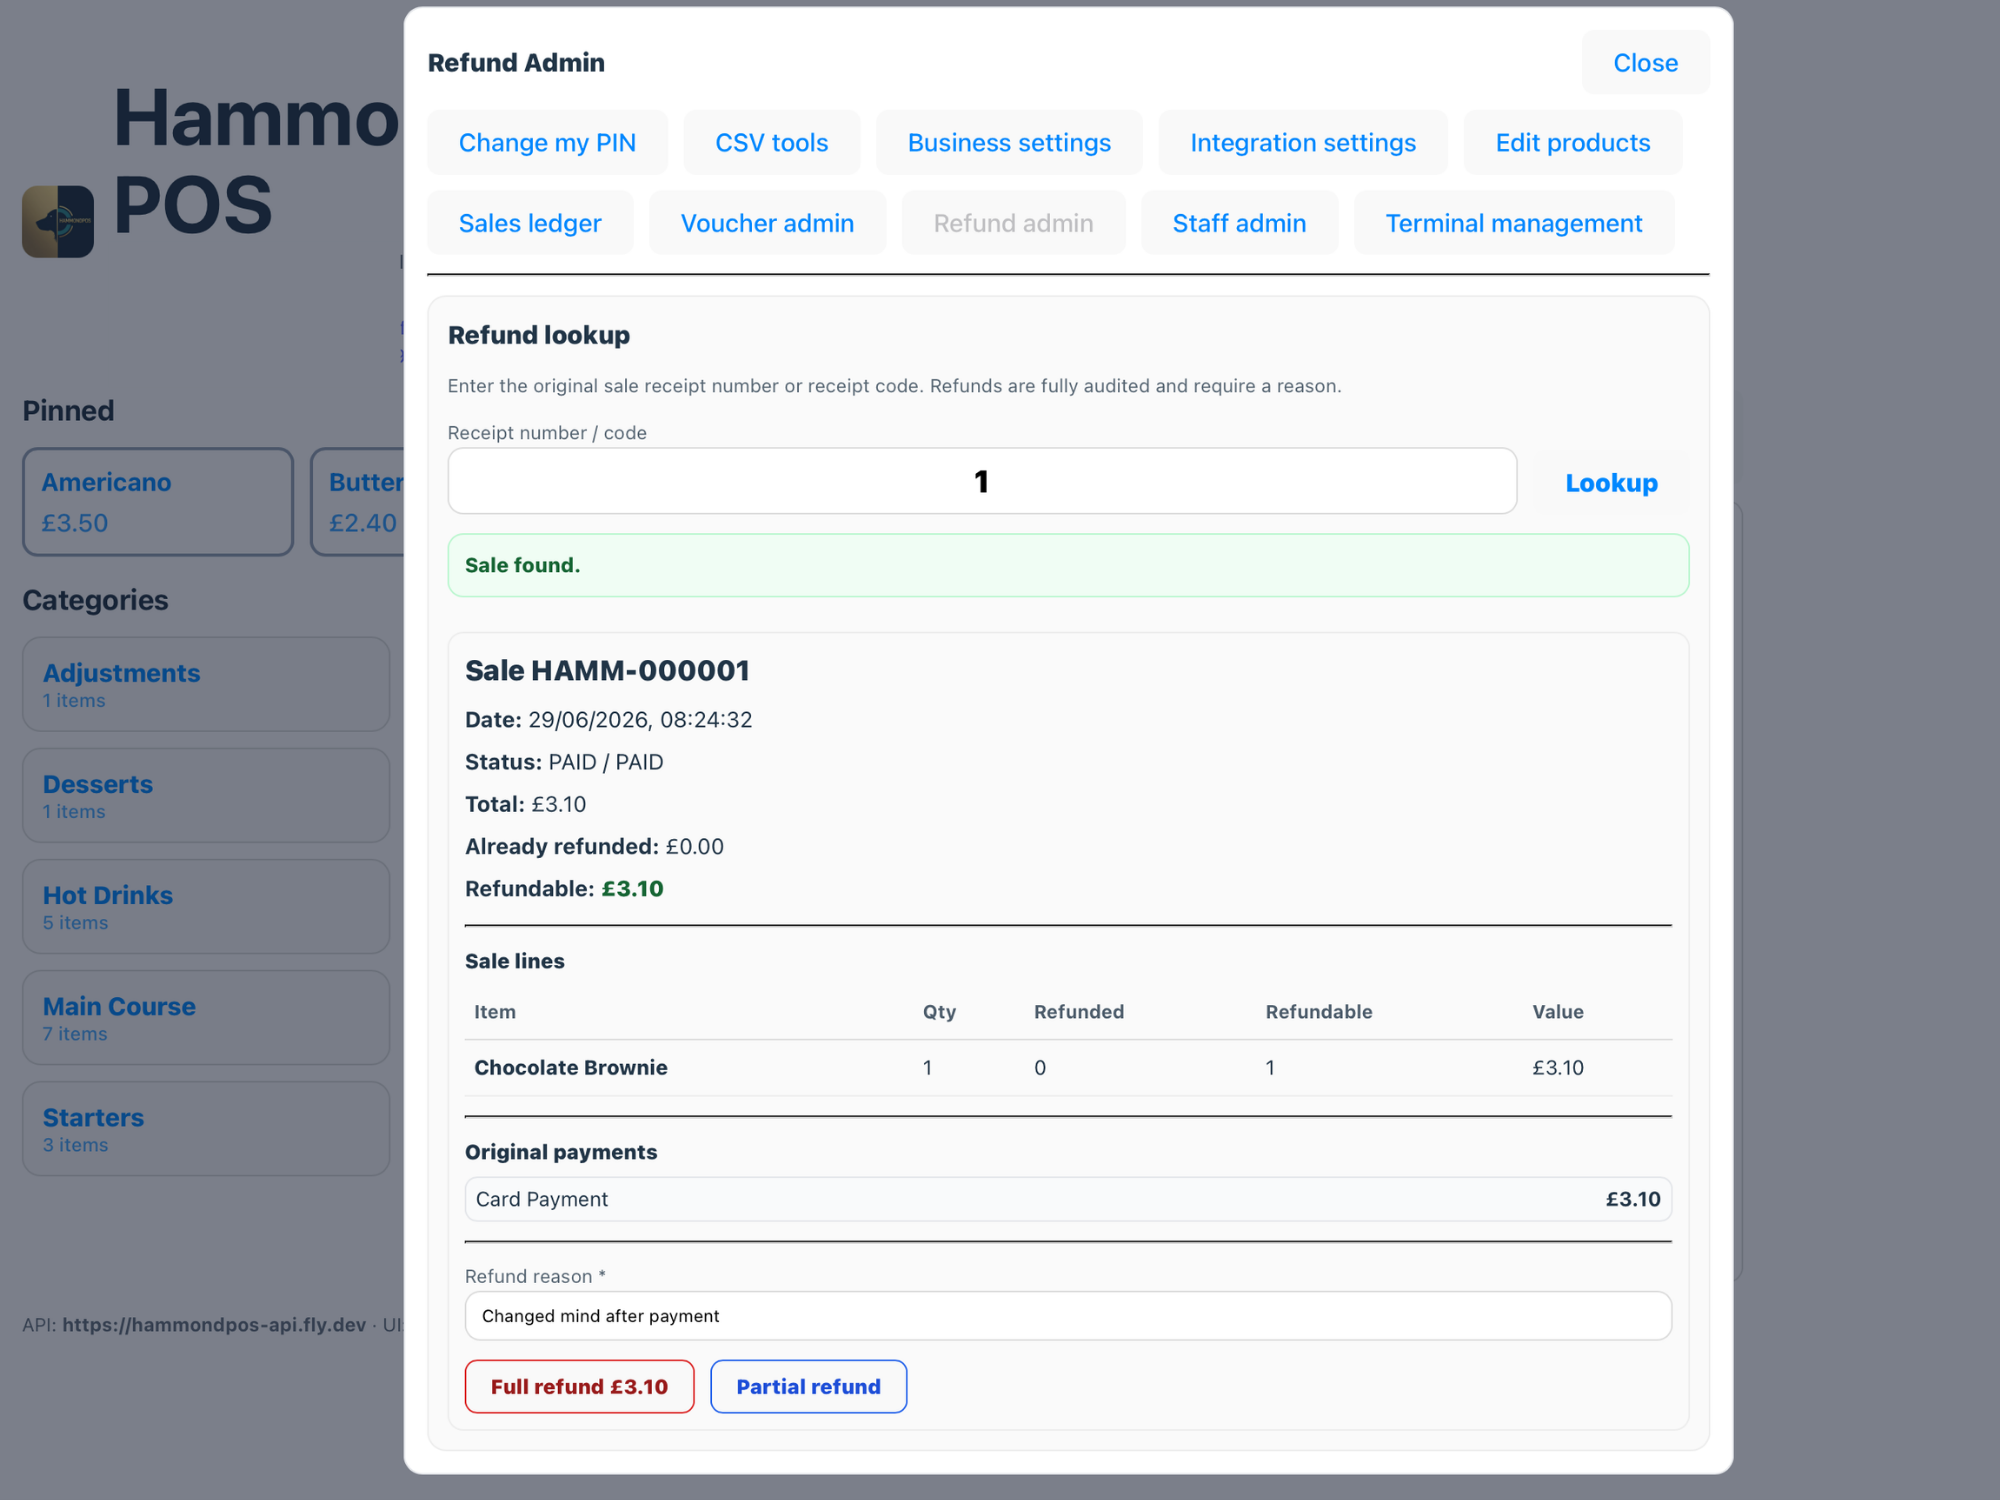
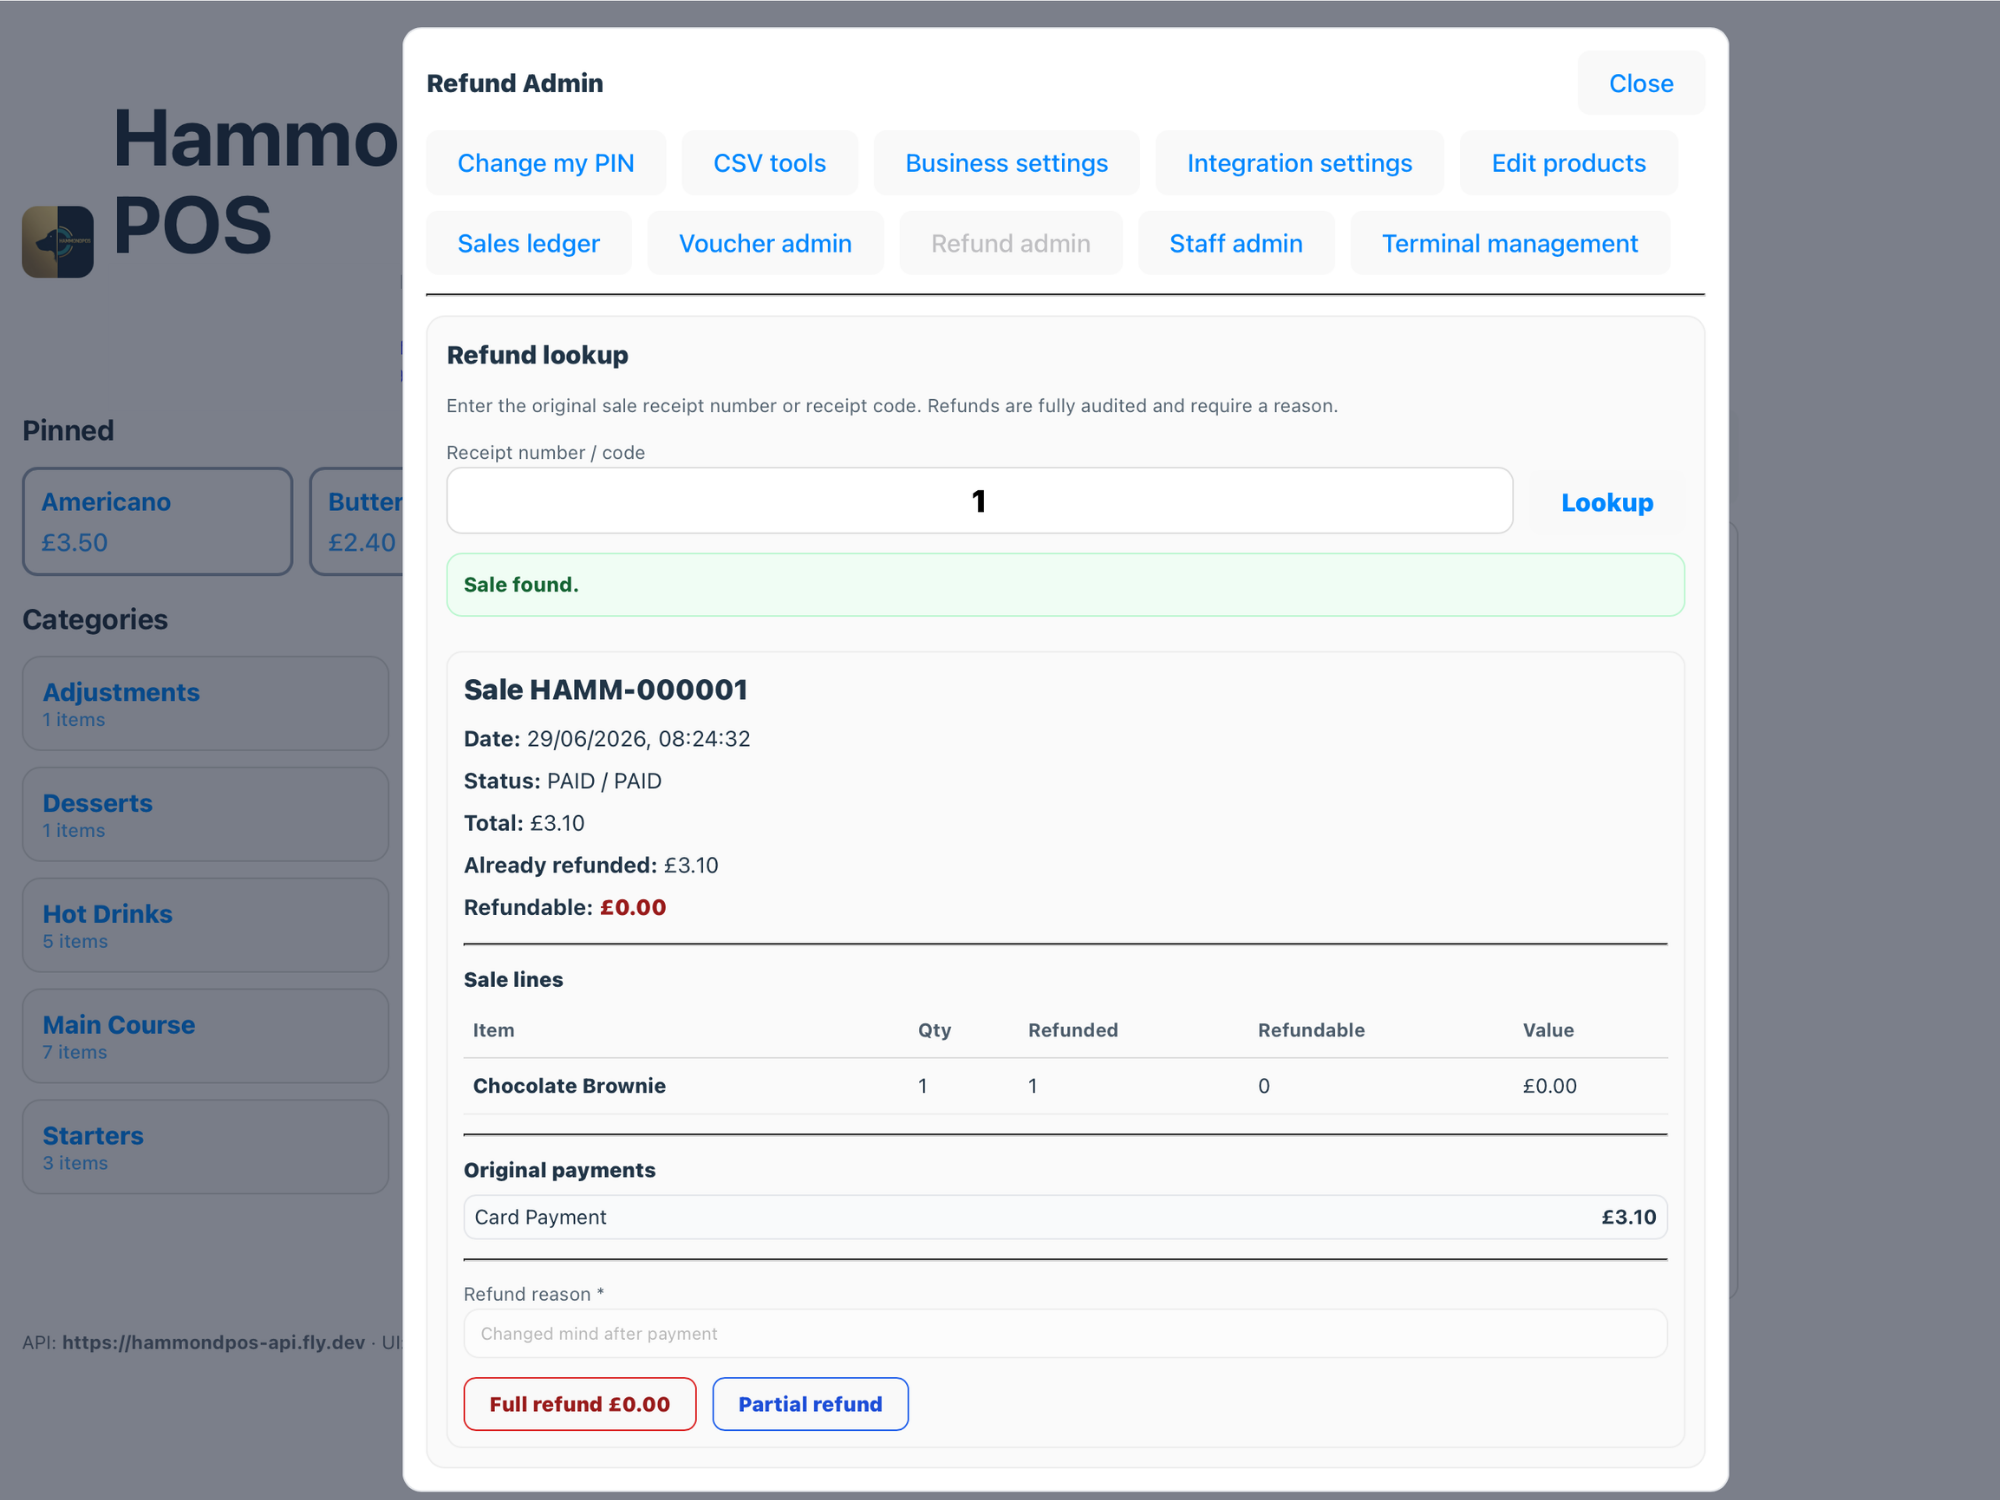
Find the original saleUse Refund admin or Sales Ledger to locate the receipt.
Choose full or partial refundRefund the whole sale or select individual lines/quantities.
Enter a reasonUse a clear reason so the refund can be understood later.
Process the payment routeFor Dojo PAC, use the matched refund flow back to the original payment route where available.
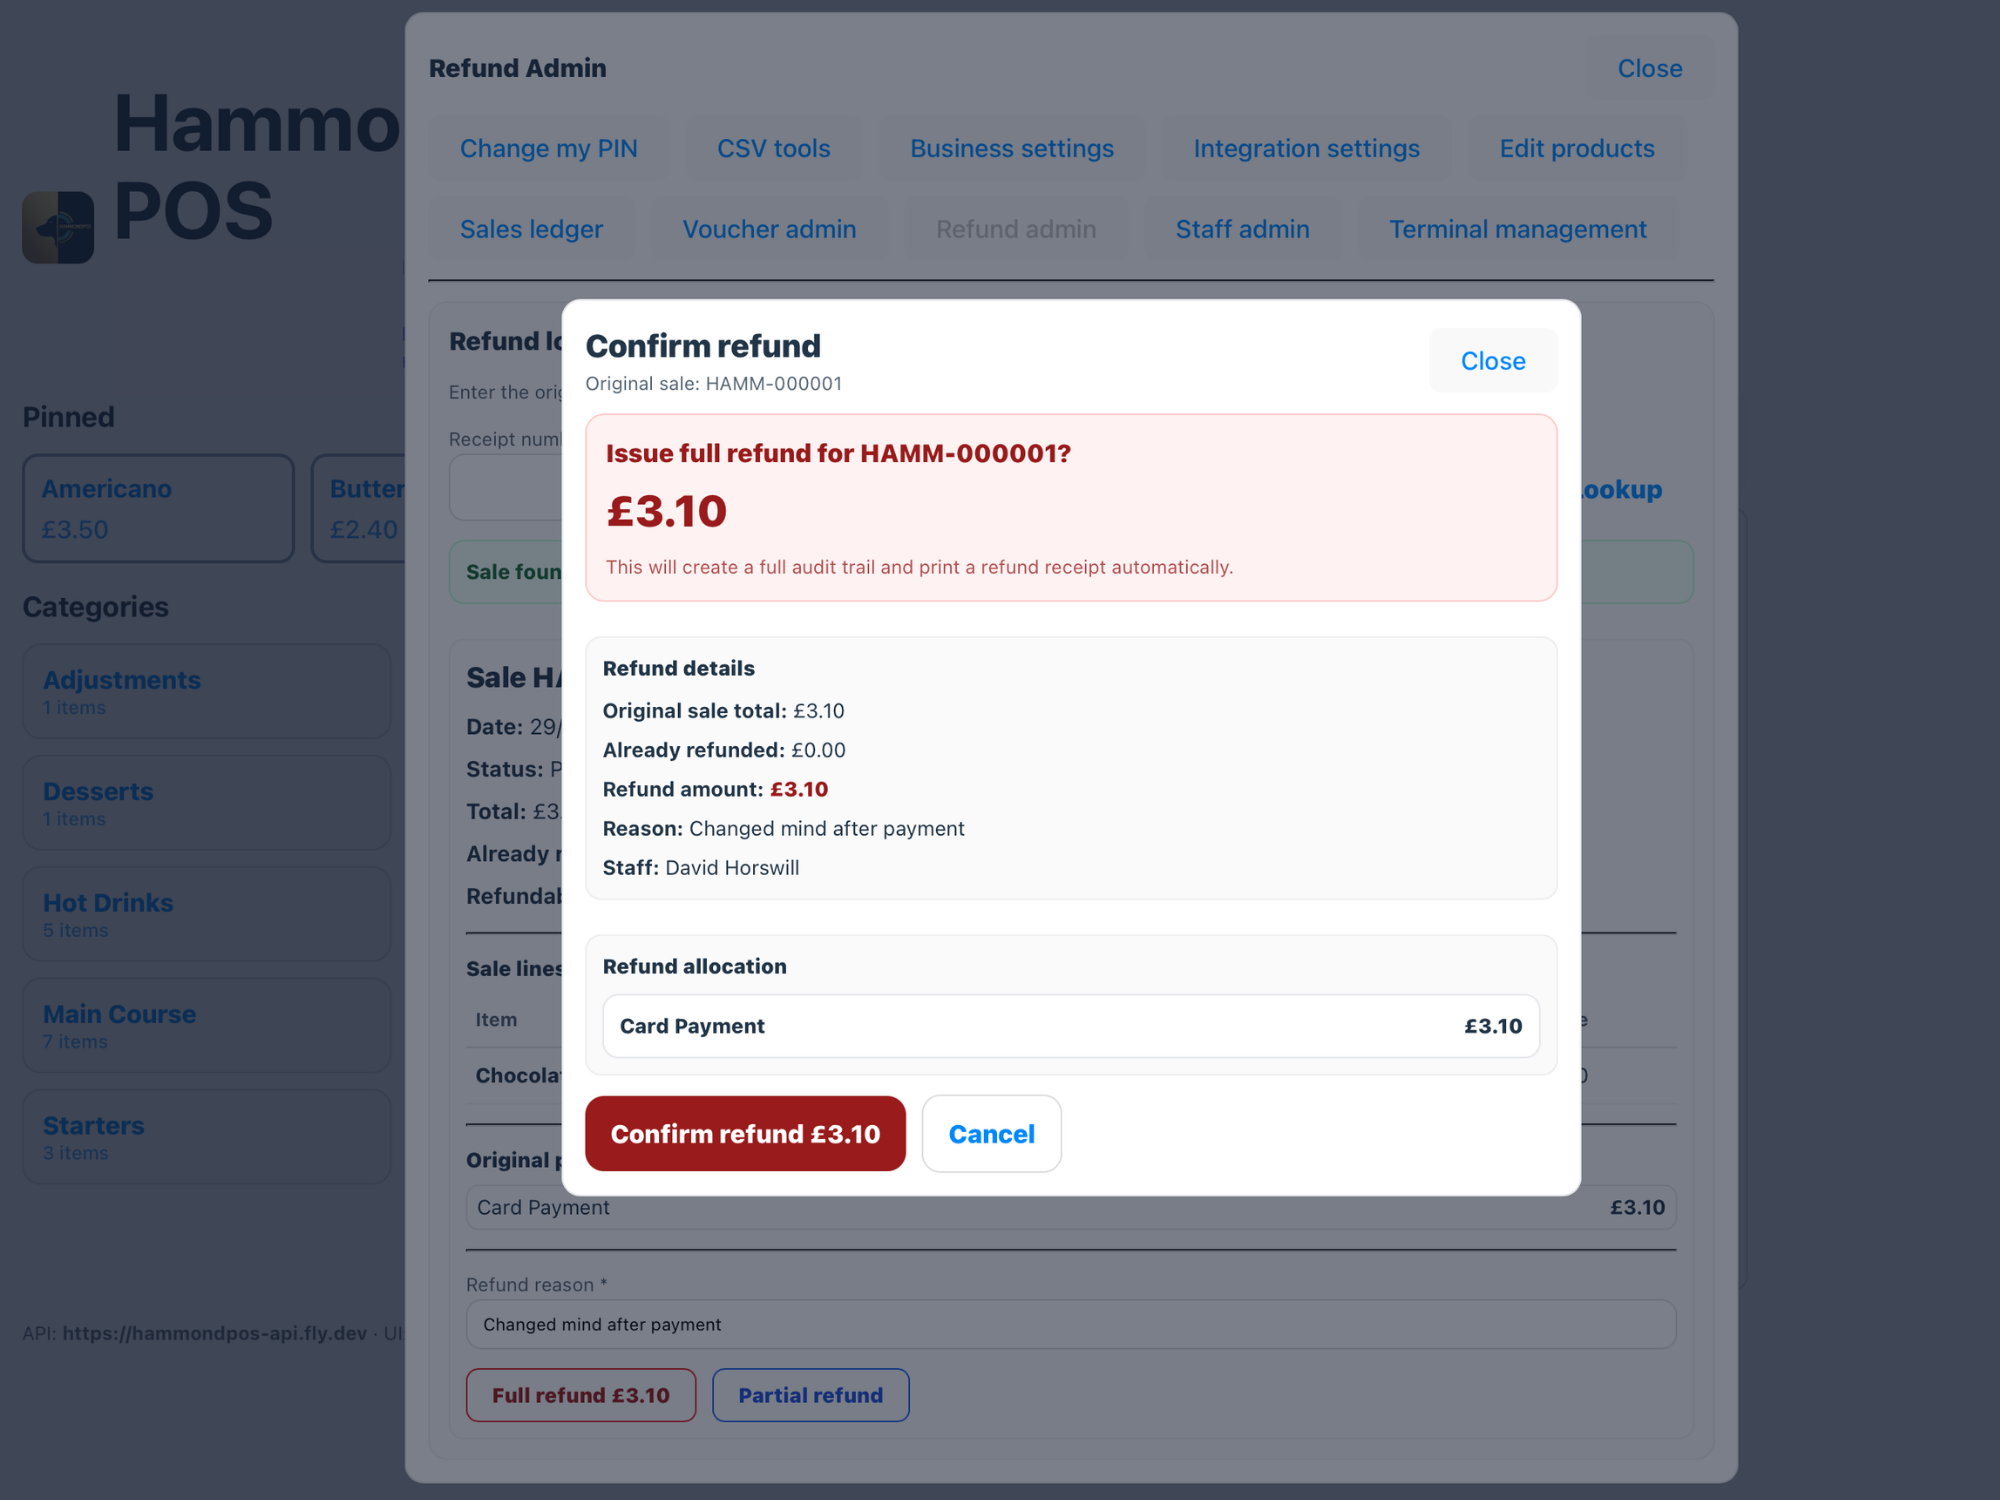
Confirm completionOnly complete the internal refund once the provider refund has succeeded.
Print or retain evidenceKeep the refund receipt/reference for reconciliation.
Troubleshooting
Most support calls start with connectivity, terminal binding, printer routing, permissions or payment-provider configuration. Work through the checks below before escalating.
Step-by-step
Identify the symptomRecord what the operator was trying to do and what message appeared.
Check connectivityConfirm the tablet has Wi-Fi and internet, and that printers are on the same LAN when printing.
Refresh the appUse Refresh/update app or reload the browser/app screen.
Check terminal bindingIf the device says not paired or not bound, use Terminal Management to issue a fresh onboarding key.
Check permissionsIf a button is missing or disabled, confirm the signed-in staff member has the required role.
Escalate with evidenceSend the venue, terminal name, screenshot, receipt number, time, and action attempted.